
Demystifying the Dial: Core Multimeter Functions
Learning how to work a digital multimeter (DMM) is the single most important skill for anyone stepping into the world of electronics, electrical wiring, or automotive repair. A multimeter acts as your primary diagnostic window into invisible electrical forces, translating voltage, current, and resistance into readable digital data. Whether you are troubleshooting a dead 12V car battery, verifying a PWM signal from an Arduino microcontroller, or checking household mains wiring, mastering the dial is non-negotiable.
Before diving into our equipment roundup, you must understand the core measurement modes. Modern DMMs generally feature an auto-ranging function, meaning the meter automatically selects the correct measurement scale (millivolts vs. volts), but knowing the underlying physics of what you are probing is critical for both accurate readings and personal safety.
Measuring DC and AC Voltage (Volts)
Voltage is the electrical potential difference between two points. To measure it, your multimeter must be connected in parallel with the circuit. For direct current (DC) sources like batteries, solar panels, and microcontrollers, you will use the V⎓ setting. For alternating current (AC) sources like household wall outlets, you will use the V~ setting. According to SparkFun's Multimeter Tutorial, always start with the highest voltage range if you are using a manual-ranging meter to prevent overloading the internal circuitry.
Testing Continuity and Resistance (Ohms)
Resistance (Ω) measures how much a component opposes the flow of current. This is essential for verifying resistor values or checking for degraded wiring. Continuity is a derivative of resistance; it simply checks if a complete path exists. When the probes touch, the meter sends a tiny current through the circuit. If the resistance is near zero, the meter emits an audible beep. This is the fastest way to trace broken traces on a PCB or verify if a fuse is blown.
Measuring Current (Amps): The Danger Zone
Measuring current is where most beginners destroy their equipment. Unlike voltage, current must be measured in series. This means you must physically break the circuit and route the current through the multimeter. In current mode, the meter acts as a simple wire with near-zero resistance.
Critical Warning: If you leave your red probe in the Ampere (A) jack and probe across a voltage source (in parallel), you are creating a dead short circuit. The multimeter will attempt to draw infinite current, instantly blowing the internal fuse and potentially causing an arc flash.
Equipment Roundup: Top Digital Multimeter Kits
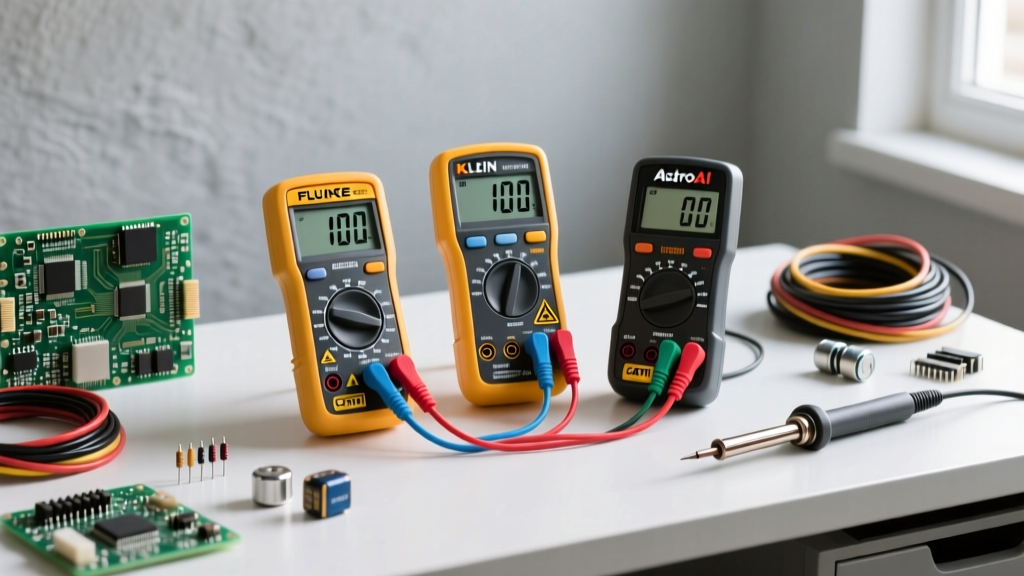
Choosing the right tool depends entirely on your working environment. A hobbyist soldering PCBs on a desk has vastly different safety requirements than an electrician troubleshooting a 480V industrial motor. Below is our curated roundup of the best DMMs on the market, balancing price, accuracy, and safety features.
| Model | Display Count | True-RMS | Safety Rating | Approx. Price |
|---|---|---|---|---|
| Fluke 115 | 6,000 | Yes | CAT III 600V | $175 |
| Klein Tools MM400 | 4,000 | Yes | CAT III 600V | $55 |
| AstroAI DM6000AR | 6,000 | Yes | CAT II 600V | $35 |
The Professional Standard: Fluke 115
The Fluke 115 is the undisputed workhorse for field electricians and serious electronics technicians. It features a robust holster, a built-in flashlight for dark panels, and a VoltAlert non-contact voltage detector. More importantly, its internal architecture uses high-rupturing-capacity (HRC) ceramic fuses and blast shields, ensuring that if a catastrophic transient overvoltage occurs, the meter absorbs the energy rather than exploding in your hands.
The Prosumer Sweet Spot: Klein Tools MM400
For advanced DIYers, automotive mechanics, and HVAC technicians, the Klein Tools MM400 offers incredible value. It includes temperature testing via a thermocouple and a dedicated capacitor testing mode, which is vital for troubleshooting motor start capacitors. As noted in the Klein Tools Digital Multimeter Catalog, the MM400 is drop-tested to withstand 1-meter falls, making it highly durable for job site environments.
The Budget Hobbyist: AstroAI DM6000AR
If you are strictly working on low-voltage DC electronics, Arduino projects, or automotive 12V systems, the AstroAI DM6000AR is a capable budget option. However, it is rated only for CAT II. This means it should never be used on hardwired residential mains or outdoor power lines, where transient spikes can exceed its internal protection thresholds.
Decoding Safety Ratings: Why CAT III and CAT IV Matter
When learning how to work a digital multimeter safely, you will encounter 'CAT' (Measurement Category) ratings printed near the probe jacks. These ratings do not just denote the maximum steady-state voltage the meter can handle; they define the meter's ability to survive transient overvoltages (lightning strikes, inductive load switching, and power grid faults).
According to Fluke's Guide to CAT Ratings, a CAT III 600V meter is designed to withstand an 8,000V transient spike, whereas a CAT II 600V meter is only rated for a 4,000V spike. Using a CAT II meter on a CAT III circuit (like a residential breaker panel) is a severe safety hazard. Always match your meter's CAT rating to the environment you are working in.
Real-World Troubleshooting: Blown Fuses and Ghost Voltages
Even experienced technicians make mistakes. Understanding the common failure modes of a DMM will save you time, money, and frustration.
Replacing a Blown Amperage Fuse
If your meter reads voltage and resistance perfectly, but reads '0.00' or 'OL' when measuring current in series, you have likely blown the internal amperage fuse. To fix this, you must open the meter's casing. You will find a cylindrical ceramic fuse filled with sand. This is an HRC fuse. The sand acts as an arc-quenching medium, preventing the fuse from turning into a plasma bomb during a high-energy short circuit. Never replace an HRC ceramic fuse with a standard glass automotive fuse. Glass fuses lack the interrupting capacity and will shatter violently if subjected to mains-level fault currents.
Chasing 'Ghost Voltages'
When probing long runs of unconnected AC wiring, you may read 40V to 80V on a wire that should be dead. This is 'ghost voltage,' caused by capacitive coupling between adjacent live and dead wires in the same conduit. High-impedance digital multimeters (which draw almost zero current) are sensitive enough to detect this phantom energy. To eliminate ghost voltages, professional meters feature a 'LoZ' (Low Impedance) mode, which places a resistive load across the probes to bleed off the capacitive charge, revealing the true zero-voltage state of the wire.
Essential Accessories to Complete Your Kit
A multimeter is only as good as the accessories you pair it with. To build a comprehensive diagnostic kit, consider adding the following to your toolbox:
- Silicone Test Leads: Standard PVC leads melt instantly if they touch a hot soldering iron. High-grade silicone leads withstand temperatures up to 200°C and remain highly flexible in freezing outdoor environments.
- Mini Alligator Clips: Essential for clipping onto tiny component legs, IC pins, or fuse block tabs without holding the probes manually for extended periods.
- Magnetic Hanger: When working inside a breaker panel or under a dashboard, a strong neodymium magnetic strap allows you to mount the meter at eye level, freeing both hands to manipulate the circuit.
- Piercing Probes: Useful for automotive diagnostics, these feature a sharp needle tip designed to pierce through wire insulation to read signals without stripping the cable or risking a corroded connection later.
By selecting the right equipment for your specific tier of work and respecting the fundamental laws of series and parallel circuits, you will master how to work a digital multimeter efficiently and safely. Whether you opt for the rugged Fluke 115 or the budget-friendly AstroAI, proper technique and safety awareness remain your most valuable tools.