
The $7,000 Problem: Why Commercial Thermal Drones Fail Small Contractors
For independent roofing contractors and home inspectors, finding trapped moisture beneath asphalt shingles or EPDM membranes is a high-stakes game. Moisture intrusion destroys decking and voids warranties, but it remains invisible to the naked eye until the ceiling collapses. The industry standard solution is a thermal drone inspection. However, enterprise-grade drones like the DJI Mavic 3 Thermal or Matrice series cost between $5,000 and $12,000, completely pricing out small-business operators who only need to scan two or three residential roofs a week.
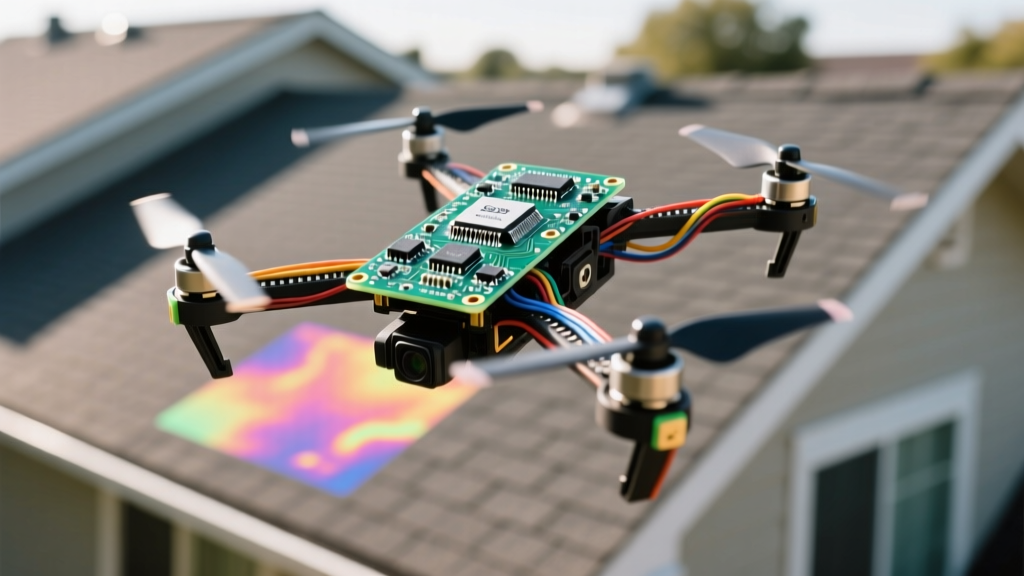
This guide solves that exact problem. By building a custom quadcopter powered by an ESP32 companion computer and an ArduPilot flight controller, you can achieve 85% of the diagnostic capability of an enterprise drone for roughly $350. We will focus on integrating the MLX90640 far-infrared thermal sensor, bypassing the notorious I2C noise issues that plague DIY drone builders, and configuring MAVLink telemetry for real-time ground station mapping.
The Economics of DIY vs. Enterprise Drones
Enterprise drones bundle proprietary software, RTK GPS, and radiometric JPEG outputs. But for a contractor looking for relative thermal anomalies (cold spots indicating water pooling under shingles at dusk), absolute radiometric accuracy is secondary to thermal sensitivity (NETD). The MLX90640 offers a 32x24 pixel array with a 0.1°C NETD. When paired with an ESP32 streaming data over WiFi to a ground laptop running QGroundControl, you get a highly effective, localized inspection tool that pays for itself after a single $150 roof inspection gig.
Core Flight Architecture: ESP32 Meets ArduPilot
To build a reliable inspection quadcopter, we must separate the flight-critical navigation from the payload processing. The ESP32 is a phenomenal microcontroller for IoT and WiFi telemetry, but it lacks the deterministic real-time interrupt handling required to keep a quadcopter stable in 15 mph crosswinds. Therefore, we use a two-tier architecture:
- Flight Controller (FC): A SpeedyBee F405 V3 running ArduPilot 4.4.x. This handles the PID loops, GPS waypoints, and motor PWM outputs.
- Companion Computer (ESP32): An ESP32-WROOM-32 DevKit wired to the FC's TELEM2 port via UART, and to the thermal sensor via I2C. The ESP32 reads the thermal array, packages it into MAVLink messages, and broadcasts it via a local WiFi UDP hotspot to the inspector's tablet.
This modular approach ensures that if the ESP32 experiences a stack overflow or I2C lockup, the quadcopter's ability to maintain altitude and return to home (RTL) remains completely uncompromised. For a deep dive into companion computer setups, refer to the official ArduPilot companion computer documentation.
Bill of Materials: The $342 Inspection Quadcopter
Below is the exact hardware list used for this build. Prices reflect average 2024/2025 market rates from major hobbyist suppliers.
| Component | Model / Specification | Estimated Price | Role |
|---|---|---|---|
| Frame | Mark4 5-inch Carbon Fiber | $35 | Durable, cheap, modular arms |
| FC / ESC Stack | SpeedyBee F405 V3 50A | $45 | ArduPilot brain & motor commutation |
| Motors (x4) | Emax Eco II 2207 1700KV | $60 | High efficiency for 1.5kg payload |
| Propellers | Gemfan 51433 (Tri-blade) | $12 | Smooth thrust, low high-freq vibration |
| GPS Module | Beitian BN-880 (HMC5883L) | $18 | Waypoint navigation & RTL |
| Thermal Sensor | Melexis MLX90640 (32x24) | $65 | FIR array for moisture detection |
| Companion MCU | ESP32-WROOM-32 DevKit V1 | $8 | WiFi telemetry & I2C master |
| Flight Battery | Tattu 1800mAh 4S 75C LiPo | $28 | 14 mins flight time with payload |
| Misc Wiring | Silicone wire, 2.2k resistors, LDO | $15 | Signal isolation & power regulation |
Wiring the Thermal Sensor to the ESP32 I2C Bus
The most common point of failure in DIY sensor-integrated quadcopters is I2C bus corruption. A quadcopter is an electrically hostile environment. The 50A ESC switching at 48kHz generates massive electromagnetic interference (EMI) and ground bounce. If you wire the MLX90640 directly to the ESP32's internal 3.3V pull-ups, the sensor will lock up mid-flight, returning 0xFF hex dumps and freezing your thermal map.
The Hardware Fix: Dedicated LDO and Pull-Ups
To solve this, do not power the MLX90640 from the ESP32's onboard 3.3V regulator. Instead, use a dedicated AMS1117-3.3 LDO powered directly from the FC's 5V BEC. Furthermore, you must add physical 2.2kΩ pull-up resistors to both the SDA and SCL lines, tied to this clean 3.3V rail.
For the physical wiring, use twisted-pair silicone wire for the I2C lines and wrap them in copper foil tape tied to a common ground to shield against ESC noise. The SparkFun MLX90640 Hookup Guide provides excellent baseline schematics, but you must adapt them for the high-noise drone environment.
Tuning PID Controllers for Payload Stability
A standard 5-inch freestyle quadcopter weighs roughly 650g. Adding the ESP32, thermal sensor housing, and heavy-duty vibration dampening plates pushes our inspection quadcopter to 980g. This 50% increase in mass drastically alters the moment of inertia, meaning default ArduPilot PID values will result in violent yaw oscillations and blurry thermal imagery.
Expert Troubleshooting Tip: Never hard-mount the SpeedyBee FC directly to the carbon fiber frame. The high-frequency vibrations from the 1700KV motors will alias into the onboard MPU6000 gyroscope and barometer, causing 'toilet-bowling' (uncontrollable circular flight). Use 3D-printed TPU mounts with M3 rubber grommets to isolate the FC stack.
To tune the quadcopter for the heavy payload:
- Perform an AutoTune in ArduPilot on a calm day, ensuring the battery is fully charged to simulate maximum weight.
- Manually reduce the D-term (Derivative) by 15% post-AutoTune. The D-term reacts to high-frequency noise; with a heavier frame, mechanical noise shifts to lower frequencies, and an aggressive D-term will overheat your ESCs.
- Set the INS_GYRO_FILTER to 40Hz to aggressively filter out the 5-inch propeller blade-pass frequencies.
- Consult the ArduPilot initial tuning guide for exact parameter scaling based on your final all-up weight (AUW).
Real-World Deployment: Scanning a Shingle Roof
Thermal roof inspections rely on the principle of thermal lag. Water holds heat longer than dry wood or fiberglass insulation. Therefore, you must fly the quadcopter exactly 45 to 60 minutes after sunset. The dry sections of the roof will rapidly cool to ambient air temperature, while the moisture-trapped sections will appear as glowing hot spots on your ESP32-rendered ground map.
Flight Path Automation
Do not fly manually. Human thumb jitter ruins thermal stitching. Use Mission Planner on your laptop to draw a Survey Grid over the property footprint. Set the altitude to 15 meters (approx. 50 feet). At 15 meters, the 110-degree FOV of the MLX90640 covers a 4x3 meter patch of roof per frame. Set the waypoint trigger to overlap images by 30%. The ArduPilot flight controller will execute the grid flawlessly while the ESP32 streams the thermal UDP packets to your QGroundControl custom widget.
Troubleshooting Common ESP32 Telemetry Drops
If your thermal feed drops out when the quadcopter is 50 meters away, you are likely experiencing WiFi antenna desense. The 2.4GHz WiFi spectrum overlaps with the harmonic noise generated by the 5.8GHz VTX (if installed) and the switching harmonics of the 4S LiPo power delivery.
The Fix: Remove the ESP32's stamped-metal PCB antenna. Solder a U.FL pigtail to the ESP32 and route a dipole antenna out the rear of the 3D-printed payload housing, ensuring it remains vertically polarized and at least 10cm away from the carbon fiber frame (which attenuates RF signals). This simple $3 hardware swap typically extends reliable UDP telemetry range from 30 meters to over 120 meters, providing more than enough clearance for residential roof inspections.
By embracing open-source hardware and understanding the underlying electrical realities of UAV design, you can build a quadcopter that doesn't just fly—it actively solves expensive, real-world structural problems.