
The Core Dilemma: Trenching Your Own Yard vs. Hiring a Licensed Electrician
Running power to a detached garage, backyard workshop, or an outdoor kitchen pad is one of the most high-impact upgrades a homeowner can undertake. However, when the main panel is separated from the destination by a sprawling lawn or concrete driveway, you are forced to deal with underground electrical wiring residential challenges. The central question for any ambitious DIYer in 2026 is whether the sweat equity of digging your own trench and pulling wire justifies the risk of failing a municipal electrical inspection or creating a long-term safety hazard.
This analysis breaks down the exact material costs, labor realities, National Electrical Code (NEC) requirements, and hidden failure modes of residential underground feeder installations. We will evaluate a standard, high-demand scenario: a 100-foot underground run to supply a 60-Amp subpanel in a detached garage, capable of supporting a Level 2 EV charger and standard workshop power tools.
Scenario Setup: 100-Foot Run to a 60A Detached Subpanel
To provide an accurate DIY vs. professional comparison, we must establish a baseline project. A 60-Amp subpanel requires a 240-volt feeder. Due to voltage drop considerations over a 100-foot distance, using the minimum 6 AWG copper wire is a rookie mistake. At 60 Amps, 6 AWG copper yields a voltage drop of roughly 3.8%, which violates the NEC recommendation of keeping feeder voltage drop below 3%. Therefore, a proper installation requires upgrading to 4 AWG Copper or 2 AWG Aluminum (XHHW-2). For this analysis, we will use 4 AWG Copper THWN-2 in PVC conduit, as it remains the gold standard for residential longevity.
Cost and Time Matrix: DIY vs. Professional Installation
| Project Phase | DIY Approach (Cost & Time) | Licensed Electrician (Cost & Time) |
|---|---|---|
| Permits & Utility Locates | $75 - $150 (Permit fees) Free (811 Locates) Time: 1-2 weeks waiting | $150 - $300 (Pulled by Pro) Free (811 Locates) Time: Handled by contractor |
| Trenching (100 ft at 18 inches deep) | $150 (Mini-excavator rental) or $0 (Hand digging) Time: 4-10 hours | $800 - $1,500 (Labor + equipment) Time: 2-4 hours |
| Materials (4 AWG THWN-2, 1.5 inch PVC, fittings, warning ribbon) | $450 - $600 (Retail pricing) Time: 2 hours sourcing | $600 - $800 (Contractor markup) Time: Included in labor |
| Wire Pulling, Gluing, & Termination | $0 (Self-performed) Time: 6-8 hours | $800 - $1,200 (Master/Journeyman labor) Time: 3-5 hours |
| Backfilling & Site Restoration | $0 (Self-performed) Time: 3-5 hours | $300 - $600 (Labor) Time: 1-2 hours |
| TOTAL ESTIMATE | $675 - $900 Total Time: 2-3 Weekends | $2,650 - $4,400 Total Time: 1-2 Days |
As the matrix illustrates, the financial savings of the DIY route are substantial—often exceeding $2,500. However, the DIYer is paying with physical labor, weekend time, and assuming the liability of code compliance.
Material Deep Dive: Direct Burial UF-B vs. PVC Conduit
When planning underground electrical wiring residential routes, you generally have two code-compliant material choices. Understanding the edge cases of each is critical for passing inspection.
Option A: Southwire UF-B (Underground Feeder) Cable
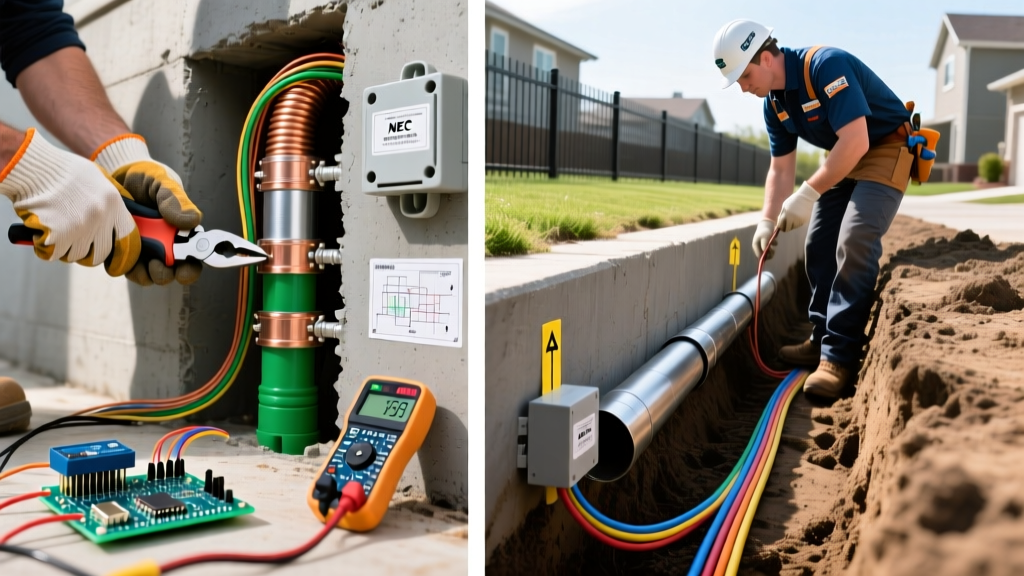
UF-B cable is a direct-burial rated, solid-core cable encased in a rugged, moisture-resistant PVC jacket. For a 60A circuit, you would need 4/3 UF-B with a ground. Advantage: It requires no conduit for the main underground run, saving money on PVC and glue. Disadvantage: The NEC mandates a burial depth of 24 inches for direct-burial UF-B without a concrete encasement. Digging an 18-inch trench is difficult; digging a 24-inch trench through clay or rocky soil is a backbreaking endeavor. Furthermore, UF-B must still be protected by Schedule 80 PVC conduit wherever it transitions from underground to above-ground (from 18 inches below grade to 8 feet above grade).
Option B: Schedule 40 PVC Conduit with THWN-2 Conductors
This is the preferred method for most professional electricians in 2026. You bury empty 1.5-inch or 2-inch Schedule 40 PVC conduit at a depth of 18 inches, then pull individual THWN-2 rated copper or aluminum wires through it. Advantage: The shallower 18-inch trench saves massive amounts of labor. If a wire ever faults or you need to upgrade to 100 Amps in the future, you can simply pull the old wires out and push new ones in without digging up your yard. Disadvantage: Requires meticulous PVC gluing and wire-pulling techniques to avoid snags and moisture traps.
NEC Code Realities: Where DIYers Fail the Inspection
The National Fire Protection Association (NFPA) outlines strict rules for underground installations in NEC Article 300.5. Municipal inspectors are notoriously strict about underground wiring because once the trench is backfilled, the work is hidden from view. Here are the most common DIY code violations:
- Omitting the Warning Ribbon: NEC 300.5(D) requires a warning ribbon (usually bright red or yellow, stating 'WARNING: HIGH VOLTAGE') to be placed in the trench exactly 12 inches above the underground conduit or cable. If a future landscaper digs a hole for a tree, the shovel should hit the ribbon before it hits your conduit.
- Using THHN Instead of THWN-2: Many DIYers buy standard THHN wire from big-box stores. While THHN is fine for dry, indoor conduit, underground conduit will eventually fill with water due to condensation and groundwater seepage. You must use wire rated for wet locations, specifically marked as THWN-2 or XHHW-2.
- Improper Conduit Sealing: While underground conduit is expected to hold water, the conduit entering the main house panel and the detached subpanel must be sealed with duct seal putty or expanding foam to prevent moisture and soil gases from migrating into your electrical panels.
CRITICAL SAFETY STEP: Before breaking ground, you must call 811 or submit a request via Call811.com at least 48 to 72 hours in advance. Striking an underground municipal gas or fiber-optic line can result in catastrophic injury and tens of thousands of dollars in liability. For more on excavation hazards, review the OSHA Trenching and Excavation guidelines.
Top 3 Hidden Failure Modes in Residential Underground Runs
Beyond failing an inspection, poor execution leads to long-term electrical failures. Here is what separates a master electrician's work from a rushed DIY job:
1. Solvent Weld Fume Damage to Insulation
When gluing PVC conduit, DIYers often use excessive purple primer and PVC cement, then immediately pull the THWN-2 wires through the pipe. The volatile organic compounds (VOCs) and chemical heat generated by curing PVC cement can actually melt or degrade the plastic insulation of the wires. Professionals always glue the entire conduit run, cap the ends, and wait a minimum of 2 to 4 hours for the solvents to fully off-gas before pulling wire.
2. Frost Heave and Conduit Shearing
In northern climates, the freeze-thaw cycle causes the ground to shift—a phenomenon known as frost heave. If PVC conduit is laid directly on jagged rocks or hard clay without a proper bedding layer, the shifting soil can snap the rigid PVC or pull it apart at the glued joints. Always bed the conduit in 2 to 3 inches of fine sand or stone dust, and backfill with sifted soil free of large rocks.
3. The Neutral-Ground Bonding Error
At the main house panel, the neutral and ground bars are bonded together. However, at the detached garage subpanel, the neutral and ground must be isolated. If a DIYer fails to remove the green bonding screw or strap inside the new subpanel, returning neutral current will travel back through the earth via the grounding rod, creating a severe shock hazard and causing GFCI breakers to trip constantly.
Final Verdict: When to Grab a Shovel and When to Call a Pro
Tackling underground electrical wiring residential projects as a DIYer is highly feasible if you possess intermediate electrical knowledge, understand voltage drop mathematics, and are physically capable of trenching. The DIY route is highly recommended if your yard is relatively flat, free of massive tree root systems, and if you opt for the PVC conduit method to keep the trench depth at a manageable 18 inches.
However, you should hire a licensed professional if your trenching route requires boring under concrete driveways, navigating complex municipal utility easements, or if your local jurisdiction requires a Master Electrician's license to pull a permit for detached structures. In 2026, with the rise of high-draw EV chargers and smart-home workshops, ensuring your underground feeder is oversized, properly grounded, and code-compliant is an investment that protects both your property and your family.