
The Anatomy of an Electrical Wiring Pigtail
When upgrading a home's electrical system, replacing worn-out receptacles, or extending a circuit, the electrical wiring pigtail is a fundamental technique that bridges the gap between a safe, code-compliant circuit and a latent fire hazard. A pigtail is a short jumper wire—typically 6 to 8 inches long—used to connect multiple circuit conductors to a single wire nut, lever connector, or device terminal. While the concept is simple, the execution separates weekend DIYers from seasoned journeyman electricians. In 2026, with the widespread adoption of push-in and lever-style connectors alongside traditional twist-on wire nuts, understanding the nuances of pigtailing is more critical than ever for ensuring long-term circuit integrity.
NEC Code Requirements You Cannot Ignore
Before stripping a single wire, it is vital to understand why pigtailing is often mandated by the National Electrical Code (NEC). The National Fire Protection Association (NFPA) outlines several specific scenarios where pigtailing is not just best practice, but strict law:
- Neutral Continuity (NEC 406.4(C)): You cannot rely on a receptacle's internal brass or silver tabs to pass the neutral current to downstream devices. If the receptacle is removed, the downstream neutral is broken, creating a dangerous open-neutral scenario on a multi-wire branch circuit. A neutral pigtail ensures the circuit remains continuous regardless of the device's status.
- Equipment Grounding (NEC 250.148): Grounding conductors must be spliced together with a pigtail that connects to the receptacle's green grounding screw. You cannot daisy-chain the ground wire through the receptacle's mounting yoke. If the device is removed, the downstream grounding path must remain intact to prevent shock hazards.
- Box Fill and Conductor Fill (NEC 314.16): When adding pigtails, you must account for box fill calculations. All equipment grounding conductors combined count as one conductor fill, and all pigtails originating and terminating within the same box do not count toward the fill limit. However, the physical bulk of multiple wire nuts can overcrowd a standard single-gang box, leading to pinched wires and short circuits.
Tooling Matrix: DIY Hardware Store vs. Professional Van
The most visible difference between a DIY electrical wiring pigtail and a professional installation lies in the tooling and connector selection. While traditional twist-on wire nuts have been the standard for decades, the professional sector has heavily pivoted toward lever-nut technology for speed, visual verification, and reliability.
| Feature | Standard DIY Approach (Wire Nuts) | Professional Approach (Lever Connectors) |
|---|---|---|
| Connector Type | Ideal Yellow (72B) or Red (74B) Wing-Nuts | WAGO 221 Series (221-413 for 3-port) |
| Strip Length | 3/4" (Often estimated by eye) | 11mm / 7/16" (Measured via built-in gauge) |
| Cost Per Connection | ~$0.05 per nut | ~$0.45 per lever connector |
| Connection Speed | 45-60 seconds (requires twisting) | 10-15 seconds (flip, insert, snap) |
| Visual Verification | None (Opaque plastic housing) | Clear housing + built-in voltage test ports |
| Tool Requirement | Lineman pliers for pre-twisting | Standard wire strippers (e.g., Klein 11063W) |
According to industry data, the upfront cost of using WAGO 221 Series Compact Splicing Connectors is roughly nine times higher than traditional wire nuts. However, professionals absorb this material cost because the labor savings on a 40-receptacle commercial remodel easily offsets the price difference, reducing hand fatigue and eliminating the risk of improperly twisted wire nut joints.
Step-by-Step Execution: The Professional Standard
Whether you are using 14 AWG wire on a 15-amp circuit or 12 AWG wire on a 20-amp circuit, the physical preparation of the electrical wiring pigtail dictates the longevity of the connection. Here is the professional workflow for creating a flawless pigtail junction:
- Precise Stripping: Use a calibrated wire stripper to remove exactly 3/4" of insulation for wire nuts, or exactly 11mm for WAGO lever connectors. Stripping too little results in insulation creep (where the connector bites the plastic jacket instead of copper). Stripping too much leaves exposed, live copper outside the connector.
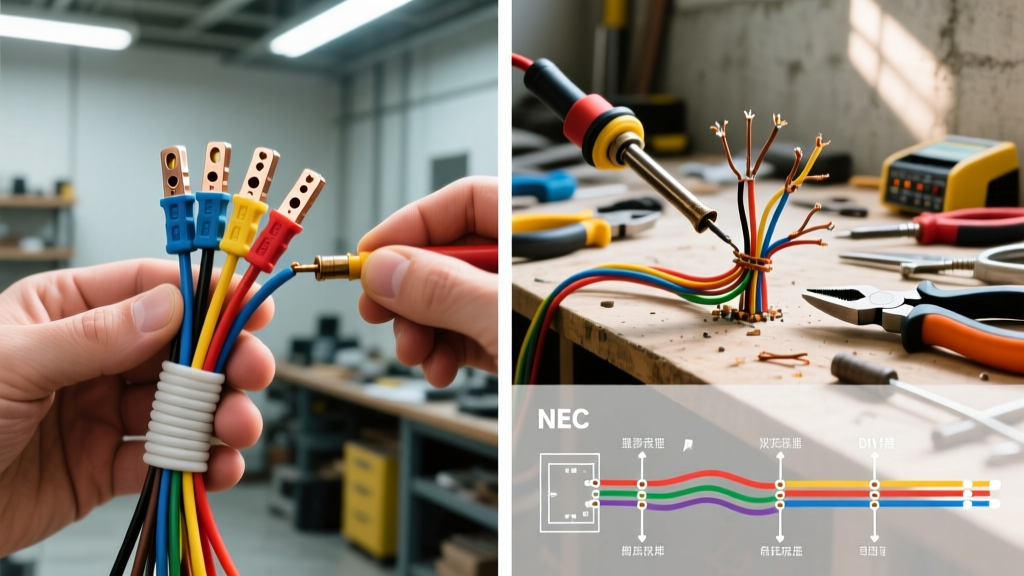
- Alignment and Pre-Twisting (Wire Nuts Only): Align the bare ends of the circuit wires and the pigtail jumper so they are perfectly flush. Using lineman pliers, grip the wires just below the insulation and twist clockwise. The goal is to marry the copper strands into a single, unified helix before the wire nut ever touches them.
- Connector Application: Thread the wire nut clockwise over the pre-twisted bundle. Apply firm downward pressure while turning until the nut clicks or the wires outside the nut begin to twist slightly—this indicates the internal metal coil has bottomed out and secured the connection. For lever connectors, simply lift the orange lever, insert the stripped wire until it bottoms out, and snap the lever down.
- The Pull Test (NEC 110.14(B)): Grip each individual wire entering the connector and give it a firm, sharp tug. If any wire pulls out, the connection has failed and must be redone. This mechanical test is a strict NEC requirement for all splices.
Common Failure Modes and Edge Cases
When analyzing failed electrical inspections or post-installation circuit faults, three specific pigtail failure modes dominate the landscape:
1. The "Umbrella" Effect
This occurs when a DIYer places a wire nut over three wires, but one wire is slightly shorter than the others. As the nut is twisted, the metal coil catches the two longer wires, bending the shorter wire outward into a "U" or umbrella shape outside the coil. The result is a wire that looks secured but has zero mechanical or electrical contact inside the nut, leading to arcing and eventual melting.
2. Cold Joints from Oxidation
In older homes built before 1970, you may encounter aluminum branch wiring. Pigtailing aluminum to copper requires extreme caution. Standard wire nuts will result in galvanic corrosion, leading to high-resistance cold joints that generate immense heat. Professionals use specific purple wire nuts (Ideal 65) combined with Noalox antioxidant paste, or they use COPALUM crimp connectors to safely bridge the dissimilar metals.
3. Box Fill Overcrowding
Adding three pigtails (hot, neutral, ground) to an already crowded single-gang 18-cubic-inch remodel box violates NEC box fill rules. When wires are jammed into an overfilled box, the internal pressure can push a wire nut off a conductor over time due to thermal expansion and contraction cycles. Professionals upgrade to deep 22.5-cubic-inch boxes when multiple pigtails are required.
The Grounding Pigtail: A Non-Negotiable Rule
The most frequently botched pigtail in DIY renovations is the equipment grounding conductor. The Electrical Safety Foundation International (ESFI) continuously highlights the dangers of improper grounding in home safety reports. Many DIYers mistakenly believe that by wrapping the bare copper ground wire around the receptacle's green screw and then continuing that same wire to the next box, they have maintained the ground path. This is a severe code violation. If the receptacle is removed for painting or replacement, the downstream devices instantly lose their safety ground. A dedicated 6-inch bare copper or green THHN pigtail must be spliced to the incoming and outgoing ground wires, with the sole end of the pigtail terminating at the receptacle's grounding screw.
Time and Cost Analysis: When to DIY vs. Call a Pro
For a standard room remodel involving 15 receptacles and 2 switches, a DIYer using traditional wire nuts and standard hand tools will spend approximately 3 to 4 hours carefully stripping, pre-twisting, and capping the necessary pigtails. The material cost will be under $5 for wire nuts and a few feet of scrap THHN wire. Conversely, a licensed electrician using WAGO 221 lever connectors and an automatic wire stripping tool will complete the exact same pigtailing process in under 45 minutes. The material cost will be roughly $25 for the lever connectors. While the DIY approach saves $20 in materials, the professional approach guarantees visual verification, built-in test ports for future multimeter troubleshooting, and a connection that is immune to the "umbrella" failure mode. If you are uncomfortable executing the mandatory NEC pull test or calculating box fill volumes, the professional route is the only safe alternative.