
The Core Dilemma: Soldered Rings vs. Mechanical Crimping
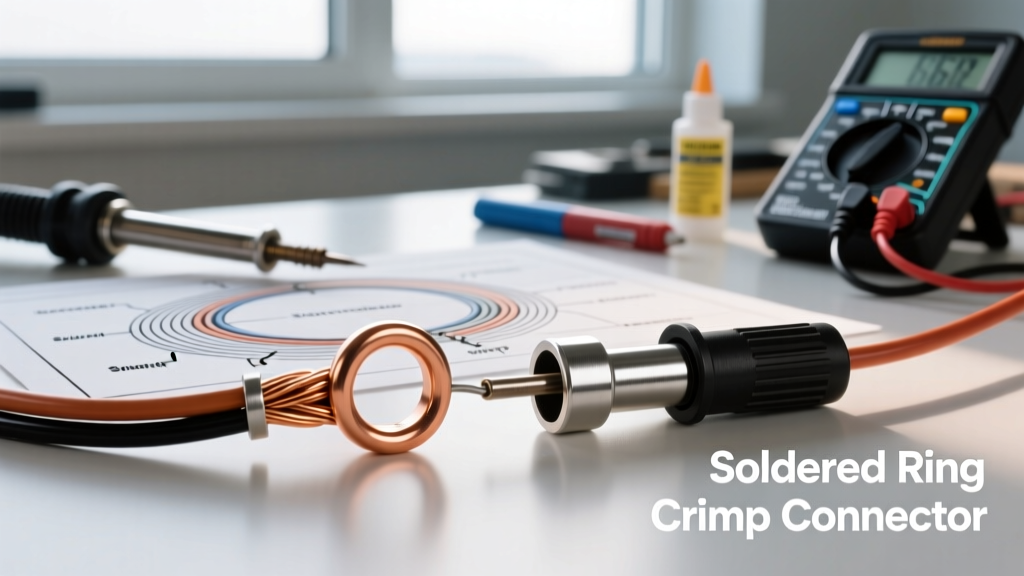
In the realm of high-reliability electrical wiring, the debate between mechanical crimping and solder-based connections is perennial. When marine electricians, aerospace technicians, and automotive restorers refer to soldered rings, they are specifically describing heat-shrink solder sleeves (also known as solder seal wire connectors or solder ring splices). These components feature pre-installed rings of solder and flux encased within a dual-walled, adhesive-lined polyolefin tube.
As we navigate the wiring standards of 2026, the shift toward stringent environmental sealing and vibration resistance has elevated the profile of soldered rings. However, they are not a universal panacea. The American Boat & Yacht Council (ABYC) and the IPC wire harness standards dictate strict use-cases for both methodologies. This decision framework will help you determine exactly when to deploy soldered rings and when to rely on traditional cold-crimp terminations.
Anatomy of a Modern Soldered Ring Splice
To make an informed decision, you must understand the metallurgy and polymer science occurring inside the sleeve. A premium soldered ring (such as those manufactured by TE Connectivity Raychem or Ancor Marine) consists of four distinct layers and components:
- Outer Jacket: Radiation-cross-linked polyolefin that shrinks at 120°C (248°F), providing mechanical strain relief and primary moisture protection.
- Inner Adhesive Layer: An EVA (Ethylene Vinyl Acetate) hot-melt adhesive that flows at 110°C, creating a waterproof, capillary-blocking seal at the wire entry points.
- Flux Core: A rosin-based or mildly activated rosin (RMA) flux coating the inner wire strands to remove oxidation during the heating phase.
- Solder Preform: Precision-stamped rings of solder. While Sn63/Pb37 (Tin/Lead) eutectic solder remains popular in classic automotive restoration for its low 183°C melt point and high fatigue resistance, modern marine and aerospace applications increasingly mandate SAC305 (Tin/Silver/Copper) lead-free preforms, which melt at 217°C to comply with updated RoHS directives.
The Decision Matrix: When to Use Soldered Rings
Use the following framework to evaluate your specific project requirements. Neither method is inherently superior; rather, their efficacy is dictated by the operational environment.
| Parameter | Soldered Rings (Heat Shrink Sleeves) | Traditional Mechanical Crimping |
|---|---|---|
| Moisture & Corrosion | Superior. Adhesive extrusion creates a hermetic, waterproof seal. | Poor to Fair. Requires secondary heat-shrink or adhesive sealing. |
| High-Vibration Fatigue | Risk of solder wicking causing a stiff, brittle transition point that can snap under extreme harmonic vibration. | Superior. Cold-welded crimp allows the wire strands to flex independently without work-hardening. |
| Tooling Capital Cost | Low to Medium. Requires a precision heat gun ($150 - $250). | High. Professional ratcheting crimpers (e.g., Knipex, Daniels M22520) cost $180 - $800+. |
| Production Speed | Slow. 15–30 seconds per joint, plus cooling time. | Fast. 2–4 seconds per joint with a ratcheting tool. |
| Skill Dependency | High. Relies on operator's thermal management and visual inspection. | Low. Ratcheting tools prevent release until the exact compression force is achieved. |
The Verdict Framework
Choose Soldered Rings When: You are wiring marine bilge pumps, exterior automotive sensors, underwater ROVs, or any application where the connection will be exposed to saltwater, high humidity, or sub-zero temperatures where capillary action could draw water into the harness.
Choose Mechanical Crimps When: You are building high-vibration engine harnesses, aerospace flight-control wiring, or high-current battery cables (e.g., 2/0 AWG starter cables) where the mass of the solder would create a catastrophic stress-riser under harmonic engine vibration.
Thermal Profiling and Application Protocol
The most common point of failure with soldered rings is improper thermal management. Applying too much heat too quickly scorches the polyolefin and boils the flux, while too little heat results in a 'cold shrink' where the adhesive fails to seal. For optimal results, follow this thermal protocol aligned with IPC-A-620 wire harness acceptance standards:
- Preparation: Strip the wire to the exact depth specified by the sleeve manufacturer (usually 1/4 inch for 16-14 AWG). Twist the strands lightly—do not over-twist, as this prevents solder penetration.
- Alignment: Insert the wires into the sleeve so the stripped ends meet precisely in the center, directly beneath the soldered rings.
- Pre-Heat Phase: Using a temperature-controlled heat gun (such as the Master HG-501K set to 250°C / 482°F), apply air at a 45-degree angle. Keep the nozzle moving continuously to shrink the outer jacket from the center outward.
- Solder Melt Phase: Once the jacket is snug, focus the heat directly on the solder rings. Watch for the flux to bubble slightly and the solder to flash from dull gray to bright silver. This phase transition takes roughly 3 to 5 seconds.
- Adhesive Extrusion: Continue heating the ends of the sleeve until a small bead of clear or amber EVA adhesive extrudes from the wire entry points. This visual cue confirms a waterproof seal.
- Cooling: Allow the joint to cool naturally for 20 seconds. Never quench a hot soldered ring with water or compressed air, as thermal shock will crack the solder joint and compromise the polyolefin.
Expert Insight: 'The transition from leaded to lead-free soldered rings in marine environments has caught many DIYers off guard. If you are using SAC305 lead-free sleeves, your heat gun must be capable of sustaining 300°C (572°F) at the nozzle, and your dwell time will increase by roughly 40% compared to traditional Sn63/Pb37 rings.' — Marine Electrical Systems Engineering Report, 2025.
Visual Inspection and Quality Assurance
According to IPC standards, a compliant soldered ring connection must exhibit specific visual markers. If your joint lacks these, it must be cut out and replaced; you cannot simply 'reheat' a failed sleeve because the flux will have been exhausted and the adhesive degraded.
- Solder Fillet: A smooth, concave fillet of solder must be visible through the transparent or semi-transparent jacket at the wire entry points.
- Wire Outline: The outline of the stranded wire should be visible beneath the solder mass, indicating proper wetting rather than a blob of solder sitting on top of the strands.
- Adhesive Flow: A uniform ring of adhesive must be visible at both ends of the sleeve, confirming that the internal temperature reached the EVA melting point.
- Jacket Integrity: The polyolefin should be taut but not burnt, blistered, or discolored beyond a slight darkening.
Cost and Tooling Analysis
When building a business case or planning a large-scale DIY project, the cost per joint and capital expenditure must be weighed. As of 2026, premium solder seal connectors (like TE Connectivity's Raychem SolderSleeve or Ancor Marine Grade) cost between $1.10 and $2.50 per piece, depending on AWG size and volume. Budget alternatives (e.g., bulk generic brands) can be found for $0.25 each, but they frequently suffer from inadequate flux coatings and non-cross-linked jackets that melt into a puddle when heated.
Conversely, a high-quality mechanical crimp setup requires a significant upfront investment. A professional Knipex 97 53 14 ratcheting crimper costs approximately $190, and insulated crimp terminals cost about $0.30 to $0.60 each. While the per-joint consumable cost is lower for crimping, the barrier to entry is higher. For a boat owner doing a one-off bilge pump rewiring (requiring perhaps 10 splices), spending $25 on a pack of premium soldered rings and using a $40 entry-level heat gun is vastly more economical than buying a $190 crimping tool.
Critical Failure Modes to Avoid
Understanding how soldered rings fail is just as important as knowing how to install them. Avoid these three common edge cases:
1. Solder Wicking and the 'Broomstick' Effect
If excessive heat is applied for too long, capillary action will draw the molten solder deep into the stranded wire insulation. This creates a rigid, 'broomstick-like' section of wire that cannot flex. In high-vibration environments, the wire will eventually suffer from metal fatigue and snap exactly at the transition point between the flexible wire and the solder-wicked stiff section.
2. The Cold Shrink Illusion
Using a cheap, single-temperature hardware store heat gun often results in the outer jacket shrinking before the internal solder rings reach their melting point. The joint looks perfect on the outside, but internally, the wires are merely resting against each other, and the adhesive has not flowed. This leads to high-resistance voltage drops and eventual water ingress.
3. Gauge Mismatch
Soldered rings are strictly color-coded by AWG (Red: 22-18, Blue: 16-14, Yellow: 12-10). Attempting to use a Blue sleeve on a 12 AWG wire will prevent the jacket from closing, while using a Yellow sleeve on a 16 AWG wire will result in the sleeve crushing the wire strands and failing to form an adhesive seal at the entry points.
Final Recommendations
Soldered rings represent a pinnacle of environmental sealing for low-to-medium current DC wiring. By adhering to strict thermal protocols, selecting the correct metallurgy for your operational environment, and verifying the joint against IPC visual standards, you can create connections that outlast the equipment they serve. Reserve mechanical crimping for high-current, high-vibration scenarios, and deploy solder seal sleeves wherever moisture and corrosion pose the primary threat to your electrical system's integrity.