
The Architecture: Why Marry Linux with RTOS?
When engineers approach advanced raspberry and arduino projects, the primary challenge is bridging the gap between high-level operating system tasks and deterministic, low-level hardware control. A Raspberry Pi running Linux is exceptional for network routing, Docker containerization, and heavy AI inference, but it fundamentally lacks the hard real-time capabilities required for sub-millisecond motor control or high-frequency ADC sampling. Conversely, an Arduino microcontroller excels at deterministic I/O but lacks the silicon and OS-level networking stack to run modern machine learning models or manage complex MQTT broker routing.
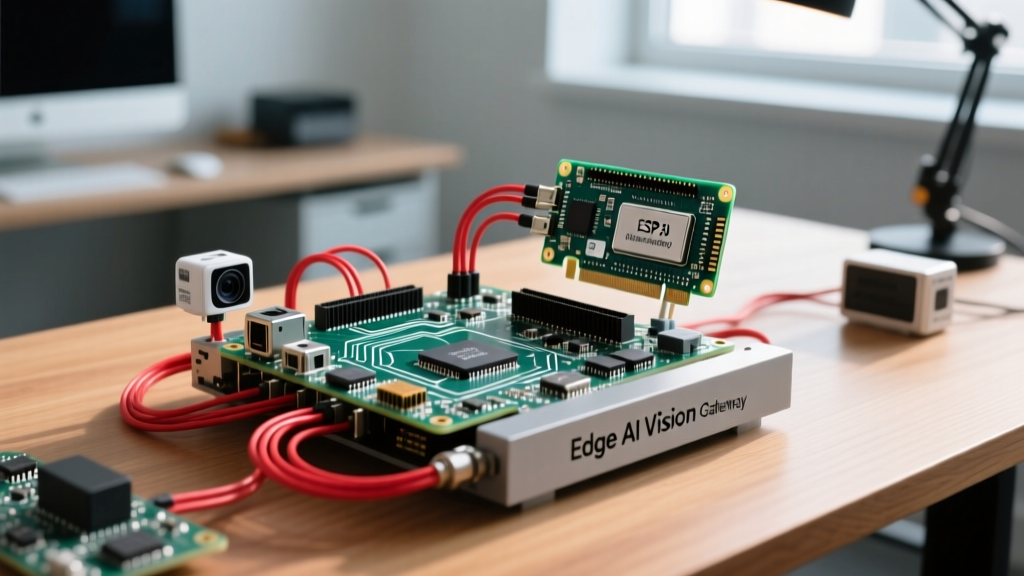
In this 2026 advanced build guide, we are designing an Edge AI Vision and Sensor Fusion Gateway. By pairing the Raspberry Pi 5 (equipped with the Hailo-8L AI Kit) and the Arduino Portenta H7, we create a heterogeneous computing environment. The Pi handles YOLOv8 object detection and cloud telemetry, while the Portenta manages 1kHz vibration sensor polling and real-time actuator feedback.
Division of Labor
- Raspberry Pi 5 (8GB): Runs Raspberry Pi OS (Bookworm), hosts the Hailo-8L NPU via PCIe Gen 2, executes computer vision pipelines, and manages secure TLS MQTT connections to AWS IoT Core.
- Arduino Portenta H7: Runs FreeRTOS on the STM32H747XI dual-core MCU. The Cortex-M7 (480 MHz) handles complex DSP algorithms for vibration analysis, while the Cortex-M4 (240 MHz) manages USB-CDC communication and hardware interrupts.
2026 Hardware Bill of Materials (BOM)
To replicate this build, you will need specific enterprise-grade maker hardware. Standard hobbyist boards will bottleneck the AI inference pipeline.
| Component | Exact Model / Specification | System Role | Est. Cost (USD) |
|---|---|---|---|
| Host Computer | Raspberry Pi 5 (8GB RAM) | Linux Host, AI Inference, Network Gateway | $80.00 |
| AI Accelerator | Raspberry Pi AI Kit (Hailo-8L 13 TOPS) | PCIe M.2 HAT+ NPU for Vision Models | $70.00 |
| Microcontroller | Arduino Portenta H7 (w/ MIMXRT1170 or STM32H747) | RTOS Sensor Fusion, DSP, Actuator Control | $110.00 |
| Vision Shield | Arduino Portenta Vision Shield (OV7675) | Secondary low-res thermal/motion trigger | $65.00 |
| Power Supply | 65W USB-C PD GaN Charger (Dual Port) | Simultaneous Pi 5 (27W) and Portenta (5W) power | $35.00 |
Phase 1: Arduino Portenta H7 Sensor Fusion
The Arduino Portenta H7 features a unique dual-core architecture. In advanced builds, you should never block your main control loop with communication protocols. We utilize the Cortex-M4 core exclusively for handling the USB-CDC serial buffer, freeing the Cortex-M7 to execute Fast Fourier Transforms (FFT) on incoming MEMS accelerometer data.
Memory Allocation and RTOS Tasks
Using the Arduino Mbed OS core, we define two distinct FreeRTOS tasks. The sensor polling task is pinned to the M7 core with a strict 1ms tick rate. If you attempt to run high-speed SPI ADC reads while simultaneously servicing USB interrupts on a single core, you will experience jitter that ruins DSP calculations. By offloading the USB stack to the M4, the M7 maintains a perfect 1000Hz sampling rate.
Phase 2: Raspberry Pi 5 Edge AI Inference
The introduction of the Raspberry Pi AI Kit revolutionized edge computing for DIY engineers. The kit includes a Hailo-8L M.2 HAT+ that connects directly to the Pi 5’s PCIe Gen 2 x1 interface, delivering 13 TOPS (Tera Operations Per Second) of INT8 inference power.
Integrating the Hailo NPU with rpicam-apps
Rather than writing custom Python OpenCV scripts that bog down the main CPU, we leverage the native libcamera post-processing framework. By configuring a custom JSON tuning file, the Pi 5 routes the 1080p video stream directly through the ISP and into the Hailo NPU via DMA (Direct Memory Access), completely bypassing CPU bottlenecks.
- Install the Hailo PCIe drivers and firmware via
sudo apt install hailo-all. - Download a pre-compiled YOLOv8n HEF (Hailo Executable Format) model optimized for 640x640 resolution.
- Configure the
rpicam-hellopost-processing JSON to draw bounding boxes only when the confidence threshold exceeds 0.85, reducing GPU overlay overhead.
Phase 3: High-Bandwidth USB-C Bridging
A common failure point in legacy raspberry and arduino projects is relying on hardware UART for inter-device communication. While a baud rate of 921600 might suffice for simple temperature telemetry, it completely collapses when the Arduino needs to send DSP metadata or the Pi needs to send complex JSON configuration payloads.
Expert Insight: Never use UART for Pi-to-Arduino vision metadata. The RX/TX buffers will overflow during AI inference spikes. Instead, connect the Pi 5 and Portenta H7 directly via a high-quality USB-C to USB-C cable. The Portenta will enumerate as a CDC ACM (Communication Device Class - Abstract Control Model) virtual serial port, providing up to 12 Mbps of throughput with hardware-level error checking.
On the Raspberry Pi, the Portenta will mount at /dev/ttyACM0. To ensure persistent mapping regardless of boot enumeration order, write a custom udev rule targeting the Portenta’s specific Vendor ID (VID) and Product ID (PID). This guarantees your Python MQTT bridge script always connects to the correct serial node on startup.
Power Budgeting and Thermal Edge Cases
Power management is where most advanced builds fail in the field. The Raspberry Pi 5 strictly requires a 5V/5A (25W) USB-C Power Delivery profile to unlock full current to the USB ports and PCIe HAT. If the Pi detects a standard 5V/3A charger, it throttles the USB current limit to 600mA, which will cause the Hailo-8L M.2 module to brownout and crash the PCIe bus during heavy inference loads.
The Dual-Device Power Solution
Do not attempt to power the Portenta from the Pi 5’s USB ports. The combined draw of the Hailo NPU, the Pi’s BCM2712 SoC, and the Portenta’s dual-core MCU will exceed the Pi's internal power distribution limits. Instead, use a 65W multi-port GaN PD charger. Plug the Pi 5 into the primary 30W PD port, and the Portenta H7 into the secondary 18W port. This ensures isolated power rails and prevents ground-loop noise from corrupting the Arduino's sensitive 16-bit ADC readings.
Real-World Troubleshooting & Failure Modes
When deploying this gateway in an industrial or outdoor enclosure, expect the following edge cases:
- PCIe Link State Failures: The Pi 5’s PCIe controller can sometimes fail to negotiate Gen 2 speeds with the Hailo HAT on cold boots. Add
pcie_aspm=offto your/boot/firmware/cmdline.txtto disable Active State Power Management on the PCIe bus, ensuring the NPU stays awake during micro-inference bursts. - USB-C Enumeration Delays: Linux may take up to 4 seconds to enumerate the Portenta’s CDC ACM port on boot. Your Python bridge script must implement a robust
serial.SerialExceptionretry loop with exponential backoff, rather than failing outright on startup. - Thermal Throttling under Load: The Hailo-8L generates significant localized heat. The official Pi 5 Active Cooler is mandatory. Without it, the NPU will silently throttle from 13 TOPS down to 4 TOPS within three minutes of continuous YOLOv8 inference, severely dropping your FPS.
By respecting the distinct architectural strengths of both Linux and RTOS environments, you elevate your build from a simple hobbyist script to a robust, enterprise-grade edge computing node. This heterogeneous approach represents the absolute cutting edge of modern raspberry and arduino projects in 2026.