
The 'Hello World' of Hardware: Beyond the Basics
Configuring an LED on Arduino is universally recognized as the 'Hello World' of embedded systems. However, what starts as a simple blink sketch often masks critical hardware realities that can destroy microcontrollers or result in unreliable deployments. As the maker ecosystem has evolved in 2026, the transition from legacy 8-bit AVR boards to modern ARM and dual-core architectures—like the Arduino Uno R4 Minima ($27.50) and the Arduino Nano ESP32 ($22.00)—demands a rigorous approach to GPIO limits, forward voltage calculations, and modern PWM configurations.
This configuration guide moves past the basic breadboard tutorials. We will detail exact resistor sizing matrices, modern ESP32 core PWM syntax, and high-power scaling techniques using logic-level MOSFETs, ensuring your LED circuits are both electrically safe and programmatically optimized.
Hardware Configuration: GPIO Limits and Resistor Sizing
The most common failure mode when wiring an LED on Arduino is bypassing the current-limiting resistor. An LED is a diode; once the forward voltage ($V_f$) threshold is crossed, its resistance drops to near zero. Without a resistor, the microcontroller's GPIO pin attempts to supply infinite current, limited only by its internal silicon trace resistance. This leads to immediate thermal degradation of the silicon die.
Understanding Modern GPIO Limits
- Arduino Uno R3 / R4 Minima (5V Logic): The ATmega328P and Renesas RA4M1 microcontrollers can safely source/sink up to 20mA per pin, with a total package limit of 200mA.
- Arduino Nano ESP32 (3.3V Logic): The ESP32-S3 has a strict absolute maximum of 40mA per pin, but the recommended operating current is 20mA or less. Furthermore, the total current across all GPIO pins must not exceed 110mA.
Resistor Calculation Matrix
To calculate the required resistor, we use Ohm's Law: $R = (V_s - V_f) / I$. We will target a conservative 15mA ($0.015A$) for standard 5mm indicator LEDs, which provides excellent luminosity while preserving GPIO lifespan. Below is the configuration matrix for common LED colors across 5V and 3.3V architectures.
| LED Color | Typical $V_f$ | Target Current | Resistor (5V Boards) | Resistor (3.3V Boards) |
|---|---|---|---|---|
| Red | 2.0V | 15mA | 200Ω (Use 220Ω) | 86Ω (Use 100Ω) |
| Yellow / Green | 2.2V | 15mA | 186Ω (Use 200Ω) | 73Ω (Use 82Ω) |
| Blue / White | 3.2V | 15mA | 120Ω (Use 120Ω) | Cannot drive directly* |
*Note: Blue and White LEDs require ~3.2V. On a 3.3V Nano ESP32, the 0.1V headroom is insufficient to push 15mA through a standard resistor. You must either use a low-$V_f$ specific LED or drive it via a transistor/MOSFET.
Software Configuration: Digital vs. PWM Control
Once the hardware is secured, configuring the software requires understanding the difference between digital toggling and Pulse Width Modulation (PWM). The standard digitalWrite() function is sufficient for on/off states, but dimming requires PWM.
Legacy AVR vs. Modern ESP32 PWM Syntax
A major configuration hurdle in 2026 is the divergence in Arduino core libraries. If you are using an Uno R4 or legacy Uno R3, analogWrite() handles PWM seamlessly. However, the Arduino Nano ESP32 utilizes the ESP32-S3 LEDC (LED Control) peripheral, requiring a different initialization sequence in the modern v3.x Arduino core.
// Configuration for Arduino Uno R4 / Legacy AVR
const int ledPin = 9;

void setup() {
  pinMode(ledPin, OUTPUT);
}

void loop() {
  analogWrite(ledPin, 128); // 50% duty cycle (0-255 range)
  delay(1000);
}
// Configuration for Arduino Nano ESP32 (Modern Core)
const int ledPin = D5; // Use 'D' prefix for digital pins on Nano ESP32

void setup() {
  // Attach pin to LEDC timer: Pin, Frequency (5kHz), Resolution (8-bit)
  ledcAttach(ledPin, 5000, 8);
}

void loop() {
  ledcWrite(ledPin, 128); // 50% duty cycle
  delay(1000);
}
CRITICAL ESP32 STRAPPING PIN WARNING: When configuring an LED on Arduino Nano ESP32, avoid GPIO 0, 2, 12, and 15. These are 'strapping pins' used during the boot sequence. If an LED is wired to these pins, it will flicker erratically on reset, and the pull-up/pull-down states required for booting may be overridden by the LED's forward voltage, causing the board to fail to enter flash mode.
Scaling Up: High-Power and Addressable Configurations
Standard 5mm LEDs draw ~20mA. But what if your project requires high-power illumination (e.g., 1W or 3W star LEDs drawing 350mA to 700mA) or addressable RGB strips? Direct GPIO connection will instantly vaporize the microcontroller's internal traces.
High-Power LED MOSFET Configuration
To drive high-current LEDs, use a logic-level N-Channel MOSFET like the IRLZ44N. Unlike standard MOSFETs that require 10V+ at the gate, the IRLZ44N fully opens at the 5V or 3.3V provided by Arduino GPIOs.
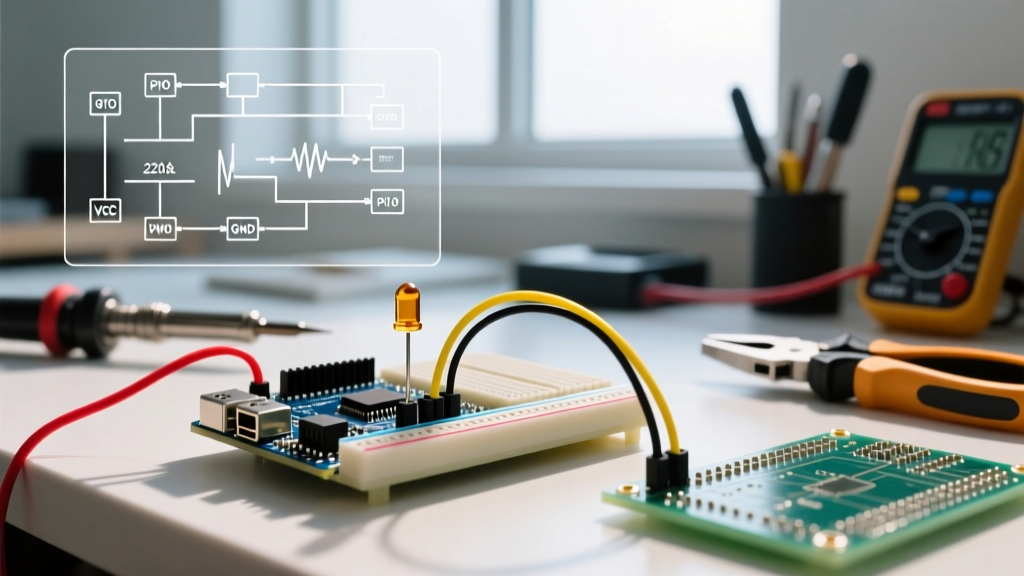
- Gate: Connect to Arduino PWM pin via a 220Ω resistor (prevents ringing).
- Drain: Connect to the LED's cathode (negative).
- Source: Connect to system Ground.
- Pull-down: Add a 10kΩ resistor between Gate and Source to ensure the MOSFET stays off during Arduino boot-up.
Addressable WS2812B (NeoPixel) Power Injection
Addressable LEDs like the WS2812B integrate the driver and RGB die into a single package. While the data line connects directly to a digital pin, the power requirements are steep. A single WS2812B pixel draws up to 60mA at full white. A strip of 60 LEDs requires 3.6 Amps—far beyond the Arduino's onboard 5V regulator (which typically maxes out at 500mA to 800mA). For detailed wiring and power injection strategies, refer to the comprehensive Adafruit NeoPixel Überguide. Always inject external 5V power directly to the strip's VCC and GND, sharing a common ground with the Arduino.
Troubleshooting Common LED on Arduino Failures
Even with precise calculations, hardware anomalies occur. Use this diagnostic matrix to resolve common configuration issues.
- Symptom: LED is extremely dim, even with
digitalWrite(HIGH).
Cause: The pin is configured as an INPUT instead of OUTPUT, relying on the weak internal pull-up resistor (20kΩ - 50kΩ) to source current.
Fix: EnsurepinMode(pin, OUTPUT)is declared in thesetup()block. - Symptom: LED flickers randomly when connected to an ESP32.
Cause: Pin is a strapping pin, or Wi-Fi/Bluetooth RF interference is causing voltage sag on the 3.3V rail.
Fix: Move to a non-strapping pin (e.g., GPIO 4, 5, 18) and add a 100nF decoupling capacitor across the LED's power rails if using long wires. - Symptom: PWM dimming appears 'stepped' or non-linear to the human eye.
Cause: Human perception of brightness is logarithmic, butanalogWrite()outputs a linear duty cycle.
Fix: Apply a gamma correction lookup table in your code to map linear values to perceptual brightness curves.
Summary
Successfully configuring an LED on Arduino in a modern maker environment requires more than copying a basic blink sketch. By respecting the specific GPIO current limits of your chosen board, calculating exact current-limiting resistors based on forward voltage, and utilizing the correct core-specific PWM functions, you ensure robust, scalable, and professional-grade hardware deployments.