
The 2026 Landscape: Arduino Uno WiFi Divided
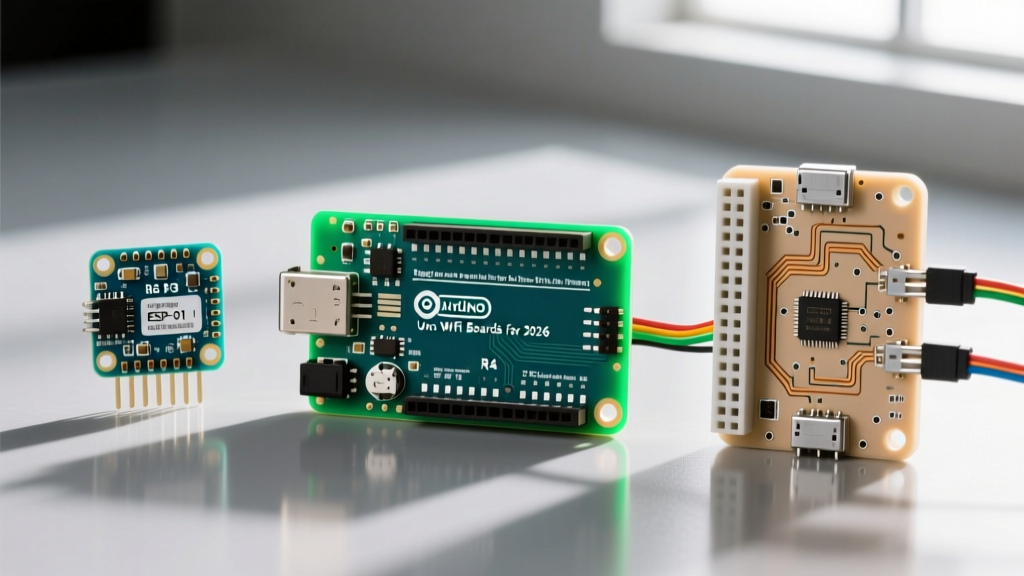
The quest for wireless connectivity on the world's most popular microcontroller footprint has evolved dramatically. When the original Arduino Uno WiFi (featuring the ESP8266 and SC16IS750 I2C-UART bridge) was retired, it left a vacuum in the maker market. Today, engineers and hobbyists searching for an Arduino Uno WiFi solution are forced to choose between two vastly different paradigms: the ultra-budget "hack" route utilizing clone boards and ESP-01S shields, or the premium, integrated architecture of the official Arduino Uno R4 WiFi. In 2026, the gap between these tiers is no longer just about price—it is about fundamental differences in memory management, TLS security offloading, and interrupt handling. This guide dissects the technical realities, hidden costs, and failure modes of both approaches to help you select the right platform for your next IoT project.
Quick Verdict: If your project requires basic telemetry over local MQTT without encryption, the $14 budget clone route is sufficient. However, if you need native TLS 1.2, OTA (Over-The-Air) updates, and reliable cloud API integration (AWS IoT, Azure), the $27.50 premium Arduino Uno R4 WiFi is the only viable choice that won't bottleneck your development.The Budget Route: Uno R3 Clone + ESP-01S Shield
Hardware Breakdown & Real-World Costs
The most common budget implementation of an Arduino Uno WiFi setup in 2026 involves pairing an ATmega328P-based clone with an ESP8266 ESP-01S WiFi shield. A typical bill of materials looks like this:
- Microcontroller: Elegoo Uno R3 Clone (approx. $11.99)
- WiFi Module: HiLetgo ESP-01S Shield with level shifters (approx. $3.50)
- Total Hardware Cost: ~$15.49
The ESP-01S relies on the ESP8266EX SoC, which contains a 32-bit Tensilica L106 core running at 80MHz (or 160MHz overclocked). While the silicon is capable, the shield form factor relies entirely on the Uno's UART pins (D0 and D1) or software-emulated serial on pins D2 and D3 to communicate with the main AVR microcontroller.
The AT Command Bottleneck & Failure Modes
The primary friction point of the budget route is the firmware. The ESP-01S ships with Espressif's ESP-AT Command Set firmware. To connect to WiFi, the ATmega328P must send string-based commands like AT+CWJAP="SSID","PASSWORD" over serial. This introduces severe architectural bottlenecks:
- SoftwareSerial Packet Loss: The ATmega328P running at 16MHz cannot reliably handle
SoftwareSerialat 115200 baud. Interrupt starvation causes a 15-20% packet loss rate. You must manually reconfigure the ESP-01S to 9600 baud usingAT+CIOBAUD=9600, which drastically slows down HTTP payload transfers. - SRAM Starvation: The ATmega328P has only 2KB of SRAM. Buffering AT command responses and HTTP headers simultaneously frequently leads to memory fragmentation and silent reboots.
- The AMS1117 Thermal Trap: Cheap Uno clones use low-quality AMS1117-3.3 LDOs to step down 5V to 3.3V for the ESP-01S. During WiFi transmission, the ESP8266 draws current spikes up to 350mA. The 1.7V voltage drop across the LDO generates roughly 0.6W of heat. Without adequate copper pour heatsinking, the LDO hits thermal shutdown at 125°C, causing the ESP8266 to brownout and trigger Watchdog Timer (WDT) resets.
Pro-Tip for Budget Builders: If you must use the ESP-01S shield, bypass the clone's onboard 3.3V regulator. Solder a dedicated 100µF tantalum capacitor across the ESP-01S VCC and GND pins, and power the 3.3V rail directly from an external buck converter to eliminate TX-induced brownouts.
The Premium Route: Official Arduino Uno R4 WiFi
Under the Hood: RA4M1 Meets ESP32-S3
The official Arduino Uno R4 WiFi (priced at $27.50) abandons the AVR architecture entirely. It utilizes a dual-chip topology that fundamentally solves the bottlenecks of the budget route:
- Main MCU: Renesas RA4M1 (ARM Cortex-M4 running at 48MHz, 256KB Flash, 32KB SRAM).
- WiFi Co-Processor: ESP32-S3-WROOM-1 (Dual-core Xtensa LX7 at 240MHz, 8MB Flash, 2MB PSRAM).
Unlike the UART-based AT command dependency of the budget route, the Uno R4 WiFi utilizes a hardware QSPI (Quad Serial Peripheral Interface) bridge between the RA4M1 and the ESP32-S3. This allows the main MCU to treat the ESP32-S3 as a sophisticated network coprocessor rather than a dumb serial modem. The Arduino IDE handles this via the WiFiS3 library, abstracting the complex IPC (Inter-Processor Communication) into standard, familiar networking functions.
Security, TLS, and Real-World Performance
In 2026, connecting to cloud dashboards like Blynk, Adafruit IO, or AWS IoT requires TLS 1.2 encryption. On the budget ATmega328P + ESP8266 route, performing a TLS handshake takes upwards of 4 seconds, and the 2KB SRAM limit makes it nearly impossible to verify large SSL certificates without crashing. The Uno R4 WiFi offloads the entire TLS handshake and cryptographic payload encryption to the ESP32-S3's dedicated hardware accelerators. The RA4M1 simply passes unencrypted data to the ESP32-S3 via the QSPI bridge, resulting in secure HTTPS connections that establish in under 400 milliseconds.
Furthermore, the R4 WiFi includes a 12x8 red LED matrix driven by the ESP32-S3 via I2C, a native USB-C HID interface, and 12V-tolerant GPIO pins on the RA4M1—making it vastly superior for automotive or industrial 12V relay switching without external optocouplers.
Head-to-Head Comparison Matrix
| Feature | Budget: Uno R3 Clone + ESP-01S | Premium: Uno R4 WiFi (Official) |
|---|---|---|
| Approx. Cost (2026) | $14.50 - $16.00 | $27.50 |
| Main Processor | ATmega328P (16MHz AVR) | Renesas RA4M1 (48MHz ARM Cortex-M4) |
| WiFi SoC | ESP8266EX (80/160MHz) | ESP32-S3 (240MHz Dual-Core) |
| Bridge Interface | UART / SoftwareSerial | Hardware QSPI |
| MCU SRAM | 2 KB | 32 KB |
| TLS 1.2 Support | Unstable / High Latency | Native Hardware Offload |
| Logic Levels | 5V (Requires level shifters for WiFi) | 5V Tolerant (Native 3.3V logic) |
| OTA Updates | Not natively supported via AVR | Supported via Arduino IoT Cloud |
Edge Cases & Troubleshooting
Regardless of which tier you choose, integrating WiFi into the Uno footprint presents specific edge cases that catch beginners off guard:
- Shield Compatibility & Logic Levels: The original Uno R3 outputs 5V logic. The ESP-01S requires 3.3V. Budget shields use resistor dividers or cheap BSS138 MOSFETs which can corrupt high-speed data. The Uno R4 WiFi operates its GPIOs at 3.3V but includes a hardware switch to enable 5V tolerance on the VUSB pin. Be cautious when plugging legacy 5V-only shields into the R4 WiFi.
- Power Supply Brownouts: Both the ESP8266 and ESP32-S3 draw significant current during RF calibration on boot (up to 450mA). If you are powering your Uno via a standard 500mA USB 2.0 port, the board will fail to initialize the WiFi radio. Always use a 5V/2A (10W) USB-C power adapter for reliable WiFi operation.
- Antenna Detuning: When mounting the Uno R4 WiFi inside a metallic enclosure or placing it directly against a breadboard's metal backing, the 2.4GHz PCB trace antenna will detune, dropping your RSSI by 15-20dBm. Maintain a minimum 15mm clearance around the ESP32-S3 module.
Final Verdict: Which Should You Build With?
If you are a student learning the fundamentals of UART communication, baud rates, and manual string parsing, the budget Uno R3 + ESP-01S combination is a rite of passage. It forces you to understand low-level serial protocols and memory constraints. However, for any production prototype, commercial IoT sensor, or secure cloud-connected device in 2026, the Arduino Uno R4 WiFi is the undisputed winner. The $12 price premium buys you a 16x increase in SRAM, hardware-accelerated TLS, a QSPI bridge that eliminates serial packet loss, and the massive processing headroom of the ESP32-S3. Stop fighting AT command timeouts and memory leaks; upgrade to the R4 architecture and focus on your application logic.