
The Renovation Bottleneck: Evaluating Your Electrical Wiring Box
When homeowners and contractors plan a major renovation—whether it is gutting a kitchen, finishing a basement, or adding an Accessory Dwelling Unit (ADU)—the aesthetic choices often overshadow the critical infrastructure hiding behind the drywall. At the heart of this infrastructure is the electrical wiring box. In residential renovation planning, this term generally refers to two distinct but equally vital components: the main service breaker panel and the individual junction or outlet boxes routed through your walls.
Ignoring the capacity and layout of your electrical wiring box during the planning phase can lead to failed inspections, tripped breakers, and thousands of dollars in mid-project change orders. According to the Electrical Safety Foundation International (ESFI), outdated or improperly sized electrical systems are a leading cause of residential fires and renovation delays. This guide provides a deep-dive, contractor-level framework for sizing, upgrading, and planning your electrical wiring boxes to meet modern 2026 demands.
Main Service Panel vs. Junction Boxes: Defining the Scope
Before running a single wire, you must clarify which 'wiring box' your renovation impacts. Most remodels require attention to both.
- The Main Service Panel (Breaker Box): The central hub where utility power enters the home and is distributed to branch circuits. Renovations that add high-draw appliances (EV chargers, induction ranges, tankless water heaters) require a load calculation to ensure the main panel can handle the new amperage.
- Junction and Device Boxes: The localized enclosures inside walls and ceilings that house wire splices, switches, and receptacles. The National Electrical Code (NEC) strictly governs the physical volume of these boxes based on the number and gauge of wires entering them.
NEC Load Calculations: Do You Need a Panel Upgrade?
If your renovation adds square footage or major appliances, you must perform a load calculation per NEC Article 220. Many older homes built in the 1970s and 80s feature 100-amp or 150-amp service panels. In 2026, with the proliferation of electric vehicles and heat pump HVAC systems, a 200-amp service is the bare minimum for a modernized home, with 400-amp services becoming increasingly common for all-electric, net-zero builds.
For dwelling units, electricians typically use the Optional Calculation Method (NEC 220.82), which applies specific demand factors to general lighting, small appliance circuits, and HVAC loads. Below is a breakdown of common renovation additions and their typical amperage requirements that must be accounted for in your main electrical wiring box.
Table: Common Renovation Additions & Amperage Draw
| Renovation Addition | Typical Voltage | Required Circuit Breaker Size | Wire Gauge Required |
|---|---|---|---|
| Level 2 EV Charger (Hardwired) | 240V | 40A to 60A | 8 AWG to 4 AWG Copper |
| Induction Cooktop / Range | 240V | 40A to 50A | 8 AWG to 6 AWG Copper |
| Mini-Split Heat Pump (1 Zone) | 240V | 20A to 30A | 12 AWG to 10 AWG Copper |
| Kitchen Small Appliance Circuit | 120V | 20A (Minimum 2 circuits) | 12 AWG Copper |
| Spa / Hot Tub (Indoor/Outdoor) | 240V | 50A to 60A (GFCI) | 6 AWG Copper (THWN in conduit) |
Junction Box Placement and NEC 314.16 Box Fill Calculations
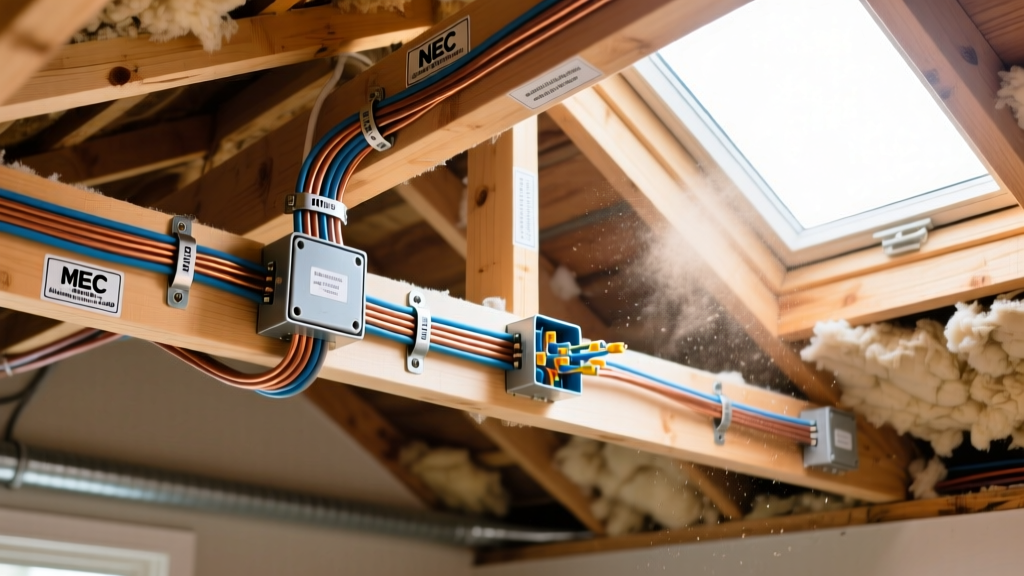
When framing new walls or dropping ceilings for recessed lighting, the physical size of your localized electrical wiring boxes is strictly regulated by NEC 314.16 (Box Fill Calculations). Cramming too many wires into an undersized box causes heat buildup, insulation degradation, and severe fire hazards.
To calculate the minimum cubic inch (cu in) volume required for a junction or device box, you must assign a volume allowance to every conductor, clamp, and device inside the box. The National Fire Protection Association (NFPA) enforces these multipliers strictly during rough-in inspections.
Box Fill Volume Allowances per Conductor
- 14 AWG Wire: 2.0 cubic inches per conductor
- 12 AWG Wire: 2.25 cubic inches per conductor
- 10 AWG Wire: 2.5 cubic inches per conductor
- 8 AWG Wire: 3.0 cubic inches per conductor
Pro-Tip for Renovators: When wiring a 3-way switch loop using 12/3 Romex in a standard single-gang box, you are dealing with multiple current-carrying conductors, grounds, and clamps. Always default to 'deep' 1-gang boxes (minimum 22 cu in) for smart switches and dimmers, as the physical bulk of smart relays (like Lutron Caseta or Leviton Decora Smart) requires significant extra space beyond the bare wire fill calculations.
The 2026 Shift: Smart Electrical Wiring Boxes
A major trend in high-end renovations is the replacement of the traditional dumb breaker panel with a smart electrical wiring box. Systems like the SPAN Smart Panel or the Leviton Smart Load Center replace standard breakers with digitally monitored, app-controlled equivalents.
Why plan for a smart panel during a remodel?
If your renovation includes solar PV, battery backup (like the Tesla Powerwall 3), or an EV charger, a smart panel allows you to prioritize critical circuits during a grid outage. Instead of upgrading to a massive 400-amp service to handle simultaneous loads, a smart panel can automatically shed non-essential loads (like the water heater or dryer) to keep the EV charging and the refrigerator running within a 200-amp limit.
Cost Breakdown: Panel and Box Upgrades
Budgeting accurately for electrical infrastructure is critical. Below are the estimated 2026 market rates for electrical wiring box upgrades, including labor and materials. Note that prices vary by region and the complexity of the utility drop.
- Main Panel Upgrade (100A to 200A): $2,800 – $4,500. This includes a new 200A Square D QO or Eaton CH main panel, new meter socket, and utility coordination.
- Smart Panel Integration (e.g., SPAN): $4,500 – $7,500 installed. The hardware alone costs roughly $3,500, requiring specialized certified installers.
- New Work Junction/Device Boxes: $1.50 – $4.00 per box (materials). Old-work (remodel) boxes with retrofit brackets cost slightly more ($3.00 – $8.00).
- Sub-Panel Installation (e.g., for a detached ADU or garage): $1,200 – $2,500 for a 60A to 100A sub-panel, assuming the main panel has the capacity and the trenching/wire run is under 50 feet.
For broader context on how electrical upgrades impact overall home efficiency and valuation, the NFPA Codes and Standards directory remains the definitive resource for ensuring your planned upgrades meet the latest safety benchmarks adopted by local municipalities.
Common Renovation Pitfalls to Avoid
- Ignoring the Neutral Bar Capacity: When adding AFCI/GFCI breakers (required by modern code for almost all living spaces), each breaker requires its own dedicated neutral wire terminating on the neutral bar. Many older 200A panels run out of neutral bar slots long before they run out of breaker slots. Plan for a panel with a minimum of 40 spaces/80 circuits to avoid this bottleneck.
- Daisy-Chaining Recessed Lights Incorrectly: When planning canless LED lighting, electricians often use the junction box provided on the back of the light fixture to splice wires to the next light. If the fixture box is rated for only 3 sets of wires and you run 4, you violate NEC box fill rules. Always use a separate, accessible junction box in the attic for complex lighting layouts.
- Forgetting Low-Voltage Separation: When planning boxes for smart home hubs, PoE security cameras, or hardwired data, remember that low-voltage boxes must maintain physical separation from line-voltage electrical wiring boxes to prevent electromagnetic interference (EMI) and meet fire-stopping codes.
Final Planning Checklist for Contractors and Homeowners
Before drywall goes up, verify the following:
- [ ] Completed NEC Article 220 load calculation signed by a licensed electrician.
- [ ] Verified utility service drop can handle the planned amperage (e.g., upgrading overhead wires if moving from 100A to 200A).
- [ ] Specified deep device boxes (22+ cu in) for all smart switch and dimmer locations.
- [ ] Confirmed AFCI/GFCI breaker compatibility with the chosen panel brand (Square D, Eaton, Siemens).
- [ ] Scheduled the rough-in electrical inspection before scheduling insulation and drywall crews.
By treating your electrical wiring box not as an afterthought, but as the central nervous system of your renovated space, you ensure a safe, code-compliant, and future-proofed home capable of handling the electrical demands of the modern era.