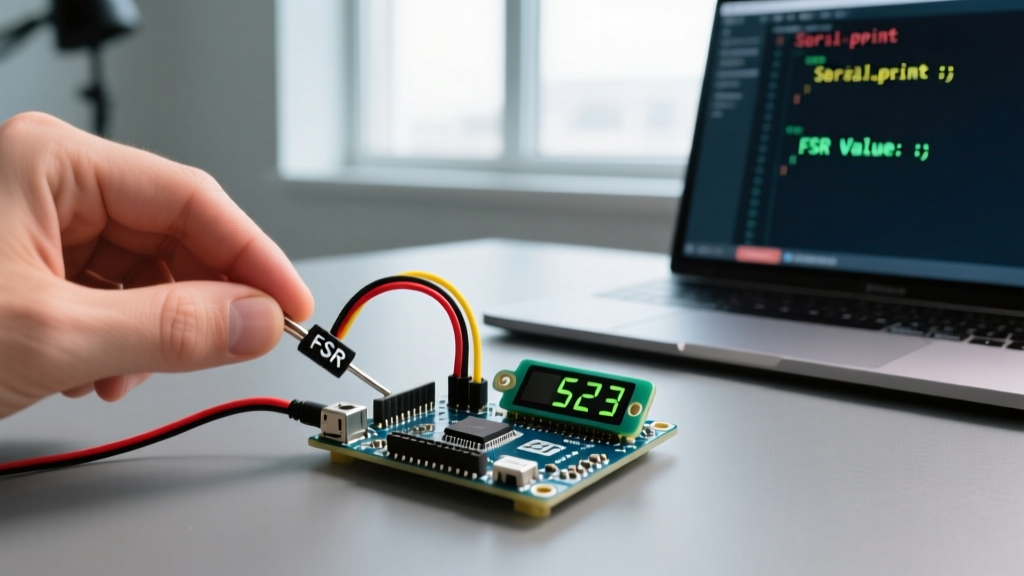
The "Arduino ESP32" ecosystem—using the Arduino IDE to program Espressif’s powerful dual-core microcontrollers—has become the default standard for hobbyist and professional IoT projects. However, migrating from an 8-bit Arduino Uno to a 32-bit ESP32 introduces new hardware realities, particularly with I2C communication. The ESP32 does not have fixed hardware I2C pins; instead, its I2C peripheral can be mapped to almost any GPIO via the internal GPIO matrix. While this offers immense flexibility, it is also the primary source of bus lockups and initialization failures for makers transitioning to the platform.
This guide targets the ESP32-S3-DevKitC-1 (N8R8) running the ESP32 Arduino Core v3.0.x (which utilizes the ESP-IDF v5.1 backend). We will wire a BME280 environmental sensor, write production-grade code with hardware fault handling, and systematically debug the most common I2C errors you will encounter on the bench.
Hardware Spec Sheet & I2C Pin Mapping
Before wiring anything, you must understand the electrical characteristics of the ESP32-S3 compared to the classic ESP32-WROOM-32E. The shift to the Arduino Core v3.x changed how the underlying ESP-IDF handles I2C timeouts, making proper pull-up resistors and bus capacitance management more critical than ever.
| Parameter | ESP32-WROOM-32E (Classic) | ESP32-S3-DevKitC-1 (Target) | Engineering Notes & Constraints |
|---|---|---|---|
| Default I2C SDA Pin | GPIO 21 | GPIO 8 | Always explicitly define in Wire.begin() to avoid peripheral conflicts. |
| Default I2C SCL Pin | GPIO 22 | GPIO 9 | Avoid strapping pins (e.g., GPIO 0, 3, 45, 46 on S3) for I2C to prevent boot failures. |
| Logic Level (VCC) | 3.3V | 3.3V | Feeding 5V into ESP32 GPIOs will destroy the silicon. Use level shifters for 5V sensors. |
| Max I2C Bus Speed | 400 kHz (Fast Mode) | 1 MHz (Fast Mode Plus) | 1 MHz requires <20pF bus capacitance and 2.2kΩ pull-ups. Stick to 100 kHz for breadboards. |
| Internal Pull-ups | ~45 kΩ (Weak) | ~45 kΩ (Weak) | Internal pull-ups are too weak for I2C. External 4.7kΩ resistors are mandatory. |
| Typical Board Price (2026) | $6.00 - $8.00 USD | $9.00 - $12.00 USD | S3 variants include native USB and AI vector instructions, justifying the slight premium. |
Parts List & Wiring Procedure
To follow this build exactly, gather the following specific components. Substituting raw modules for breakout boards will change the pull-up resistor requirements.
- Microcontroller: ESP32-S3-DevKitC-1 (N8R8 variant with 8MB Flash / 8MB PSRAM).
- Sensor: Adafruit BME280 I2C Breakout (Product ID 2652) or SparkFun BME280 (SEN-13676). Both include onboard 3.3V LDOs and 4.7kΩ pull-ups.
- Wiring: 22AWG stranded silicone jumper wires (pre-crimped with Dupont connectors).
- Power: USB-C cable capable of data transfer (not a charge-only cable).
Step-by-Step Wiring
- De-energize the board: Unplug the USB-C cable from your ESP32-S3 before making connections.
- Connect Power: Route a wire from the ESP32
3V3pin to the BME280VIN(orVCC) pin. Do not use the 5V pin unless your specific breakout board explicitly requires 5V input to regulate down to 3.3V. - Connect Ground: Route a wire from the ESP32
GNDpin to the BME280GNDpin. - Connect I2C Data (SDA): Connect ESP32
GPIO 8to the BME280SDApin. - Connect I2C Clock (SCL): Connect ESP32
GPIO 9to the BME280SCLpin. - Verify Pull-ups: If using a raw BME280 chip on a custom PCB rather than an Adafruit/SparkFun breakout, you must solder 4.7kΩ resistors between the SDA and 3.3V lines, and the SCL and 3.3V lines.
Complete Arduino ESP32 Code with Error Handling
The following code is written for the ESP32-S3-DevKitC-1. It explicitly defines the I2C pins, initializes the bus at a safe 100 kHz clock speed, and includes robust error handling to prevent the sketch from silently failing or spamming the serial monitor if the sensor disconnects.
Adafruit BME280 Library and its dependency, Adafruit Unified Sensor.
#include <Wire.h>
#include <Adafruit_Sensor.h>
#include <Adafruit_BME280.h>

// --- PIN DEFINITIONS (Target: ESP32-S3-DevKitC-1) ---
#define I2C_SDA 8
#define I2C_SCL 9
#define STATUS_LED 2 // Standard external LED pin (adjust if using onboard RGB)

// --- CONSTANTS ---
#define SEALEVELPRESSURE_HPA (1013.25)
#define BME_I2C_ADDR 0x77 // Adafruit breakouts default to 0x77; some clones use 0x76

// Instantiate the sensor object
Adafruit_BME280 bme;

void setup() {
  Serial.begin(115200);

  // Wait for serial monitor to connect (native USB on S3 requires this delay)
  unsigned long startTime = millis();
  while (!Serial && (millis() - startTime) < 3000) {
    delay(10);
  }

  Serial.println("\n--- ESP32-S3 BME280 I2C Initialization ---");

  // Configure status LED for hardware fault indication
  pinMode(STATUS_LED, OUTPUT);
  digitalWrite(STATUS_LED, LOW);

  // Initialize I2C bus with explicit pins and 100kHz clock
  // Wire.begin(SDA, SCL, frequency) is the safest method for ESP32
  if (!Wire.begin(I2C_SDA, I2C_SCL, 100000)) {
    Serial.println("FATAL: I2C bus initialization failed. Check GPIO definitions.");
    haltSystem();
  }

  // Attempt to find the sensor with error handling
  if (!bme.begin(BME_I2C_ADDR, &Wire)) {
    Serial.print("FATAL: Could not find BME280 at I2C address 0x");
    Serial.println(BME_I2C_ADDR, HEX);
    Serial.println("Check wiring, pull-up resistors, or try address 0x76.");
    haltSystem();
  }

  Serial.println("BME280 initialized successfully.");

  // Configure sensor oversampling for indoor environmental monitoring
  bme.setSampling(Adafruit_BME280::MODE_NORMAL,
                  Adafruit_BME280::SAMPLING_X2,  // Temperature
                  Adafruit_BME280::SAMPLING_X16, // Pressure
                  Adafruit_BME280::SAMPLING_X1,  // Humidity
                  Adafruit_BME280::FILTER_X16,
                  Adafruit_BME280::STANDBY_MS_500);
}

void loop() {
  // Only read if the sensor is responding to prevent I2C bus lockups
  Wire.beginTransmission(BME_I2C_ADDR);
  if (Wire.endTransmission() == 0) {
    printSensorData();
  } else {
    Serial.println("ERROR: Sensor lost connection. I2C bus may be locked.");
    // In a production system, you would reset the I2C bus here:
    // Wire.end(); Wire.begin(I2C_SDA, I2C_SCL, 100000);
  }

  delay(2000); // 2-second read interval
}

void printSensorData() {
  Serial.print("Temperature: "); Serial.print(bme.readTemperature()); Serial.println(" *C");
  Serial.print("Pressure:    "); Serial.print(bme.readPressure() / 100.0F); Serial.println(" hPa");
  Serial.print("Humidity:    "); Serial.print(bme.readHumidity()); Serial.println(" %");
  Serial.println("-------------------------");
}

void haltSystem() {
  // Blink LED rapidly to indicate a fatal hardware fault without needing Serial
  while (1) {
    digitalWrite(STATUS_LED, HIGH);
    delay(100);
    digitalWrite(STATUS_LED, LOW);
    delay(100);
  }
}
Debugging: I2C Failures and Bus Lockups
When working with the Arduino ESP32 core, I2C failures usually manifest in two distinct ways: a library-level failure or a core-level driver timeout. Because the ESP32 uses an RTOS (FreeRTOS) under the hood, I2C errors can sometimes crash the task watchdog if not handled correctly.
The First Three Things to Check
Before rewriting code, grab your multimeter and verify these three physical layer realities:
- VCC Voltage at the Sensor: Measure between the sensor's VCC and GND pins. It must read between 3.2V and 3.4V. If it reads 5V, you are likely back-feeding the ESP32's 3.3V rail, which will eventually fry the onboard LDO.
- Pull-Up Resistance: Set your multimeter to resistance mode. Measure between the SDA line and the 3.3V line. You should read approximately 4.7kΩ. If it reads infinite (OL), your breakout board lacks pull-ups or your solder joint is cold.
- Pin Swapping: The ESP32 allows you to map I2C to any pin, meaning the compiler won't stop you from swapping SDA and SCL in your code. Verify that physical GPIO 8 is actually connected to the sensor's SDA pin, not SCL.
Ranked Causes for Common Error Strings
Error String 1: [E][Wire.cpp:500] requestFrom(): i2cWriteReadNonTimeout
This is a low-level ESP-IDF driver error indicating the I2C master sent a clock pulse but the slave never acknowledged (ACK) or released the SDA line.
- Cause A (Most Likely): Missing pull-up resistors. The SDA line is floating and gets pulled low by parasitic capacitance, making the bus think a slave is holding it.
- Cause B: Bus capacitance is too high. If you have long wires (>30cm) or multiple sensors on a breadboard, the 100kHz clock edges are degrading into sawtooth waves. Fix: Drop the clock speed to 50kHz in
Wire.begin(). - Cause C: Logic level mismatch. You are driving a 5V sensor with 3.3V logic, and the sensor's input high threshold (VIH) is not being met.
Error String 2: Failed to find BME280 chip (or Could not find a valid BME280 sensor)
This is generated by the Adafruit library when the sensor responds to the I2C address, but the WHO_AM_I register returns an unexpected value.
- Cause A (Most Likely): Wrong I2C address. Many cheap clone BME280 modules tie the SDO pin to GND, making the address
0x76instead of the Adafruit default0x77. Fix: Run an I2C scanner sketch to find the true address. - Cause B: You are actually using a BMP280 (temperature/pressure only) instead of a BME280 (temperature/pressure/humidity). The silicon IDs are different, and the BME library will reject the BMP chip.
Extending and Simplifying the Build
Once your baseline Arduino ESP32 I2C circuit is stable, you will inevitably want to add more sensors or optimize the hardware. Here is how to scale the system without violating I2C electrical limits.
Extending: Adding Multiple Identical Sensors
The I2C protocol only allows two devices with the exact same address to share a bus. If you need to monitor temperature in three different rooms using three identical BME280 breakouts, you cannot simply wire them in parallel. Instead, introduce an I2C Multiplexer like the TCA9548A.
The TCA9548A sits on the main I2C bus and acts as a switch, routing the ESP32's SDA/SCL signals to one of 8 downstream channels. You select the channel via a specific I2C command before querying the sensor. This completely isolates the bus capacitance of each sensor, allowing you to run longer wires to each room without degrading the main bus signal integrity.
Simplifying: The Internal Pull-Up Trap
If you are designing a custom PCB and want to save two 4.7kΩ resistors, you might be tempted to enable the ESP32-S3's internal pull-ups via software: pinMode(I2C_SDA, INPUT_PULLUP);.
Do not do this for production hardware. The internal pull-ups are roughly 45kΩ. According to the Espressif I2C API documentation, the bus rise time will violate the I2C specification at any speed above 10kHz. While it might "work" on a bare desk with one sensor, the moment you add a second sensor or introduce environmental noise, the bus will lock up. Always budget space for external 0603 or 0805 pull-up resistors on your custom PCBs.
For more details on the underlying RTOS drivers that govern these I2C behaviors, refer to the official Arduino ESP32 Core GitHub repository, specifically the release notes for v3.0.x which detail the migration from the legacy I2C driver to the new ESP-IDF v5.1 interrupt-based I2C driver. Understanding this shift is the key to moving from a hobbyist who copies code to an embedded engineer who designs robust hardware.