
The DFPlayer Arduino Ecosystem in 2026: Navigating the Clone Chip Crisis
The DFPlayer Mini (MP3-TF-16P) remains a staple in the maker community for adding standalone audio to embedded projects. However, if you are building a project today, you are almost certainly not using the original YX5300 UART MP3 chip. The market is now saturated with HW-247A boards featuring GD3200B or JL (JieLi) clone silicon. While these clones cost between $1.50 and $3.00, they introduce severe initialization anomalies, silent failures, and baud-rate mismatches that leave many makers staring at a frustrating "Time Out" error in the Arduino IDE Serial Monitor.
This error diagnosis guide bypasses generic wiring diagrams and dives deep into the silicon-level quirks, power delivery failures, and file-system edge cases that cause DFPlayer Arduino integrations to fail. Whether you are driving a 3W 4Ω speaker or routing audio through a 3.5mm jack, these are the definitive troubleshooting protocols for 2026.
Decoding the "Time Out" and "Not Initialized" Serial Errors
The most common point of failure occurs during the myDFPlayer.begin() handshake. The official DFRobot Official Wiki library sends a specific hex initialization packet (7E FF 06 3F 00 00 00 FE BA EF) and waits for an acknowledgment. Clone chips, particularly the JL variants, often drop the first byte, ignore the reset command, or fail to send the expected ACK packet, causing the library to throw a "Not Initialized" or "Time Out" error.
The Software Workaround for Clone Silicon
If you are using a clone chip and the standard DFRobot library fails, do not assume your hardware is dead. You have two primary software interventions:
- Method 1: The Dummy Byte Injection. Modify your initialization sequence to send a dummy byte (
0x00) before the standard init packet. Some JL chips require this to wake up the UART receiver buffer. - Method 2: Switch to the Makuna Library. The community-maintained
makuna/DFMiniMp3library includes built-in quirks-handling for clone chips. It utilizes a more robust state machine for serial acknowledgments and gracefully handles the missing ACK packets that cause the official library to hang.
Expert Tip: Never use hardware serial (
Serial) on an Arduino Uno for the DFPlayer if you also need the Serial Monitor for debugging. Use Arduino SoftwareSerial Documentation on pins 10 (RX) and 11 (TX). Remember that SoftwareSerial disables interrupts during transmission, which can interfere with timing-critical sensors like ultrasonic rangefinders.
Hardware Wiring: The Mandatory 1kΩ RX Resistor Rule
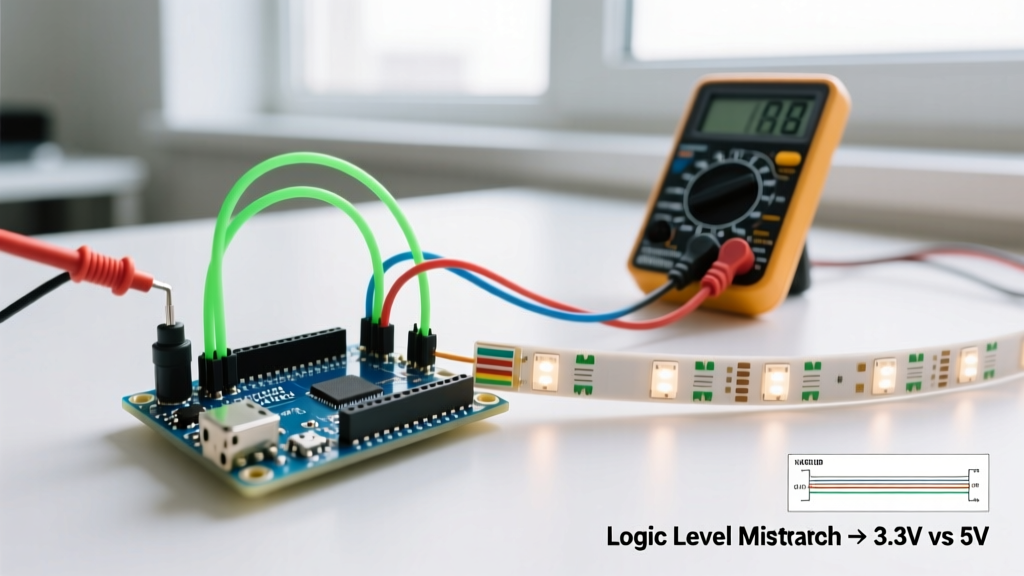
A silent but deadly killer of DFPlayer modules is logic-level mismatch. The Arduino Uno and Nano operate at 5V logic, while the DFPlayer Mini’s UART RX pin is strictly 3.3V tolerant. Feeding 5V directly into the RX pin forward-biases the internal ESD protection diode on the MP3 chip. This causes erratic serial drops, skipped tracks, and eventually, permanent silicon death.
Correct Level-Shifting Pinout
| DFPlayer Pin | Arduino Pin | Voltage Level | Required Component |
|---|---|---|---|
| VCC | 5V | 5.0V | Direct (with decoupling cap) |
| GND | GND | 0V | Direct |
| TX | Pin 10 (RX) | 3.3V to 5V | None (3.3V registers as HIGH on 5V AVR) |
| RX | Pin 11 (TX) | 5V to 3.3V | 1kΩ Resistor in Series |
| BUSY | Pin 4 | 3.3V | None (Use INPUT_PULLUP) |
Always place a 1kΩ resistor on the Arduino TX to DFPlayer RX line. If you are using a 3.3V Arduino (like the Arduino Nano 33 IoT or ESP32), this resistor is unnecessary, but for standard 5V AVR boards, it is non-negotiable.
SD Card Rejection and Track Skipping Nightmares
If your DFPlayer initializes but refuses to play audio, or randomly skips tracks, the culprit is almost always the microSD card’s file allocation table (FAT) structure. The DFPlayer’s internal firmware does not parse standard directory trees; it relies on a strict, legacy FAT32 indexing method.
The 32KB Cluster Size Imperative
Modern SD card formatters often default to 64KB or 128KB allocation unit sizes for cards larger than 16GB. The DFPlayer Mini cannot read these cluster sizes. You must use the official SD Association Memory Card Formatter and explicitly force the allocation unit size to 32KB or smaller.
File Naming and Folder Architecture
To ensure reliable track addressing via serial commands (0x03 for global play, 0x0F for folder play), adhere to this strict naming convention:
- Root Playback: Files must be named with a 4-digit prefix:
0001.mp3,0002.mp3. The text after the prefix is ignored by the chip but helps you organize. - Folder Playback: Create folders named
01,02up to99. Inside folder01, files must be named001.mp3to255.mp3. Each folder is strictly limited to 255 tracks.
Power Supply Sag, Audio Distortion, and Brownouts
If your audio sounds distorted, crackles during bass-heavy tracks, or causes your Arduino to randomly reset, you are experiencing power rail sag. The DFPlayer Mini features an onboard 3W amplifier. When driving a 4Ω speaker at high volume, the module can draw peak currents exceeding 500mA.
Bypassing the Arduino Polyfuse
The Arduino Uno’s USB port is protected by a 500mA resettable polyfuse. If the DFPlayer pulls 550mA during a bass transient, the voltage on the 5V rail drops below 4.3V. This triggers a brownout detection (BOD) reset on the ATmega328P, crashing your entire sketch. Furthermore, the high-frequency switching noise from the MP3 chip’s internal DC-DC converter bleeds back into the Arduino’s analog reference, ruining sensor readings.
The Decoupling and External Power Protocol
- Add Local Capacitance: Solder a 100µF electrolytic capacitor and a 0.1µF ceramic capacitor directly across the VCC and GND pins on the DFPlayer breakout. This provides instantaneous current for audio transients.
- Use an External Buck Converter: For projects using 3W speakers, bypass the Arduino’s 5V regulator entirely. Use an LM2596 buck converter module, adjust it to exactly 5.0V, and wire it directly to the DFPlayer VCC and the Arduino’s 5V pin. This provides a clean, 3A-capable power rail.
- Isolate Analog Grounds: If using the 3.5mm DAC jack instead of the speaker amplifier, route the audio ground separately from the digital power ground to eliminate the notorious DFPlayer high-pitch whine.
Diagnostic Quick-Reference Matrix
Use this matrix to rapidly isolate your specific DFPlayer Arduino failure mode:
| Observed Symptom | Probable Root Cause | Hardware Intervention | Software Intervention |
|---|---|---|---|
| "Time Out" on Init | JL/GD Clone Chip Handshake | Verify 1kΩ RX Resistor | Switch to Makuna Library |
| Distorted / Crackling Audio | 5V Rail Sag / Polyfuse Limit | Add 100µF Cap & Ext 5V PSU | Lower EQ Bass via Hex Cmd |
| Track Skipping / No Play | FAT32 Cluster Size > 32KB | Reformat via SD Association Tool | Rename to 0001.mp3 format |
| Module Overheating | 8Ω Speaker on 3W Amp | Use 4Ω Speaker or Line-Out | N/A |
| High-Pitch Whine (DAC Jack) | Ground Loop / DC-DC Noise | Isolate Audio GND, Add Ferrite | N/A |
Final Troubleshooting Verdict
Successfully integrating a DFPlayer Mini with an Arduino in 2026 requires acknowledging the realities of modern clone silicon and strict embedded power constraints. By implementing the 1kΩ logic-level resistor, enforcing 32KB FAT32 formatting, and isolating your power delivery from the Arduino’s fragile USB polyfuse, you will eliminate 95% of the errors that plague beginner and intermediate builds. Always verify your chip variant via serial debug logs before assuming hardware failure, and leverage community-maintained libraries to bridge the gap between legacy datasheets and modern clone behavior.