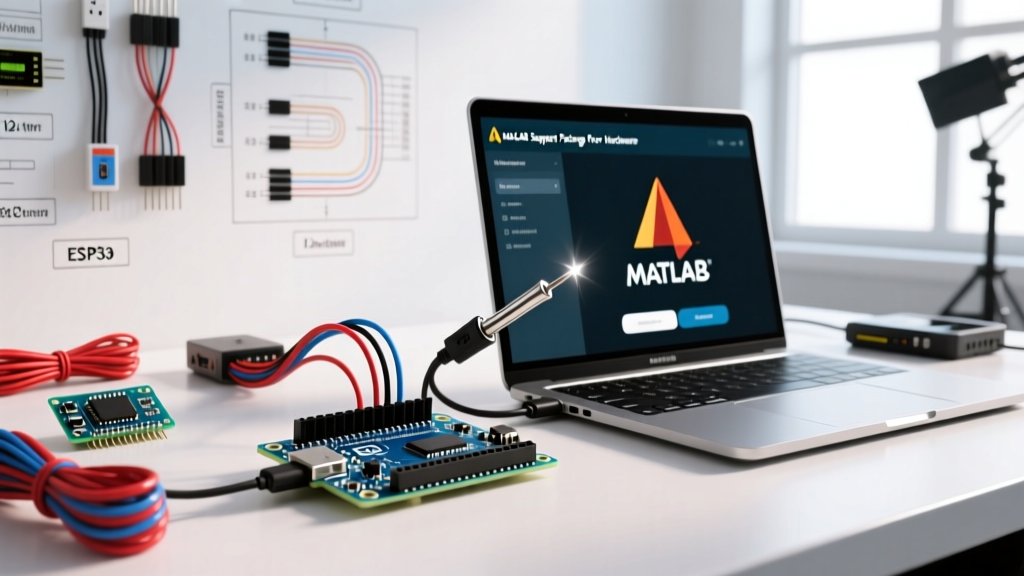

The Engineering Advantage of Pairing Arduino with MATLAB
For control systems engineers, academic researchers, and advanced hobbyists, relying solely on the Arduino IDE's C++ environment can become a bottleneck when dealing with complex signal processing, real-time data visualization, or PID tuning. Configuring Arduino with MATLAB bridges this gap, allowing you to leverage MATLAB's computational engine while using the microcontroller as a flexible, low-cost data acquisition (DAQ) and actuation node.
Unlike basic serial string parsing, the official MATLAB Support Package for Arduino Hardware establishes a robust RPC (Remote Procedure Call) protocol over serial or Wi-Fi. This guide details the exact hardware requirements, installation procedures, and advanced configuration techniques—including I2C bus mapping and Simulink code generation—to ensure a stable, low-latency pipeline in 2026.
Hardware Selection and Compatibility Matrix
Not all Arduino boards interact with MATLAB identically. The underlying USB-to-Serial converter chip and the microcontroller's architecture dictate connection stability and sampling rates. Below is a compatibility and pricing matrix for the most common boards used in MATLAB configurations.
| Board Model | Microcontroller | USB Interface | Approx. Price (2026) | MATLAB Suitability |
|---|---|---|---|---|
| Arduino Uno R4 Minima | Renesas RA4M1 (ARM Cortex-M4) | Native USB | $20.00 | Excellent (High-speed math, native USB avoids CH340 latency) |
| Arduino Uno R4 WiFi | Renesas RA4M1 + ESP32-S3 | Native USB | $27.50 | Excellent (Supports wireless TCP/IP MATLAB connections) |
| Arduino Mega 2560 Rev3 | ATmega2560 (AVR) | ATmega16U2 | $45.00 | Good (High pin count, but slower 8-bit AVR processing) |
| Cloned Uno R3 (CH340G) | ATmega328P (AVR) | CH340G | $8.00 - $12.00 | Poor (Requires third-party drivers, frequent COM port drops) |
Expert Recommendation: For new deployments, the Arduino Uno R4 WiFi is the optimal choice. Its 32-bit ARM Cortex-M4 handles MATLAB's background RPC handshake significantly faster than legacy 8-bit AVR boards, reducing the baseline loop latency from ~15ms down to ~4ms.
Step 1: Installing the MATLAB Support Package
Before writing any code, you must install the dedicated hardware support package. Do not attempt to use raw serialport objects unless you are writing a custom firmware protocol from scratch.
- Open MATLAB (R2025b or R2026a recommended) and navigate to the Home tab.
- Click Add-Ons > Get Add-Ons to open the Add-On Explorer.
- Search for "Arduino" and select MATLAB Support Package for Arduino Hardware.
- Click Install. This will also prompt you to install the Simulink Support Package for Arduino Hardware if you plan to use block-based code generation.
This installation flashes a specialized, hidden RPC server firmware onto the Arduino. This is why you cannot simultaneously use the standard Arduino IDE Serial Monitor while MATLAB is connected to the board.
Step 2: COM Port Configuration and Handshake
The most frequent point of failure when integrating Arduino with MATLAB is COM port contention. MATLAB requires exclusive access to the serial port to maintain the RPC handshake.
Establishing the Connection Object
To initialize the connection, use the arduino object. If you have only one board connected, MATLAB will auto-detect the port and board type:
a = arduino();However, in a lab environment with multiple microcontrollers, explicit declaration is mandatory to prevent cross-flashing or reading from the wrong sensor array:
a = arduino('COM4', 'UnoR4Minima', 'TraceOn', true);Setting 'TraceOn', true is a critical debugging step. It outputs the underlying serial handshake bytes to the MATLAB command window, allowing you to verify that the RPC protocol is successfully negotiating the baud rate (which defaults to 115200 for the support package, overriding the standard 9600 baud).
Edge Case: Resolving Port Locks
If MATLAB throws a Connection failed error, the port is likely locked by another process. Use MATLAB's built-in port scanner to verify availability:
ports = serialportlist('all');
disp(ports);
Ensure the Arduino IDE's Serial Plotter is closed, and check Windows Device Manager to ensure no background 3D printer slicers (like Cura or PrusaSlicer) are polling the port.
Step 3: Data Acquisition and Latency Management
When reading analog sensors, understanding the latency of the MATLAB-Arduino bridge is crucial for control loop stability.
Performance Insight: A standard
readVoltage(a, 'A0')command over USB serial takes approximately 8 to 12 milliseconds per call on an Uno R4. If your application requires sampling at 1kHz (1ms intervals), the standard RPC object will fail. For high-speed DAQ, you must write custom C++ firmware on the Arduino to buffer data into arrays and transmit it in bulk via raw serial, bypassing the MATLAB Support Package's RPC overhead.
For standard applications (e.g., reading a thermocouple at 10Hz or monitoring battery voltage), the native functions are perfectly adequate:
% Configure analog pin resolution (14-bit on Uno R4)
configureAnalogPin(a, 'A0', 'ADCResolution', 14);

% Read and plot 100 samples
tic;
for i = 1:100
    v(i) = readVoltage(a, 'A0');
    pause(0.05); % 50ms delay
end
toc;
plot(v, '-o');
title('Analog Read via MATLAB RPC');
Advanced Configuration: I2C Bus Integration
One of the most powerful features of the MATLAB Arduino configuration is direct I2C bus manipulation without writing C++ Wire library code. This is ideal for prototyping with sensors like the MPU6050 IMU or BME280 environmental sensor.
Scanning and Mapping I2C Devices
Use the scanI2CBus function to verify your hardware wiring and pull-up resistor configuration:
devices = scanI2CBus(a, 'I2C0');
disp(devices);
% Expected output: '0x68' (for MPU6050)
Reading Registers Directly
Once the address is confirmed, instantiate an i2cdev object to read and write specific hex registers. This requires consulting the sensor's datasheet but saves hours of firmware coding:
% Create I2C device object
imu = i2cdev(a, '0x68');

% Wake up MPU6050 (Write 0x00 to PWR_MGMT_1 register 0x6B)
writeRegister(imu, hex2dec('6B'), hex2dec('00'), 'uint8');

% Read 6 bytes starting from ACCEL_XOUT_H (0x3B)
rawData = readRegister(imu, hex2dec('3B'), 6, 'uint8');

% Combine bytes into 16-bit signed integers (MATLAB bitwise operations)
accelX = bitshift(int16(rawData(1)), 8) + int16(rawData(2));
This direct-register approach via MATLAB is heavily utilized in university robotics labs to quickly validate sensor hardware before committing to embedded C++ deployment.
Simulink Integration: External Mode vs. Code Generation
When moving from MATLAB scripts to Simulink block diagrams, you have two distinct configuration paths. Choosing the wrong one is a common source of frustration.
- External Mode (PIL - Processor-in-the-Loop): Simulink runs the control logic on your PC and sends actuator commands to the Arduino over serial in real-time. Use case: Rapid PID tuning where you need to adjust parameters on the fly via Simulink Dashboard scopes. Limitation: Requires a constant USB connection; latency is bound by serial baud rates.
- Deploy to Hardware (Code Generation): Simulink compiles the block diagram into optimized C++ code, invokes the
avrdudeorbossacuploader, and flashes the Arduino. Use case: Final deployment for autonomous rovers or remote weather stations. The Arduino runs independently of the PC.
To configure Simulink for deployment, open the Configuration Parameters (Ctrl+E), set the Hardware Board to your specific Arduino model, and verify the COM port under Hardware Board Settings. For the Uno R4, ensure you have the latest Renesas toolchain installed via the MATLAB Add-On manager.
Troubleshooting Common Configuration Failures
Even with meticulous setup, environmental factors can disrupt the MATLAB-Arduino bridge. Use this diagnostic checklist:
- Error: "Cannot program the board. The port is in use."
Solution: Another application holds the DTR/RTS lines. Close all instances of the Arduino IDE, Python (pyserial), and 3D printing software. Restart the MATLAB kernel if the port remains ghost-locked. - Error: "I2C scan returns empty or throws a NACK."
Solution: The MATLABi2cdevobject requires proper hardware pull-up resistors (typically 4.7kΩ to 3.3V or 5V). The Arduino's internal pull-ups (20kΩ-50kΩ) are often too weak for reliable I2C communication at 400kHz Fast Mode. Add external pull-ups to the SDA and SCL lines. - Intermittent Connection Drops on Windows 11:
Solution: Windows USB Selective Suspend may be powering down the Arduino's USB interface during microsecond processing gaps in MATLAB. Open Windows Device Manager > Universal Serial Bus controllers > USB Root Hub > Power Management, and uncheck "Allow the computer to turn off this device to save power."
Authoritative References
For deeper exploration into the RPC protocol and Simulink blocksets, refer to the official documentation:
- MathWorks: MATLAB Support Package for Arduino Hardware - Official installation and function reference.
- MathWorks: Simulink Support Package for Arduino Hardware - Guide to blockset configuration and code generation.
- Arduino Docs: Uno R4 WiFi Architecture - Hardware specifications and native USB serial behavior.