
Why Choose the DHT22 Sensor for Environmental Monitoring?
When building DIY weather stations, smart home climate controllers, or greenhouse automation systems, the DHT22 sensor (also widely known by its chip name, AM2302) remains a staple in the electronics community. Unlike more expensive I2C or SPI-based environmental sensors, the DHT22 utilizes a proprietary 1-wire communication protocol, making it incredibly easy to wire and program using microcontrollers like the Arduino Uno, ESP32, or Raspberry Pi Pico.
In this beginner tutorial, we will dissect the DHT22 sensor, compare it to its cheaper sibling (the DHT11), map out the exact pinout, and provide robust C++ code to get reliable temperature and humidity readings. We will also dive deep into real-world troubleshooting, addressing the notorious 'NaN' errors that plague many beginners.
DHT11 vs. DHT22 Sensor: A Technical Comparison
Before wiring your breadboard, it is crucial to understand why the DHT22 commands a slightly higher price tag than the DHT11. The DHT22 offers significantly better resolution, accuracy, and a wider operating range.
| Specification | DHT11 (Blue) | DHT22 / AM2302 (White) |
|---|---|---|
| Temperature Range | 0°C to 50°C | -40°C to 80°C |
| Temperature Accuracy | ± 2.0°C | ± 0.5°C |
| Humidity Range | 20% to 80% RH | 0% to 100% RH |
| Humidity Accuracy | ± 5% RH | ± 2% RH |
| Sampling Rate | 1 Hz (1 reading/sec) | 0.5 Hz (1 reading/2 sec) |
Verdict: If your project involves outdoor environments, freezers, or requires precision better than 2 degrees, the DHT22 sensor is the mandatory choice. For simple indoor room-temperature logging, the DHT11 suffices.
Understanding the DHT22 Pinout and Pull-Up Resistors
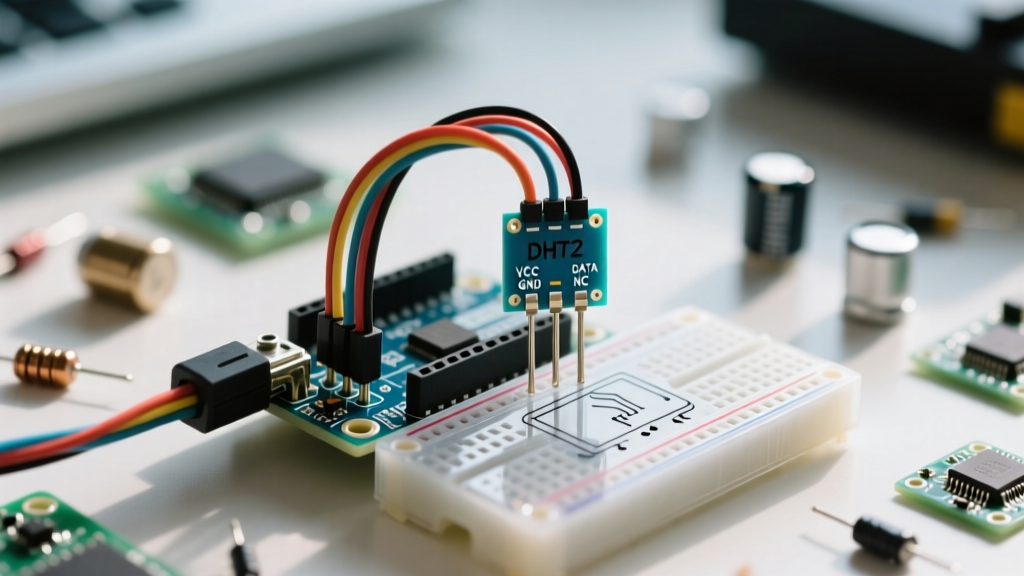
The raw DHT22 module typically features 4 pins. If you are using a breakout board (a PCB with the sensor already mounted alongside passive components), you will usually only see 3 exposed pins.
Raw 4-Pin Module Pinout:
- Pin 1 (VCC): Power supply (3.3V to 5.5V DC).
- Pin 2 (DATA): Serial data output (1-wire bus).
- Pin 3 (NC): No Connection. Leave this pin floating.
- Pin 4 (GND): Ground.
The Critical Pull-Up Resistor
The 1-wire protocol requires the data line to be pulled HIGH when idle. If you are using the raw 4-pin component, you must connect a 4.7kΩ to 10kΩ pull-up resistor between Pin 1 (VCC) and Pin 2 (DATA). Without this resistor, the signal will float, resulting in corrupted data packets and checksum failures. Most 3-pin breakout boards include this SMD resistor on the PCB, but always verify by checking the board's schematic or tracing the traces.
Pro-Tip: The DHT22 requires a minimum of 2 seconds between read commands to allow its internal capacitive humidity sensing element to discharge and reset. Polling the sensor faster than 0.5Hz will result in stale data or bus lockups.
Step-by-Step Wiring Guide for Arduino Uno
Let's wire the DHT22 sensor to a standard 5V Arduino Uno. We will assume you are using a raw 4-pin module to demonstrate proper circuit design.
- Connect Pin 1 (VCC) of the DHT22 to the 5V pin on the Arduino.
- Connect Pin 4 (GND) of the DHT22 to any GND pin on the Arduino.
- Connect Pin 2 (DATA) of the DHT22 to Digital Pin 2 on the Arduino.
- Insert a 10kΩ resistor into the breadboard, bridging the connection between the 5V rail and Digital Pin 2 (acting as the pull-up).
For comprehensive wiring diagrams and official datasheets, refer to the Adafruit DHT Sensor Guide, which remains the gold standard for hobbyist sensor integration.
Programming the DHT22: Arduino IDE Setup
Decoding the proprietary 1-wire timing protocol manually using microsecond delays is tedious and prone to interrupt-related errors. Instead, we leverage the highly optimized Adafruit DHT Sensor Library.
Library Installation
Open the Arduino IDE, navigate to Sketch > Include Library > Manage Libraries, and search for 'DHT sensor library' by Adafruit. Install both the DHT library and its required dependency, the 'Adafruit Unified Sensor' library.
The Arduino C++ Sketch
#include <DHT.h>

#define DHTPIN 2     // Digital pin connected to the DHT sensor
#define DHTTYPE DHT22   // Define sensor type

DHT dht(DHTPIN, DHTTYPE);

void setup() {
  Serial.begin(9600);
  Serial.println(F('DHT22 Sensor Tutorial - ElectricalFlux'));
  dht.begin();
}

void loop() {
  // Wait 2 seconds between readings (Sensor limit)
  delay(2000);

  float h = dht.readHumidity();
  float t = dht.readTemperature(); // Celsius by default
  float f = dht.readTemperature(true); // Fahrenheit

  // Check if any reads failed and exit early (to try again).
  if (isnan(h) || isnan(t) || isnan(f)) {
    Serial.println(F('Failed to read from DHT sensor! Check wiring.'));
    return;
  }

  Serial.print(F('Humidity: '));
  Serial.print(h);
  Serial.print(F('%  Temperature: '));
  Serial.print(t);
  Serial.print(F('°C | '));
  Serial.print(f);
  Serial.println(F('°F'));
}
Advanced Troubleshooting: Fixing 'NaN' and Checksum Errors
Even with correct wiring, beginners frequently encounter 'NaN' (Not a Number) or timeout errors in the Serial Monitor. Here is a domain-expert framework for diagnosing DHT22 communication failures.
1. The 'NaN' Output and Timing Interrupts
The 1-wire protocol relies on precise microsecond timing. If your Arduino is handling heavy hardware interrupts (like PWM motor control or software-based serial on multiple pins), the DHT library may miss the sensor's data pulses. Solution: Temporarily disable interrupts during the read function, or move the sensor to a dedicated microcontroller like an ESP8266/ESP32, which handles these timings more robustly via RTOS tasks.
2. Voltage Logic Mismatches (3.3V vs 5V)
If you are wiring a DHT22 to a 3.3V microcontroller like the ESP32 or Raspberry Pi Pico, power the sensor with 3.3V. However, the DHT22's internal circuitry sometimes struggles to pull the data line fully HIGH to 3.3V, causing the microcontroller to misread the logic threshold. Solution: Power the DHT22 VCC with 5V (if the sensor module tolerates it) but use a logic level shifter or a voltage divider on the DATA line to step the 5V signal down to 3.3V for the ESP32 GPIO pin.
3. Cable Length and Parasitic Capacitance
The DHT22 can theoretically transmit data over cables up to 20 meters. However, long unshielded cables introduce parasitic capacitance, which rounds off the sharp digital edges of the 1-wire square wave. If using cables longer than 1 meter, drop the pull-up resistor value from 10kΩ down to 2.2kΩ to provide a stronger, faster pull-up current, overcoming the cable's capacitance and preventing checksum errors.
Final Thoughts on Environmental Sensing
Mastering the DHT22 sensor is a rite of passage for electronics hobbyists. By respecting its 0.5Hz sampling limit, implementing proper pull-up resistors, and utilizing robust libraries, you can build highly reliable climate-monitoring devices. As you expand your DIY knowledge hub, consider pairing the DHT22 with a BME280 for barometric pressure readings to create a fully-fledged, professional-grade weather station.