
The Hidden Bottlenecks in Raspberry Pi Time-Lapse Photography
When searching for how to create a time-lapse camera with raspberry pi, most tutorials provide a rudimentary bash script using deprecated tools and call it a day. However, deploying a time-lapse rig in the real world—whether for construction monitoring, astrophotography, or botanical growth—quickly exposes severe hardware and software bottlenecks. The default approach of writing high-resolution JPEGs directly to a microSD card every 60 seconds will destroy the card's flash memory cells within months due to write-cycle exhaustion. Furthermore, unoptimized image signal processor (ISP) pipelines lead to exposure flickering, while unmanaged thermal states cause the SoC to throttle, resulting in missed capture intervals.
To build a truly robust, high-performance time-lapse system, we must approach the Raspberry Pi not just as a microcontroller, but as a specialized edge-computing node. This guide focuses strictly on performance tuning: optimizing storage I/O, locking camera parameters via the modern libcamera stack, managing thermal envelopes, and leveraging hardware-accelerated video encoding.
Hardware Matrix: Matching the Sensor to the SoC
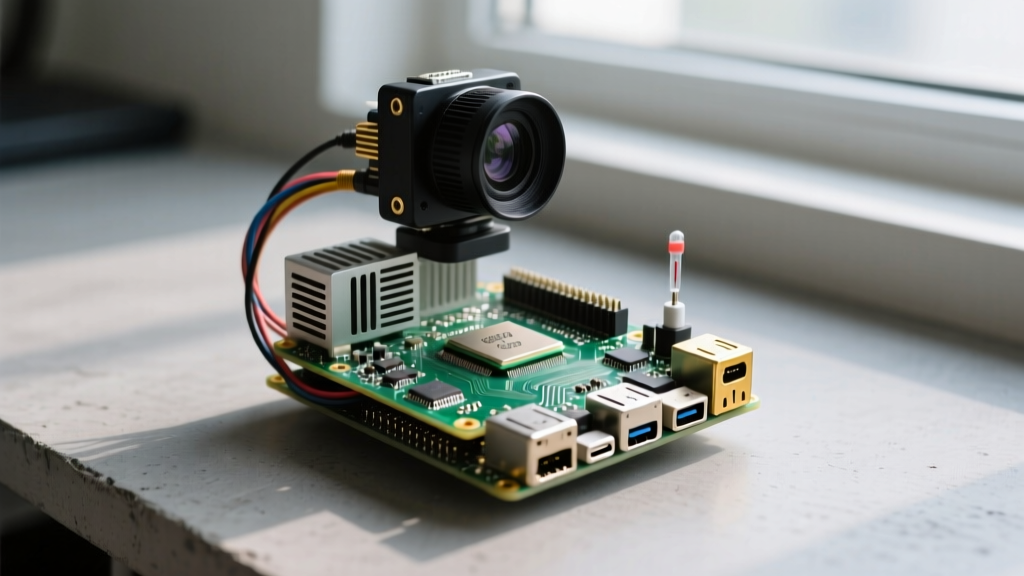
Before writing a single line of code, you must align your Raspberry Pi model with the appropriate camera sensor. The Image Signal Processor (ISP) load varies wildly depending on the resolution and the SoC's architecture. The Raspberry Pi 5, for instance, features a completely redesigned ISP pipeline compared to the Pi 4, allowing for much faster processing of 12-megapixel RAW-to-JPEG conversions.
| Component | Model | Resolution | Performance Tuning Notes |
|---|---|---|---|
| SBC | Raspberry Pi 4 (4GB) | N/A | Requires active cooling for sustained 4K encoding. USB 3.0 bus shares PCIe bandwidth. |
| SBC | Raspberry Pi 5 (8GB) | N/A | Dual 4K ISP pipelines. Requires 27W PD for full USB current limits during SSD writes. |
| Sensor | Camera Module 3 (IMX708) | 12 MP | Features PDAF. Must manually lock lens position to prevent focus hunting between frames. |
| Sensor | HQ Camera (IMX477) | 12.3 MP | Excellent for C/CS mount lenses. High dynamic range but requires precise thermal management. |
Storage I/O Optimization: The tmpfs RAM Disk Strategy
The most common point of failure in long-term Raspberry Pi deployments is SD card corruption. Flash memory has a finite number of program/erase (P/E) cycles. Capturing an image every minute for 30 days results in 43,200 individual write operations. When writing to a FAT32 or exFAT partition, the file allocation table is updated with every write, accelerating wear and causing severe fragmentation.
The Solution: Route all camera outputs to a tmpfs RAM disk, then batch-transfer the files to a durable NVMe or USB SSD on an hourly schedule.
First, create a mount point and allocate a portion of your system RAM to act as a high-speed, zero-wear volatile drive. Assuming you are capturing 5MB JPEGs, a 1GB RAM disk will comfortably hold roughly 200 images (over 3 hours of 1-minute intervals).
sudo mkdir -p /mnt/ramdisk
sudo mount -t tmpfs -o size=1G tmpfs /mnt/ramdisk
Next, use a background rsync cron job to move files from the RAM disk to your external SSD. This reduces I/O operations on the physical drive from thousands of tiny writes to a few large, sequential batch writes, maximizing the SSD's lifespan and write speed.
Tuning the libcamera Stack for Flicker-Free Captures
The legacy raspistill and picamera Python libraries are deprecated. Modern performance tuning requires utilizing the official libcamera stack. The default automatic exposure and white balance algorithms are disastrous for time-lapses, as shifting clouds or passing cars will cause the camera to constantly adjust, resulting in a jarring, flickering final video.
You must lock the exposure, white balance, and focus. If you are using the Camera Module 3 (IMX708), the continuous autofocus will shift the lens elements slightly between shots. You must switch to manual focus and lock the lens position.
libcamera-still --timeout 0 --timelapse 60000 \
  --output /mnt/ramdisk/img_%04d.jpg \
  --width 4056 --height 3040 \
  --awbgains 1.5,1.2 \
  --shutter 10000 \
  --gain 1.0 \
  --autofocus-mode manual --lens-position 4.5 \
  --flicker-period 10000us
Crucial Tuning Parameter: The --flicker-period flag is essential when shooting indoors or in urban environments with artificial lighting. Mains electricity operates at 50Hz or 60Hz, causing lights to pulse. By setting the shutter speed to a multiple of the mains frequency (e.g., 1/100s for 50Hz regions), you eliminate the banding effect that plagues poorly configured time-lapses.
Thermal Management and CPU Governor Tweaks
Processing 12-megapixel RAW data into high-quality JPEGs pushes the Pi's ISP and CPU cores hard. If the SoC reaches 85°C (on Pi 4) or 80°C (on Pi 5), the firmware will aggressively throttle the clock speed. This throttling can cause the capture script to hang, missing your precise interval timing and ruining the temporal consistency of your video.
For continuous operation, passive heatsinks are mathematically insufficient. You must use an active cooling solution, such as the official Raspberry Pi 5 Active Cooler. However, if your time-lapse camera is deployed off-grid on a solar battery system, you need to tune the CPU governor to prioritize efficiency over raw burst performance.
By forcing the CPU into the ondemand or schedutil governor and capping the maximum frequency, you can drastically reduce power consumption and thermal output without dropping frames, as the ISP handles the heavy lifting of image encoding.
echo 'schedutil' | sudo tee /sys/devices/system/cpu/cpu0/cpufreq/scaling_governor
echo '1500000' | sudo tee /sys/devices/system/cpu/cpu*/cpufreq/scaling_max_freq
This limits the Pi 4/5 to 1.5GHz, which is more than enough to trigger the libcamera pipeline while keeping the SoC well below the 60°C thermal throttling threshold, even in enclosed outdoor weatherproof housings.
Power Delivery: The Overlooked Variable
Performance tuning extends to power stability. The Raspberry Pi 5 requires a 27W (5V/5A) USB-C Power Delivery adapter. If you use a standard 15W phone charger, the Pi will boot but will restrict the USB ports to a combined 600mA. If your time-lapse setup relies on an external USB 3.0 SSD for bulk storage, the drive will experience brownouts during heavy batch-write cycles, leading to kernel panics and corrupted ext4 file systems. Always verify your power supply's PD negotiation using the vcgencmd pmic_read_adc command to ensure stable 5V rail delivery.
Hardware-Accelerated FFmpeg Encoding
Once your image sequence is captured, compiling the final video using software-based CPU encoding (like libx264 or libx265) will max out all four cores for hours. Instead, we route the encoding pipeline through the Pi's dedicated H.264/H.265 hardware video engines using the Video4Linux2 (V4L2) API.
According to FFmpeg hardware acceleration documentation, utilizing the v4l2m2m codec offloads the mathematical compression tasks from the ARM Cortex-A76 cores to the dedicated silicon, reducing encoding time by up to 80% and eliminating thermal saturation.
ffmpeg -framerate 24 -i /mnt/ssd/img_%04d.jpg \
  -c:v h264_v4l2m2m -b:v 15M \
  -pix_fmt yuv420p /mnt/ssd/final_timelapse.mp4
For 4K resolution captures, swap h264_v4l2m2m for hevc_v4l2m2m to utilize the Pi's H.265 hardware encoder, ensuring high fidelity at a fraction of the file size. As noted in extensive thermal testing benchmarks by Jeff Geerling, keeping the encoding load off the main CPU cores is the single most effective way to maintain system stability during post-processing on single-board computers.
Expert Insight: Never run your time-lapse capture script directly in the foreground of an SSH session. Network drops will kill the process. Always wrap your
libcamera-stillloop in asystemdservice withRestart=alwaysto guarantee automatic recovery from transient I/O or memory allocation faults.