
The Anatomy of a Flawless Media Center
The evolution from the original XBMC project to modern Kodi has transformed the software into a highly capable, hardware-accelerated media hub. However, building a dedicated Kodi XBMC Raspberry Pi media center requires looking beyond the baseboard. While the Raspberry Pi 5 (and even the Pi 4) boasts impressive hardware decoding for 4K HEVC content, the bare SBC is only the foundation. To achieve a true set-top-box experience that rivals commercial off-the-shelf media streamers, you must address thermal throttling, storage I/O bottlenecks, and navigation latency.
In this accessory review, we dissect the exact hardware add-ons required to eliminate the common failure modes associated with Pi-based Kodi builds. We will evaluate specific cooling solutions, NVMe storage shields, IR/CEC interceptors, and I2S audio DACs, providing real-world data on how they impact your media center's performance.
Thermal Management: Taming the 4K HEVC Decode
When Kodi scrubs through high-bitrate 4K HDR files, the BCM2712 SoC on the Raspberry Pi 5 works aggressively. Without adequate cooling, the SoC hits its 85°C thermal throttle threshold within minutes, resulting in dropped frames and audio desync. According to Tom's Hardware's extensive thermal testing, passive cooling is entirely insufficient for sustained media playback workloads.
Review: Argon ONE V3 Active Case
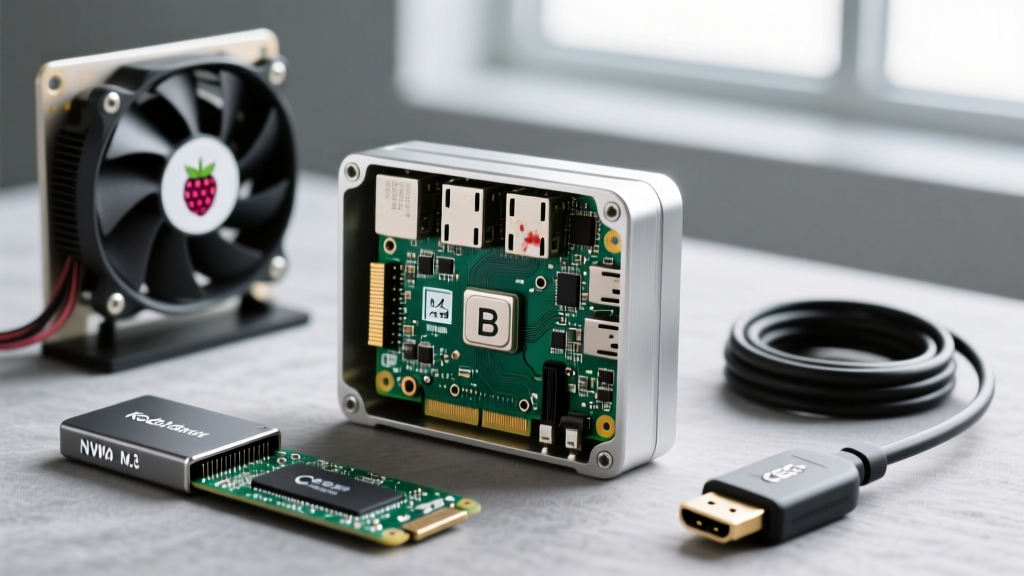
For a living-room-friendly Kodi build, the Argon ONE V3 (approx. $30) remains the gold standard. Unlike the official Raspberry Pi Active Cooler, which leaves the board exposed to dust and physical damage, the Argon ONE routes the SoC's heat through a thermal pad into the entire aluminum alloy chassis.
- Thermal Performance: Maintains load temperatures around 55°C during 4K60 HEVC playback.
- Acoustics: The integrated 30mm PWM fan is virtually silent under 60°C, only spinning up during heavy add-on scraping or initial library indexing.
- Failure Mode Warning: Users frequently experience 'thermal paste pump-out' if they use low-viscosity thermal compounds instead of the included high-density thermal pads. Stick to the provided 1.0mm pads for the RAM and PMIC chips.
Storage Architecture: Escaping the MicroSD Bottleneck
The most common cause of a corrupted Kodi installation is not a bad flash drive, but the relentless SQLite journaling writes to a MicroSD card. Kodi's Textures13.db and MyVideos.db databases constantly read and write metadata, artwork, and playback states. MicroSD cards simply cannot handle the random I/O operations (IOPS) required, leading to filesystem corruption and sluggish library navigation.
Review: Geekworm X1004 NVMe Base Shield
To solve this, we recommend bypassing USB 3.0 enclosures and utilizing the Pi 5's native PCIe 2.0 x1 lane via the Geekworm X1004 (approx. $18). This shield mounts directly to the bottom of the Pi, accommodating an M.2 NVMe SSD.
Pro-Tip for Kodi Boot Times: While the PCIe lane is limited to Gen 2 speeds (capping sequential reads around 450 MB/s), the random read/write speeds are exponentially higher than a UHS-I MicroSD card. This reduces Kodi's initial GUI load time from 14 seconds down to roughly 4 seconds. Ensure you enable Gen 3.0 in your
config.txtviadtparam=pciex1_gen=3if your specific SSD and ribbon cable can handle the overclock, though Gen 2 is recommended for maximum stability in a media center environment.
For the definitive guide on boot configurations and hardware interfaces, always refer to the official Raspberry Pi Documentation.
Navigation & Control: CEC vs. IR Interception
A true living-room Kodi XBMC Raspberry Pi setup must be controllable with a standard TV remote. HDMI-CEC (Consumer Electronics Control) is built into the Pi, allowing your TV remote to send directional commands through the HDMI cable. However, CEC implementations vary wildly between TV manufacturers (LG's WebOS and Samsung's Tizen are notorious for dropping CEC polling requests).
Review: Flirc USB Gen 2 Receiver
When CEC fails, the Flirc USB Gen 2 (approx. $22) is the ultimate failsafe. This USB dongle acts as an IR receiver and a virtual keyboard. You map your existing remote's IR signals to specific keyboard strokes that Kodi natively understands.
- Latency: Sub-10ms response time, completely eliminating the 'double-input' ghosting common with cheap IR HATs.
- Profile Management: You can program a dedicated 'Kodi' profile on a Logitech Harmony or SofaBaton remote, ensuring volume commands go to your AVR while navigation commands go exclusively to the Pi via Flirc.
- Setup Requirement: Requires a one-time setup on a desktop PC using the Flirc GUI software before plugging it into the headless Pi.
Audio Extraction: I2S DACs for Lossless Formats
If your Kodi library includes high-resolution FLAC, DSD, or Dolby TrueHD/DTS-HD MA files, relying on the Pi's native PWM audio or basic HDMI audio extraction can result in jitter and downmixed audio. For audiophiles routing audio to a dedicated stereo amplifier, an I2S DAC HAT is mandatory.
Review: HiFiBerry DAC2 Pro
The HiFiBerry DAC2 Pro (approx. $45) utilizes a Texas Instruments PCM5122 DAC chip. It connects directly to the Pi's GPIO header, pulling digital audio straight from the I2S bus before it can be degraded by the SoC's internal routing.
According to the Kodi Official Wiki, configuring ALSA (Advanced Linux Architecture) to pass through audio directly to an I2S device requires specific asound.conf tweaks to prevent Kodi's internal resampler from interfering with bit-perfect playback. The DAC2 Pro includes a hardware volume control, allowing Kodi to adjust analog volume without truncating the digital bit-depth.
Hardware Compatibility & Power Matrix
When combining these accessories, power delivery becomes the critical variable. The Raspberry Pi 5 requires a 27W USB-C PD power supply to enable full peripheral current limits (up to 1.6A on the 5V rail). Below is a matrix detailing the power draw and compatibility of our reviewed accessories.
| Accessory Category | Recommended Model | Interface | Est. Power Draw | Kodi Benefit |
|---|---|---|---|---|
| Active Cooling | Argon ONE V3 | GPIO / I2C | ~0.5W (Fan) | Prevents 4K HEVC thermal throttling |
| NVMe Storage | Geekworm X1004 | PCIe Gen 2 x1 | ~2.5W (w/ SSD) | Eliminates SQLite UI lag & SD corruption |
| IR Navigation | Flirc USB Gen 2 | USB 2.0 | ~0.2W | Bypasses unreliable TV HDMI-CEC |
| Audio DAC | HiFiBerry DAC2 Pro | GPIO / I2S | ~0.8W | Bit-perfect lossless audio extraction |
Diagnostic Troubleshooting: Real-World Failure Modes
Even with premium accessories, a Kodi XBMC Raspberry Pi build can encounter edge-case hardware conflicts. Here is how to diagnose the most common issues:
1. The Under-Voltage Lightning Bolt
If you see a yellow lightning bolt or red warning in the corner of your Kodi interface, your Pi is throttling peripheral power. This frequently happens when users plug an unpowered USB 3.0 HDD into the Pi while simultaneously using an NVMe shield. Solution: Use an official 27W Raspberry Pi power supply, or utilize a powered USB hub for external spinning drives.
2. Kodi Scraping Freezes on NVMe
When initially scraping thousands of movies, Kodi generates massive amounts of thumbnail cache data. On some NVMe controllers (particularly older Phison-based drives), the Linux asm1182e or RPi PCIe bridge can drop packets under heavy concurrent write loads, causing the Kodi GUI to hard-lock. Solution: Add pcie_aspm=off to your kernel boot parameters to disable Active State Power Management on the PCIe bus, forcing the link to remain at maximum performance during heavy scraping sessions.
3. CEC Wake-on-LAN Failures
If your TV turns on but the Pi remains in standby (or vice versa), the CEC bus is likely hanging. This is common when the TV's internal OS boots faster than the Pi's Kodi daemon. Solution: Implement a FLIRC module as detailed above, or use a smart plug integrated with Home Assistant to physically cycle the Pi's power based on the TV's ping status, ensuring a clean cold-boot sequence every time.
Final Verdict
Building a reliable media center is an exercise in bottleneck elimination. By pairing the Raspberry Pi 5 with the Argon ONE V3 for thermal mass, a Geekworm NVMe shield for database integrity, and a Flirc USB module for bulletproof navigation, you elevate the hardware from a DIY science project to a robust, living-room-ready appliance. Invest in the right accessories, and your Kodi XBMC Raspberry Pi setup will outperform and outlast commercial alternatives.