
The Hidden Hardware Bottlenecks in Headless SSH Connections
When deploying single-board computers for IoT gateways, Home Assistant clusters, or remote environmental monitoring, a headless setup is the standard. Consequently, your ability to reliably SSH Raspberry Pi nodes becomes the single most critical point of failure in your infrastructure. Most administrators attempt to solve dropped SSH sessions with software tweaks—adjusting ClientAliveInterval in the sshd_config or modifying TCP keepalive settings. However, these software-level band-aids completely ignore the physical realities of the hardware.
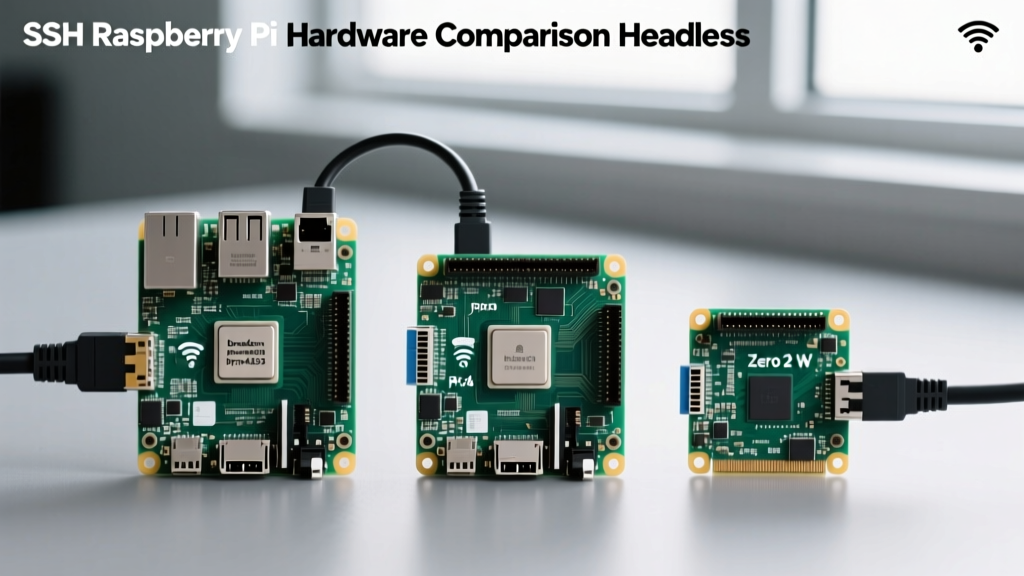
Dropped packets, latency spikes, and sudden SSH disconnects are frequently rooted in hardware limitations: thermal throttling affecting the network interface controller (NIC), insufficient power delivery causing voltage sag on the Wi-Fi chip, or outdated silicon struggling with modern network interrupts. In this comprehensive hardware comparison, we dissect the physical networking components of the Raspberry Pi 5, Pi 4, and Zero 2 W, and evaluate the external hardware upgrades required to guarantee bulletproof SSH connectivity.
Onboard Networking Silicon: Pi 5 vs. Pi 4 vs. Zero 2 W
The foundation of a stable wireless SSH connection relies on the onboard Wi-Fi SoC and its antenna layout. While software drivers are largely unified across the Raspberry Pi OS ecosystem, the physical silicon dictates throughput, latency, and susceptibility to interference.
| Model | Wi-Fi Chipset | Band Support | Antenna Design | SSH Reliability Profile |
|---|---|---|---|---|
| Raspberry Pi 5 | Infineon CYW43455 | 2.4GHz / 5GHz (802.11ac) | On-board PCB trace + U.FL | Excellent (PCIe architecture lowers CPU interrupt overhead) |
| Raspberry Pi 4B | Cypress CYW43455 | 2.4GHz / 5GHz (802.11ac) | On-board PCB trace | Good (Prone to thermal throttling drops) |
| Raspberry Pi 3B+ | Cypress CYW43455 | 2.4GHz / 5GHz (802.11ac) | On-board PCB trace | Fair (Older RF layout, higher latency) |
| Raspberry Pi Zero 2 W | Broadcom BCM43438 | 2.4GHz only (802.11n) | Miniaturized PCB trace | Poor (Highly susceptible to 2.4GHz congestion) |
The Raspberry Pi 5 utilizes the same Infineon CYW43455 chipset as the Pi 4, but the underlying board architecture has fundamentally changed. Because the Pi 5 routes I/O through a dedicated PCIe-based southbridge (the RP1 chip), network interrupts are handled far more efficiently than on the Pi 4, where the Wi-Fi chip shared the USB 2.0 internal bus. This means that during heavy SCP/SFTP file transfers over SSH, the Pi 5 maintains sub-millisecond latency, whereas the Pi 4 can experience micro-stutters that trigger SSH timeout errors.
The 2.4GHz Bluetooth Coexistence Bug
If you are using the Raspberry Pi 4 or Zero 2 W for SSH over 2.4GHz Wi-Fi while simultaneously using Bluetooth peripherals, you will encounter severe packet loss. The BCM43438 and early CYW43455 implementations struggle with Time Division Multiplexing (TDM) between Bluetooth and Wi-Fi on the same 2.4GHz spectrum. If your SSH sessions are dropping inexplicably while a Bluetooth Zigbee dongle is plugged in, the hardware is physically choking on RF scheduling. The hardware fix is strictly mandatory: migrate to a 5GHz Wi-Fi network or use an external USB Ethernet adapter.
Thermal Throttling and Power Delivery Impacts on SSH
A frequently overlooked cause of SSH disconnects is the physical thermal management of the SBC. The Wi-Fi and Ethernet controllers require a stable 3.3V rail. When a Raspberry Pi 4 hits its thermal ceiling of 80°C to 85°C, the onboard Power Management IC (PMIC) initiates thermal throttling. This rapid reduction in CPU frequency is often accompanied by micro-fluctuations in the voltage rails, which can cause the sensitive Wi-Fi SoC to reset or drop its association with the access point.
Hardware Rule of Thumb: If your Raspberry Pi 4 requires a heatsink to maintain an SSH session during a
sudo apt upgradecompilation, your thermal management is insufficient for headless deployment. Upgrade to the Pi 5 Active Cooler or a passive aluminum case that acts as a giant heatsink.
Furthermore, power supply quality directly impacts network hardware. Using a generic 5V/3A USB-C adapter often results in voltage sag under transient network loads (like the initial burst of packets when an SSH handshake occurs). Always use the official Raspberry Pi 27W USB-C PD power supply for the Pi 5, or the 15W official supply for the Pi 4, to ensure the NIC receives clean, regulated power.
External Hardware: USB Ethernet Adapters for SSH Stability
For industrial or mission-critical headless nodes where Wi-Fi is unacceptable, physical Ethernet is mandatory. However, not all external hardware is created equal. If your chosen SBC lacks a native Gigabit port (like the Zero 2 W) or you need redundant networking, you must rely on USB-to-Ethernet adapters.
When selecting a USB Ethernet adapter to ensure rock-solid SSH connectivity, the internal chipset is the only metric that matters. Avoid generic, unbranded adapters that use older ASIX AX88772 chipsets, which are limited to Fast Ethernet (100Mbps) and rely on heavy CPU polling, leading to SSH latency.
- Realtek RTL8153 (Gigabit): The gold standard for USB 3.0 Gigabit adapters. It features hardware-based TCP/IP checksum offloading, which drastically reduces the CPU overhead on the Pi 4 and Pi 5, keeping SSH sessions responsive even during heavy network traffic. Expect to pay around $15-$20.
- Realtek RTL8156 (2.5 Gigabit): The ultimate upgrade for the Raspberry Pi 5. Because the Pi 5 features a true PCIe 2.0 interface for its USB 3.0 controllers, it can actually saturate a 2.5Gbe connection. If you are using SSH for massive dataset transfers or backing up Home Assistant databases, an RTL8156-based adapter ($25-$35) paired with a 2.5G switch is a game-changer.
The Ultimate Fallback: Hardware UART Serial Consoles
What happens when the network stack completely fails, the Wi-Fi chip crashes, or a bad iptables update locks you out of your SSH Raspberry Pi node? You cannot rely on network hardware; you must bypass it entirely using a Hardware UART Serial Console.
A UART (Universal Asynchronous Receiver-Transmitter) connection provides a direct, low-level terminal to the Linux kernel via the GPIO header, completely independent of the network stack, IP addresses, or SSH daemons. To implement this, you need a USB-to-TTL serial cable. However, choosing the wrong hardware here can literally destroy your Raspberry Pi.
| Adapter Chipset | Logic Voltage | Driver Support (Linux/Win) | Safe for Pi GPIO? |
|---|---|---|---|
| CP2102 | 3.3V (Native) | Excellent (Built into kernel) | Yes (Highly Recommended) |
| CH340 | 3.3V or 5V (Varies) | Good (Requires driver on older OS) | Caution (Must verify 3.3V output) |
| FTDI FT232RL | 5V (Default) | Excellent | NO (Will fry Pi 3.3V RX pin) |
The Raspberry Pi GPIO pins operate strictly at 3.3V logic levels. Sending a 5V signal from a standard FTDI cable into the Pi's RX pin (GPIO 15) will permanently damage the SoC. Always purchase a dedicated 3.3V TTL cable, such as the Adafruit Console Cable which uses a safe PL2303 or CP2102 chipset configured for 3.3V.
To enable the hardware serial console, you must modify the boot configuration. Add enable_uart=1 to your config.txt and ensure console=serial0,115200 is present in your cmdline.txt. Once configured, you can SSH into the Pi via the serial port using a baud rate of 115200, granting you emergency root access to repair network configurations.
Decision Matrix: Choosing Your SSH Hardware Stack
Selecting the right hardware for your SSH Raspberry Pi deployment depends entirely on the physical environment and the consequences of a dropped connection.
- Home Assistant / Indoor Smart Home: Raspberry Pi 5 with 5GHz Wi-Fi (CYW43455). Ensure the Pi is housed in the official Active Cooler case to prevent thermal-induced Wi-Fi drops. No external hardware required.
- Outdoor IoT Gateway / Camera Node: Raspberry Pi 4 or Compute Module 4 with an external USB-to-Ethernet adapter (RTL8153) housed in a PoE (Power over Ethernet) splitter case. Wi-Fi is too unstable for outdoor RF environments.
- Industrial Cluster / Server Rack: Raspberry Pi 5 with a 2.5Gbe RTL8156 USB adapter, paired with a permanent hardware UART serial cable connected to a centralized console server for out-of-band management.
- Portable / Low-Power Sensor: Raspberry Pi Zero 2 W. Accept the limitations of the BCM43438 2.4GHz chip, but mitigate drops by hardcoding the Wi-Fi channel on your router to avoid auto-channel switching, which the Zero 2 W struggles to handle gracefully.
Ultimately, reliable SSH access is not just about typing the right commands; it is about respecting the physical limitations of the silicon. By matching the correct networking hardware, managing thermal thresholds, and maintaining a UART fallback, you transform the Raspberry Pi from a hobbyist toy into a resilient, enterprise-grade headless node. For deeper insights into SBC thermal behaviors and network throughput, refer to the extensive benchmarking data provided by Jeff Geerling's Pi 5 thermal testing and the official Raspberry Pi hardware configuration documentation.