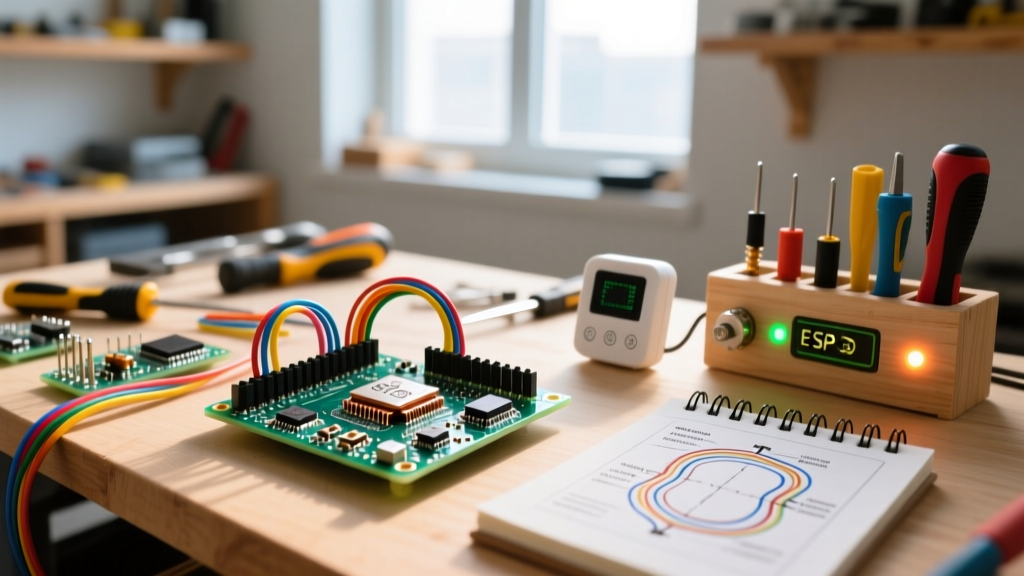
The Wemos D1 Mini V3.1 (based on the ESP-12F module) is the optimal ESP8266 WiFi board for low-cost IoT sensor nodes, offering a built-in 3.3V LDO and USB-to-Serial bridge. However, the ESP8266 WiFi stack is notoriously sensitive to power delivery and RF environment quirks. If your serial monitor is stuck in a reboot loop or throwing connection timeouts, the issue is rarely the code—it is almost always a voltage brownout during the RF transmit spike or a 2.4GHz/5GHz band mismatch. This guide walks through a robust BME280 MQTT build, provides production-ready code with error handling, and gives you a definitive decision tree for debugging ESP8266 WiFi connection failures.
Project Spec Sheet
- Difficulty: Intermediate (Requires basic I2C wiring and MQTT broker setup)
- Time to Build: 45 minutes
- Estimated Cost: $12 - $18 USD
- Target Board Variant: Wemos D1 Mini V3.1 (ESP-12F) or NodeMCU v3 (ESP-12E)
Hardware Specifications & I2C Pin Mapping
Before wiring, you must understand the ESP8266 pin limitations. Unlike the ESP32, the ESP8266 has strict strapping pin requirements at boot. Pulling GPIO0 or GPIO15 to the wrong state during power-on will halt the bootloader. The Wemos D1 Mini abstracts some of this, but I2C and Deep Sleep pins remain fixed.
| Parameter / Pin | Wemos D1 Mini (ESP-12F) | BME280 Sensor Module | Engineering Notes |
|---|---|---|---|
| WiFi Standard | 802.11 b/g/n (2.4GHz) | N/A | 5GHz networks will silently fail to connect. |
| TX Power | +19.5 dBm (max) | N/A | Derate to 15dBm in code to reduce peak current draw. |
| VCC / VIN | 5V (USB) / 3.3V (Pin) | 3.3V to 5V (onboard LDO) | D1 Mini 3.3V pin max output is ~500mA. |
| I2C SDA | D2 (GPIO4) | SDI | Internal 10k pull-ups enabled by Wire library. |
| I2C SCL | D1 (GPIO5) | SCK | 400kHz Fast Mode supported. |
| Deep Sleep Wake | D0 (GPIO16) | N/A | Must physically jumper D0 to RST pin. |
Step-by-Step Assembly & Compilable Code
This build reads temperature, humidity, and barometric pressure, publishing the payload as a JSON string to an MQTT broker. We use the PubSubClient library for MQTT and the Adafruit_BME280 library for the sensor.
Parts List
- Microcontroller: Wemos D1 Mini V3.1 (ESP-12F) with headers soldered.
- Sensor: GY-BME280 breakout board (ensure it has the onboard 3.3V LDO and logic level shifters if running at 5V, though we will use 3.3V).
- Wiring: 4x male-to-female jumper wires (Dupont style, 24 AWG).
- Power: High-quality USB-A to Micro-USB cable (capable of 2A, to prevent voltage drop).
Wiring Steps
- Connect BME280 VCC to D1 Mini 3V3.
- Connect BME280 GND to D1 Mini G.
- Connect BME280 SCL to D1 Mini D1.
- Connect BME280 SDA to D1 Mini D2.
- Optional for battery use: Jumper D1 Mini D0 to RST to enable deep sleep wake.
The Firmware
The code below targets the ESP8266 Arduino Core. It includes explicit pin definitions, non-blocking WiFi reconnection logic, and serial debugging for the exact error states the ESP8266 WiFi library outputs. For deeper API reference on the WiFi stack, consult the official ESP8266 Arduino Core Documentation.
#include <ESP8266WiFi.h>
#include <PubSubClient.h>
#include <Wire.h>
#include <Adafruit_BME280.h>

// --- PIN DEFINITIONS ---
#define PIN_I2C_SDA D2  // GPIO4
#define PIN_I2C_SCL D1  // GPIO5

// --- NETWORK CREDENTIALS ---
const char* ssid = "Your_2.4GHz_SSID";
const char* password = "Your_WiFi_Password";
const char* mqtt_server = "192.168.1.100";
const int mqtt_port = 1883;
const char* mqtt_topic = "home/lab/environment";

// --- OBJECTS ---
WiFiClient espClient;
PubSubClient client(espClient);
Adafruit_BME280 bme;

unsigned long lastMsg = 0;
const long MSG_INTERVAL = 30000; // 30 seconds

void setup_wifi() {
  delay(10);
  Serial.println("\nConnecting to WiFi...");

  // Prevent modem sleep to avoid random disconnects on some routers
  WiFi.setSleepMode(WIFI_NONE_SLEEP);
  WiFi.mode(WIFI_STA);
  WiFi.begin(ssid, password);

  int attempts = 0;
  while (WiFi.status() != WL_CONNECTED && attempts < 20) {
    delay(500);
    Serial.print(".");
    attempts++;
  }

  if (WiFi.status() == WL_CONNECTED) {
    Serial.println("\nWiFi connected");
    Serial.print("IP address: ");
    Serial.println(WiFi.localIP());
  } else {
    Serial.print("\nWiFi Failed. Status Code: ");
    Serial.println(WiFi.status()); // Outputs exact wl_status_t code
  }
}

void reconnect_mqtt() {
  int retries = 0;
  while (!client.connected() && retries < 5) {
    Serial.print("Attempting MQTT connection...");
    String clientId = "ESP8266-" + String(WiFi.macAddress());

    // Attempt to connect (no auth for local broker example)
    if (client.connect(clientId.c_str())) {
      Serial.println("connected");
    } else {
      Serial.print("failed, rc=");
      Serial.print(client.state()); // Outputs exact PubSubClient state code
      Serial.println(" retrying in 5 seconds");
      delay(5000);
      retries++;
    }
  }
}

void setup() {
  Serial.begin(115200);
  Wire.begin(PIN_I2C_SDA, PIN_I2C_SCL);

  // Set TX power to 15dBm to reduce peak current draw and heat
  WiFi.setOutputPower(15.0);

  if (!bme.begin(0x76)) { // Default I2C addr is usually 0x76 or 0x77
    Serial.println("Could not find a valid BME280 sensor, check wiring!");
    while (1) { delay(10); }
  }

  setup_wifi();
  client.setServer(mqtt_server, mqtt_port);
}

void loop() {
  if (!client.connected()) {
    if (WiFi.status() != WL_CONNECTED) setup_wifi();
    reconnect_mqtt();
  }
  client.loop();

  unsigned long now = millis();
  if (now - lastMsg > MSG_INTERVAL) {
    lastMsg = now;

    float temp = bme.readTemperature();
    float hum = bme.readHumidity();
    float pres = bme.readPressure() / 100.0F;

    // Construct JSON payload manually to avoid heavy ArduinoJson overhead
    char payload[128];
    snprintf(payload, sizeof(payload),
             "{\"temp\":%.2f,\"hum\":%.1f,\"pres\":%.1f}",
             temp, hum, pres);

    if (client.publish(mqtt_topic, payload)) {
      Serial.println("MQTT Published successfully");
    } else {
      Serial.println("MQTT Publish failed");
    }
  }
}
Debugging ESP8266 WiFi Connection Failures
When an ESP8266 fails to connect, the serial monitor will usually output a specific state code. According to the PubSubClient API documentation and the ESP8266 core, these codes map directly to physical or network layer faults.
The First Three Things to Check When It Fails
- Verify the 2.4GHz Band: The ESP8266 physically cannot see 5GHz networks. If your router uses Smart Connect (combining 2.4/5GHz under one SSID), the ESP8266 will often fail the handshake. Create a dedicated 2.4GHz IoT SSID.
- Measure the 5V Rail Under Load: When the ESP8266 transmits a WiFi packet, current draw spikes to ~170mA. Cheap, thin USB cables cause a voltage drop at the micro-USB port. If the voltage at the D1 Mini's 5V pin drops below 4.2V during this spike, the onboard LDO browns out, resetting the chip mid-connection. Use a multimeter to verify >4.6V at the board during TX.
- Check Router Legacy Rates: Modern WiFi 6 (802.11ax) routers sometimes disable legacy 802.11b rates by default. The ESP8266 relies on these for initial management frame handshakes. Enable "802.11b/g compatibility" in your router's advanced wireless settings.
Ranked Causes for Specific Error Strings
If your serial monitor outputs WiFi Failed. Status Code: 4, this corresponds to the WL_CONNECT_FAILED enumeration. Here is the ranked troubleshooting path:
- Cause 1 (80%): Incorrect WiFi password or WPA3-Only security mode. The ESP8266 only supports WPA2-PSK (AES). Downgrade your IoT SSID to WPA2.
- Cause 2 (15%): Router MAC address filtering or DHCP pool exhaustion. Check your router's client list.
- Cause 3 (5%): Corrupted flash memory WiFi calibration data. Fix by flashing the "Erase Flash" sketch from the Arduino ESP8266 tools menu before re-uploading your main code.
If your serial monitor outputs MQTT failed, rc=-2, this means the WiFi connected, but the TCP socket to the broker failed.
- Cause 1: The MQTT broker IP address is incorrect or the broker service (e.g., Mosquitto) is not running.
- Cause 2: A local firewall on the broker machine is blocking port 1883.
- Cause 3: The ESP8266 DNS resolution failed if you are using a hostname instead of an IP address. Always use static IPs for local MQTT brokers to bypass the ESP8266's flaky mDNS/DNS stack.
Extending and Simplifying the Build
Depending on your deployment environment, you may need to scale this project up for production or strip it down for a quick weekend hack.
How to Extend for Production
If you are deploying multiple sensors around a house, hardcoding WiFi credentials and relying on USB serial for debugging becomes a nightmare. Extend this build by integrating ArduinoOTA and WiFiManager.
- WiFiManager: This library turns the ESP8266 into an Access Point on first boot. You connect to it with your phone, enter your home WiFi credentials via a captive portal, and it saves them to the EEPROM. This allows you to flash identical firmware to 20 different sensors without recompiling.
- ArduinoOTA: Enables wireless firmware updates over the local network. Once the initial USB flash is done, you can push code updates directly from the Arduino IDE via the network port.
- Deep Sleep: If running on a 18650 lithium cell, uncomment the D0-to-RST jumper and add
ESP.deepSleep(30e6);at the end of the loop. This drops average current consumption from 70mA to roughly 20µA, yielding months of battery life.
How to Simplify for Quick Prototyping
If setting up a local Mosquitto MQTT broker feels like overkill for a single sensor, drop the PubSubClient library entirely and use the native ESP8266HTTPClient. You can configure a free tier of a service like IFTTT or a simple Node-RED webhook to accept HTTP POST requests. Sending a raw HTTP POST requires fewer background keep-alive packets than MQTT, which paradoxically can result in a faster connection-to-sleep cycle for battery-powered nodes that only need to report data once an hour.
Bench Tip: When prototyping with the Wemos D1 Mini, always remove the D0-to-RST jumper before uploading new code via USB. If D0 is pulling the RST line during a serial flash attempt, the bootloader will fail to handshake and the Arduino IDE will throw a "Timed out waiting for packet header" error.