
The Hidden Hazards of Legacy Receptacles
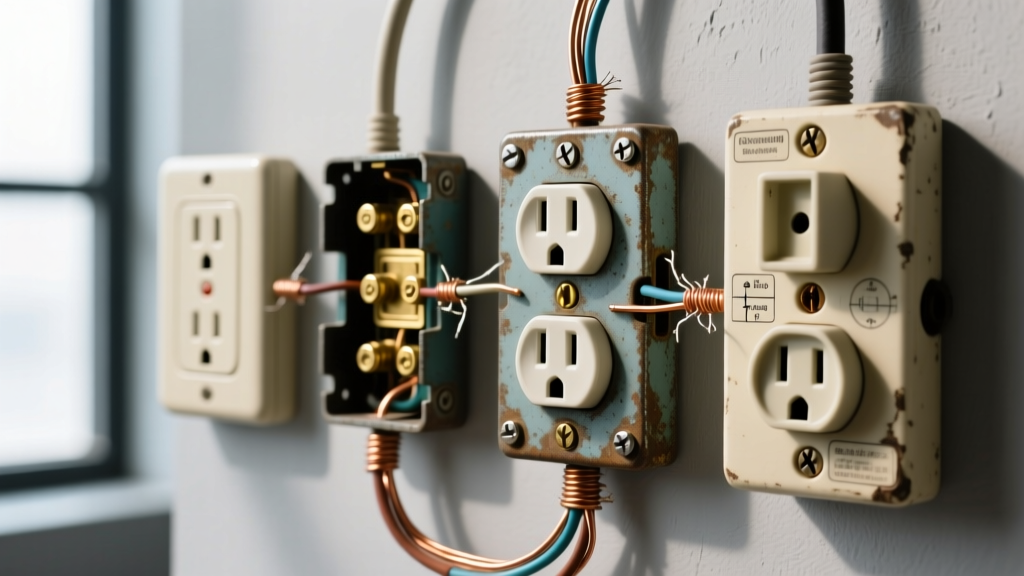
When diagnosing electrical issues in homes built before 1975, electricians and DIYers frequently encounter old electrical outlet types that no longer meet modern safety standards. These legacy receptacles are not merely cosmetic relics; they are often the weak points in an aging electrical system, prone to thermal degradation, open neutrals, and dangerous wiring modifications. As of the 2026 National Electrical Code (NEC) cycle, understanding how to troubleshoot these specific outlet configurations is critical for preventing arc faults and electrical fires.
This guide provides a deep-dive diagnostic framework for identifying, testing, and resolving the most common failures associated with legacy receptacles. We will move beyond basic visual inspections and utilize digital multimeters and advanced circuit analyzers to uncover hidden faults.
1. The Ungrounded 2-Prong Receptacle (NEMA 1-15R)
The NEMA 1-15R is the classic two-slot, ungrounded outlet found in homes with knob-and-tube or early cloth-sheathed Romex wiring. Because there is no equipment grounding conductor (EGC), these outlets cannot safely clear ground faults or protect sensitive electronics from surges.
Common Failure Modes & Diagnosis
- Backstabbed or Loose Splices: Early 2-prong outlets were often daisy-chained using push-in backstab connections or failing soldered splices in the junction box. Diagnostic Step: Use a Fluke 117 True-RMS multimeter to measure Line-to-Neutral voltage. If you read 105V-115V under load (instead of a solid 120V-124V), you have a high-resistance connection upstream.
- Reversed Polarity: In older systems, the hot and neutral wires were sometimes swapped at the receptacle or the panel. Diagnostic Step: Measure the voltage from the narrow slot (Line) to a known ground (like a metal water pipe). If it reads 0V, the polarity is reversed.
- Brittle Insulation: Cloth and early rubber insulation degrade when exposed to the heat of high-draw appliances. If the outlet faceplate feels warm or emits a faint ozone smell, the terminal insulation inside the wall box has likely failed.
2. The 'Bootleg Ground' Illusion (Fake 3-Prong Outlets)
As 3-prong grounded outlets (NEMA 5-15R) became the standard in the 1960s, many homeowners and unscrupulous handymen upgraded the faceplates on ungrounded circuits without pulling a new ground wire. To trick standard 3-light receptacle testers into showing a 'Correct' reading, they installed a jumper wire between the neutral terminal and the ground screw. This is known as a bootleg ground.
Warning: A bootleg ground is exceptionally dangerous. If the neutral wire upstream becomes disconnected (an open neutral), the metal chassis of any appliance plugged into that outlet will become energized with 120V, posing a lethal shock hazard.
How to Diagnose a Bootleg Ground
Standard 3-light testers (like the basic Gardner Bender models) cannot reliably detect a well-made bootleg ground. You must use advanced diagnostic tools:
- The Advanced Tester Method: Use an advanced analyzer like the Klein Tools RT250 or Amprobe IN-35. These devices measure the impedance of the ground path. A bootleg ground will typically trigger a 'Ground Open' or 'False Ground' warning because the impedance to the main panel ground bus is too high.
- The Multimeter Method: Set your multimeter to AC Voltage. Measure between the Line (hot) and Neutral slots (should be ~120V). Then measure between Neutral and Ground. On a properly grounded circuit, N-G should read 0V to 2V. On a bootleg ground, you will read exactly 0.0V, but if you remove the receptacle from the box, you will visually spot the illegal jumper wire.
3. Early Aluminum Wiring Outlets (1965–1973)
During the copper shortage of the late 1960s and early 1970s, builders used aluminum branch circuit wiring. Early receptacles were rated 'CU/AL' (Copper/Aluminum), but these proved inadequate due to aluminum's higher coefficient of thermal expansion, leading to 'creep' and loose connections that cause arcing and fires. Later, 'CO/ALR' (Copper/Aluminum Revised) outlets were mandated.
Troubleshooting Aluminum Receptacle Failures
According to the U.S. Consumer Product Safety Commission (CPSC), homes wired with pre-1972 aluminum wire are 55 times more likely to have one or more connections reach fire hazard conditions compared to copper.
- Thermal Imaging: Use a FLIR thermal camera to scan the outlet while a high-draw appliance (like a space heater drawing 12A-15A) is running. A temperature delta of more than 15°F (8°C) above ambient at the terminal screws indicates severe resistive heating.
- Visual Faceplate Inspection: Look for brown scorch marks on the plastic faceplate or a melted appearance around the slots. This is a definitive sign of terminal failure.
- The Pigtailing Solution: If you find standard CU/AL outlets on aluminum wire, do not simply swap them for standard copper-rated outlets. You must use AlumiConn aluminum-to-copper lug connectors to pigtail the aluminum wire to a short copper lead, which then connects to a modern CO/ALR or standard receptacle.
Diagnostic Matrix: Old Electrical Outlet Types
| Outlet Type | Visual Identifier | Multimeter (Line-Ground) | Primary Hazard | 2026 NEC Compliant Fix |
|---|---|---|---|---|
| NEMA 1-15R (2-Prong) | Two vertical slots, no round hole | 0V or floating 40V-90V | No fault clearing path; shock risk | GFCI replacement (labeled 'No Equipment Ground') |
| Bootleg Ground | 3-Prong, but jumper wire on back | ~120V (falsely reads grounded) | Open neutral energizes appliance chassis | Remove jumper, install GFCI or run new EGC |
| CU/AL (Early Aluminum) | Stamped 'CU/AL' on metal yoke | ~120V (but prone to voltage drop) | Thermal creep, arcing, fire | Pigtail with AlumiConn lugs + CO/ALR receptacle |
| Fabric-Sheathed Era | Small rectangular boxes, brittle wires | Varies (often open neutrals) | Insulation failure, short circuits | Full circuit rewiring (Knob & Tube abatement) |
Step-by-Step Diagnostic Workflow for Legacy Outlets
When approaching a home with old electrical outlet types, follow this systematic diagnostic workflow to ensure safety and accuracy:
Step 1: De-Energize and Verify
Never trust the switch or breaker label in an older home. Use a non-contact voltage tester (NCVT), followed by a contact voltage tester, to confirm the circuit is dead before removing the faceplate.
Step 2: The 'Pull Test'
Gently pull on the wires connected to the backstab terminals. In 80% of failing legacy outlets, the wire will slide right out of the push-in connector due to decades of thermal cycling weakening the internal spring tension. Always re-terminate these using the side screw terminals or, preferably, Wago 221 lever nuts in the back of the box.
Step 3: Box Fill and Depth Check
Older homes often feature shallow 2-inch deep metal or fiber junction boxes (roughly 12 to 14 cubic inches). Modern GFCI receptacles are exceptionally deep (often 1.3 inches thick). Before attempting to retrofit a GFCI into an old ungrounded circuit, verify the box fill capacity per NEC Article 314.16. If the box is too shallow, you will need to install a box extender ring or replace the box entirely.
NEC Code Implications and Upgrade Paths
The National Fire Protection Association (NFPA 70 / NEC) provides specific pathways for dealing with ungrounded legacy outlets without requiring a full, costly home rewire (which can cost $150 to $300 per circuit in 2026).
The GFCI Retrofit Exception (NEC 406.4(D)(2)(b))
If you have a 2-prong ungrounded outlet and cannot run a new ground wire, the NEC allows you to replace it with a Ground Fault Circuit Interrupter (GFCI) receptacle. The GFCI protects against line-to-neutral and line-to-ground shock hazards by monitoring current imbalance, even without an equipment ground.
- Required Labeling: You must apply the 'No Equipment Ground' and 'GFCI Protected' stickers (included with the device) to the faceplate.
- Downstream Protection: You can wire additional standard 3-prong outlets to the 'LOAD' terminals of the GFCI. This provides shock protection to downstream outlets, though they still lack a true surge-protecting ground path.
- Cost Analysis: A high-quality 2026 GFCI (like the Leviton SmartlockPro or Pass & Seymour Self-Test models) costs between $18 and $28. This is a massive safety upgrade for a minimal material investment.
When to Call for a Full Rewire
While GFCI retrofits solve the shock hazard, they do not solve the fire hazard of degraded wiring or the equipment hazard of missing surge paths. As noted by the Electrical Safety Foundation International (ESFI), modern electronics and AFCI (Arc Fault Circuit Interrupter) requirements often necessitate pulling new 12/2 or 14/2 NM-B cable with a dedicated ground. If your multimeter diagnostics reveal widespread open neutrals, melted insulation, or active aluminum creep, a GFCI is merely a band-aid; a full circuit upgrade is mandatory for safety.
Conclusion
Troubleshooting old electrical outlet types requires a shift from simple visual checks to rigorous electrical testing. By understanding the distinct failure modes of NEMA 1-15R ungrounded outlets, identifying dangerous bootleg grounds, and properly managing aluminum wiring connections, you can accurately diagnose hazards and apply the correct NEC-compliant solutions. Always prioritize true grounding where possible, and rely on GFCI technology as a proven, code-compliant safety net for legacy systems.