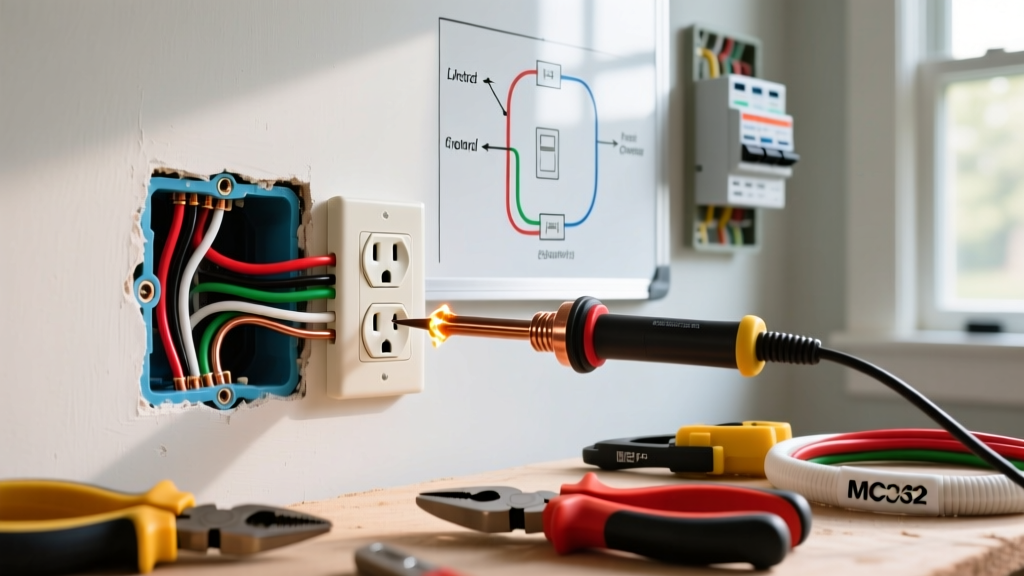
A standard single light switch wiring setup interrupts the ungrounded (hot/black) conductor using a single-pole switch rated for the circuit's amperage, while the grounded (neutral/white) conductors splice together and bypass the switch entirely. You will land black wires on brass screws, bare copper on the green screw, and use 14 AWG wire on a 15A circuit or 12 AWG on a 20A circuit. This guide walks through the exact terminations, meter readings, and physical techniques required to execute a code-compliant, reliable installation.
Tools, Materials, and Device Ratings
Before opening the gang box, ensure your materials match the branch circuit's overcurrent protection device (breaker). Mismatching a 15A switch on a 20A breaker is a direct violation of NEC Article 404.14 and creates a thermal bottleneck.
| Item | Specification / Rating | Recommended Example |
|---|---|---|
| Single Pole Switch | 15A/120V (for 15A breaker) or 20A/120V (for 20A breaker) | Leviton 15A Toggle (R62-01451-02W) or 20A Decora (R72-05693-02W) |
| Branch Circuit Wire | 14 AWG solid copper (15A) or 12 AWG solid copper (20A) | Southwire 14/2 or 12/2 NM-B (Romex) |
| Wire Connectors | UL-listed, rated for 3x 14 AWG or 12 AWG solid | Ideal 341 Orange Wing-Nuts or Wago 221 Lever-Nuts |
| Voltage Tester | Non-Contact Voltage (NCV) Tester, CAT III or CAT IV | Klein Tools NCVT-2 Dual Range |
| Multimeter | True RMS, CAT III 600V minimum | Fluke 117 or Klein MM400 |
| Wire Strippers | Precision strip gauge for 14 and 12 AWG solid | Klein 11055 or Milwaukee 48-22-4105 |
Mains Safety and Verification Protocol
Working on branch circuits involves 120V AC mains electricity. A shock from a 15A or 20A circuit can induce ventricular fibrillation. You must de-energize the circuit at the main service panel before removing the switch cover plate. Follow OSHA's Control of Hazardous Energy (Lockout/Tagout) guidelines: turn off the breaker, apply a physical lock or tag if the panel is out of sight, and verify the circuit is dead using a tested meter. Never rely solely on a wall switch being in the 'off' position. If you are unsure of your panel configuration, defer to a licensed electrician.
- De-energize: Turn off the specific 15A or 20A breaker feeding the switch at the main panel.
- Initial Sweep: Use your NCV tester (e.g., Klein NCVT-2) to scan the switch cover plate and the gap around the toggle. Confirm the tester does not beep or flash red.
- Verify Dead (Multimeter): Remove the cover plate. Set your multimeter to AC Voltage (V~). Place one probe on the bare ground wire and the other on the black wire connected to the switch. The reading must be exactly 0.0V. If you read 114V-126V, the wrong breaker was turned off, or you have a multi-wire branch circuit (MWBC) sharing a neutral that is still live.
Step-by-Step Single Light Switch Wiring Procedure
With the circuit verified dead, remove the two mounting screws and pull the existing switch out of the gang box. Take note of the existing wire routing before disconnecting anything.
- Prepare the Conductors: Using your wire strippers, trim the ends of the black, white, and bare copper wires to ensure clean, un-nicked metal. Strip exactly 3/4 inch of insulation off the black and white wires. Use the strip gauge molded into the back of your new Leviton or Eaton switch to verify the length; exposed copper outside the terminal washer invites short circuits.
- Terminate the Ground (Green Screw): Locate the bare copper ground wire (or green insulated wire). Form a J-hook using the nose of your needle-nose pliers. Hook the bare copper wire around the green grounding screw on the switch yoke in a clockwise direction. Tighten the screw to 14 in-lbs. If the box is metal, you must also run a 6-inch bare copper pigtail from the switch's green screw to the back of the metal gang box using a 10-32 ground screw.
- Splice the Neutrals (Bypass): A standard single-pole switch does not use a neutral wire. Take the two (or more) white neutral wires entering the box and join them together using an orange Ideal Wing-Nut or a 3-port Wago 221 lever-nut. Do not connect any white wire to the switch. Fold this neutral bundle neatly into the back of the box.
- Connect the Line Hot (Bottom Brass Screw): Identify the black wire bringing power from the breaker panel (the 'line' or 'feed'). Form a clockwise J-hook and loop it under the bottom brass-colored screw on the switch. Tighten firmly until the wire is pinned flat under the screw head washer, with no insulation trapped underneath and no bare copper exposed outside the washer.
- Connect the Load Hot (Top Brass Screw): Identify the black wire traveling up to the light fixture (the 'load' or 'switch leg'). Form a clockwise J-hook and loop it under the top brass-colored screw. Tighten securely.
- Fold and Mount: Carefully fold the black wires in an accordion pattern behind the switch yoke. Push the switch into the gang box, ensuring the plaster ears sit flush against the drywall. Drive the two 6-32 mounting screws into the top and bottom yoke tabs. Use the elongated holes in the yoke to level the switch before final tightening.
Verify and Test: Meter Readings and Common Botches
Before applying power, perform a dead-circuit continuity test to ensure no accidental shorts were created during the fold-in.
Power-Off Verification
Set your multimeter to Continuity (the diode/beep symbol). Place one probe on the brass line terminal and the other probe on the brass load terminal. Flip the switch toggle. In one position, the meter should beep (read < 1 ohm). In the other position, it should read 'OL' (Open Loop / infinite resistance). Next, place one probe on either brass terminal and the other on the green ground screw. The meter must read 'OL'. If it beeps, you have a direct short to ground and must re-inspect your wire stripping lengths.
Power-On Verification
Re-energize the breaker. Set the multimeter to AC Voltage. Measure between the line brass screw and the ground screw; you should read 120V nominal (114V-126V is acceptable per ANSI C84.1). Flip the switch on, and measure between the load brass screw and ground; it should also read 120V. Flip the switch off, and the load screw should drop to 0V.
The Most Common Botch: Backstabbing and Insulation Traps
The single most frequent failure mode in DIY single light switch wiring is using the 'push-in' backstab terminals on the rear of cheap builder-grade switches. While UL-listed, these spring-loaded brass clips grip the wire with minimal surface area. Under continuous loads (like a bathroom vanity with incandescent bulbs or a heated towel rack), the increased resistance causes thermal expansion, the spring loses tension, and the wire arcs internally. Symptom: The light flickers intermittently, or the switch faceplate feels warm to the touch and smells like melting PVC.
The Fix: Always use the side-wire terminal screws. Furthermore, ensure you do not trap the plastic wire insulation under the metal screw head washer. This prevents the metal-to-metal contact required for current flow, resulting in an open circuit (the light simply won't turn on) or high-resistance arcing.
Single Light Switch Wiring FAQ
Does it matter which brass screw the hot wire goes to on a single light switch wiring setup?
Electrically, no. A standard single-pole switch is a simple mechanical break in the circuit. Current flows through the brass terminal bar regardless of whether the line feed enters the top screw and the load exits the bottom, or vice versa. However, from a best-practice and troubleshooting standpoint, convention dictates that the line (feed from panel) lands on the bottom brass screw and the load (feed to fixture) lands on the top brass screw. This mimics the physical flow of electricity and makes future diagnostics easier for the next electrician.
Why does my single light switch wiring have three cables in the box?
If you see three separate NM-B cables entering your switch box, your box is acting as a junction point for downstream devices. One cable is the line feed from the panel, one cable is the switch leg going up to the light fixture, and the third cable is a 'pass-through' feed continuing power to another outlet or switch downstream. In this scenario, you will have three black wires, three white wires, and three bare grounds. You must pigtail the three black line/load wires using a wire nut, leaving only two black wires to land on the switch's brass screws. The three white wires splice together and bypass the switch entirely, and all three bare grounds must be bonded together and pigtailed to the switch's green screw.
Can I use a 20A switch on a 15A circuit for single light switch wiring?
Yes. According to NEC Article 404.14, a switch must be rated for the load it controls and the circuit it is connected to. Using a higher-rated device (a 20A switch) on a lower-rated circuit (a 15A breaker with 14 AWG wire) is perfectly legal and safe. The 15A breaker will still trip at 15 amps, protecting the 14 AWG wire, while the 20A switch operates well within its thermal limits. The reverse—installing a 15A switch on a 20A circuit with 12 AWG wire—is a code violation and a fire hazard, as the switch could melt before the 20A breaker trips.
What is the code requirement for switching the neutral wire?
NEC Article 404.2(B) explicitly prohibits switches from disconnecting the grounded (neutral) conductor, unless the switch simultaneously disconnects all ungrounded (hot) conductors. In standard single light switch wiring, you must never route the white neutral wire through the switch. The neutral must remain a continuous, unbroken path back to the panel. Switching the neutral leaves the light fixture socket energized at 120V even when the light is off, creating a severe shock hazard for anyone attempting to change a bulb.