
Strategic Rough-In: Why Dishwasher Wiring Demands Early Planning
In the sequence of a kitchen renovation, electrical rough-in is the critical path that dictates the success of your appliance installation. Failing to properly plan the electrical wiring for dishwasher circuits before drywall goes up inevitably leads to torn cabinetry, failed municipal inspections, or dangerous shared-neutral configurations. Modern dishwashers from brands like Bosch, Miele, and GE Profile draw significant startup current and require strict adherence to the latest National Electrical Code (NEC) mandates for ground and arc fault protection.
This guide provides a comprehensive renovation planning framework for dishwasher circuits, detailing exact rough-in measurements, 2026 material costs, and the technical edge cases that trip up general contractors.
Navigating the NEC: AFCI and GFCI Mandates
The most common point of failure in kitchen remodel inspections is misunderstanding the dual-protection requirements for dishwasher circuits. According to the NFPA 70 (National Electrical Code), kitchen appliance circuits are subject to rigorous safety overlays.
- GFCI Protection (NEC 210.8(D)): All 125-volt through 250-volt receptacles supplying dishwashers in dwelling units must have Ground-Fault Circuit-Interrupter protection, regardless of their distance from the sink.
- AFCI Protection (NEC 210.12): Branch circuits supplying kitchen outlets must be protected by an Arc-Fault Circuit-Interrupter.
Expert Insight: Do not use a standard GFCI receptacle behind the dishwasher. The vibration and moisture environment leads to premature sensor failure. Instead, install a dual-function (AFCI/GFCI) circuit breaker in the main panel, or use an AFCI breaker paired with a standard tamper-resistant (TR) receptacle located in the adjacent sink cabinet.
Circuit Sizing and Wire Gauge Matrix
While older homes often daisy-chained the dishwasher and garbage disposal on a single 15-amp circuit, modern renovation planning requires a dedicated circuit. High-end models with integrated water heaters (like the Bosch 800 Series) can peak at 12 to 14 amps during the sanitize cycle. Running a 20-amp circuit provides the necessary thermal headroom to prevent nuisance tripping.
| Breaker Type | Wire Gauge (NM-B) | Max Continuous Load | Renovation Use Case |
|---|---|---|---|
| 15A Dual-Function (AFCI/GFCI) | 14/2 with Ground | 12 Amps | Basic models, budget remodels, short wire runs (<50 ft) |
| 20A Dual-Function (AFCI/GFCI) | 12/2 with Ground | 16 Amps | Premium models with internal heaters, long runs, future-proofing |
| 20A Standard (No GFCI/AFCI) | 12/2 with Ground | 16 Amps | CODE VIOLATION: Do not use in 2026 kitchen renovations |
Hardwired vs. Cord-and-Plug: The Remodeler's Dilemma
When planning your rough-in, you must decide between a hardwired connection and a receptacle. This decision impacts cabinet design and inspection outcomes.
The Hardwired Approach
Hardwiring involves running the 12/2 Romex directly into the dishwasher's junction box. Pros: Eliminates the cost of a $60 dual-function breaker and a $15 receptacle; reduces points of failure. Cons: NEC 422.31 requires a disconnecting means within sight of the appliance. Since the breaker panel is rarely in the kitchen, you must install a lockable breaker disconnect at the panel, which adds $15 to the panel hardware costs and complicates service calls.
The Cord-and-Plug Approach (Recommended)
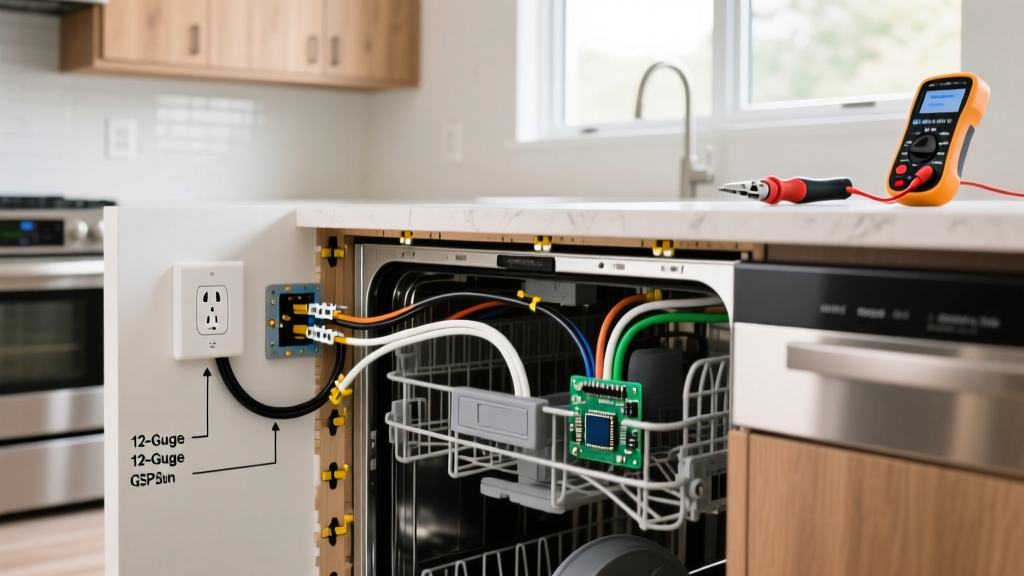
Running a 12/2 line to a standard receptacle in the adjacent sink base cabinet, then plugging in a factory-installed or aftermarket dishwasher power cord. Pros: The plug acts as the required disconnecting means. Makes appliance replacement drastically easier without opening junction boxes. Cons: Requires purchasing a 6-foot appliance power cord (approx. $25) and ensuring the cabinet divider is drilled correctly to pass the plug.
Precision Rough-In Specifications
General contractors often drill cabinet pass-through holes haphazardly, leading to pinched wires or toe-kick screw penetrations. Follow these exact measurements for the rough-in phase:
- Cabinet Penetration Height: Drill the 1.5-inch pass-through hole between the sink base cabinet and the dishwasher cavity exactly 4 to 6 inches above the subfloor. This clears the toe-kick mounting screws (which are typically 2 inches up) and avoids the water supply line and drain hose routed higher up.
- Receptacle Placement: If using the cord-and-plug method, mount the single-gang electrical box on the side wall of the sink base cabinet, 18 to 24 inches above the finished floor. This keeps the plug away from potential under-sink leaks while remaining easily accessible when the sink cabinet doors are open.
- Slack Requirements: Leave exactly 12 inches of wire protruding into the dishwasher cavity. More than 18 inches creates a hazardous coil that can press against the heating element or motor housing.
2026 Material and Labor Cost Breakdown
Budgeting for electrical rough-in requires accurate, current pricing. Below is the estimated cost to run a new, dedicated 20-amp dishwasher circuit from the main panel to the kitchen (assuming a 60-foot wire run and standard drywall patching).
- 12/2 NM-B Wire (Southwire Romex): $0.65 per foot = $39.00
- 20A Dual-Function (AFCI/GFCI) Breaker (Square D Homeline or Eaton BR): $62.00
- Single-Gang Old-Work Box & TR Receptacle: $8.50
- Appliance Power Cord (3-prong, 6ft): $24.00
- Electrician Labor (Rough-in & Trim-out @ $115/hr): $230.00
- Total Estimated Circuit Cost: $363.50
Note: If your main panel requires an upgrade to accommodate the new breaker space, expect to add $150–$300 for a subpanel installation or tandem breaker reconfiguration.
Common Renovation Failure Modes & Edge Cases
Even with meticulous planning, specific edge cases can derail a dishwasher installation. Anticipate these failure modes during the design phase:
1. Multi-Wire Branch Circuits (MWBC) in Older Homes
If you are renovating a home built between 1970 and 2005, the kitchen may be wired with an MWBC (a single 12/3 cable sharing a neutral wire between two 120V circuits). Never tap the dishwasher into a shared neutral kitchen circuit. The nonlinear loads of modern inverter-driven dishwasher motors cause harmonic distortion on shared neutrals, leading to overheated wires and AFCI nuisance tripping. Always pull a brand new, dedicated 12/2 home run to the panel.
2. Voltage Drop on Long Runs
If the main panel is in the basement and the kitchen is on the far side of a sprawling single-story home, the wire run may exceed 80 feet. According to ENERGY STAR appliance efficiency guidelines, voltage drops below 110V can cause dishwasher control boards to reset mid-cycle and water valves to chatter. For runs exceeding 80 feet, upsize the wire to 10/2 NM-B to mitigate voltage drop, terminating it on a 20A breaker.
3. Nuisance Tripping on Motor Startup
Dishwashers use induction motors that draw a brief inrush current (Locked Rotor Amps) when starting the wash pump. Cheap, off-brand AFCI/GFCI breakers often misinterpret this inrush as an arc fault. To prevent the dishwasher from shutting off 10 minutes into a cycle, exclusively use premium dual-function breakers from the manufacturer that matches your panel (e.g., Siemens Type QAF2 for Siemens panels, Square D HOM for Homeline panels). Ensure the neutral pigtail connection on the breaker is torqued tightly to the neutral bar; a loose neutral is the #1 cause of false AFCI trips.
Final Inspection Checklist
Before calling the municipal inspector, verify the following:
- [ ] The breaker is clearly labeled 'DISHWASHER' on the panel directory.
- [ ] The receptacle (if used) is readily accessible without moving the appliance.
- [ ] No NM-B cable is resting on sharp metal cabinet edges (use plastic cable grommets in pass-through holes).
- [ ] The circuit is completely independent of the garbage disposal and countertop receptacles.
Proper planning of your dishwasher's electrical infrastructure ensures seamless appliance integration, passes inspection on the first visit, and guarantees safe operation for the lifespan of your renovated kitchen. For further safety guidelines on kitchen electrical layouts, consult the Consumer Product Safety Commission's electrical safety resources.