
The Hidden Dangers of Makeshift Soldering Rests
Every beginner in electronics eventually faces the temptation to rest a 400°C (752°F) soldering iron on a random piece of scrap wood, a ceramic coffee mug, or worse, the plastic packaging their components came in. According to the CDC's NIOSH guidelines on soldering safety, improper tool handling and unsecured hot irons are leading causes of minor workshop fires and severe contact burns.
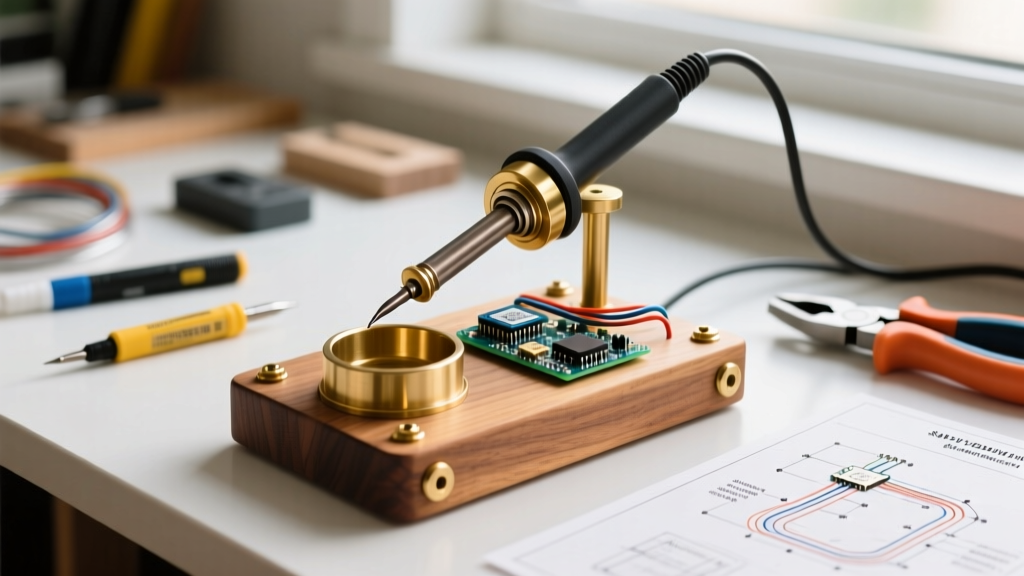
A proper stand isn't just a convenience; it is a critical safety device and a tip-preservation tool. Commercial stands like the Hakko 602 or Weller WSA350 are excellent, but building a DIY soldering iron stand offers a superior custom footprint, higher thermal mass, and integrated brass-wool cleaning for under $30. This beginner guide walks you through engineering a heat-resistant, tip-safe resting station using oak and brass.
Material Sourcing: Engineering for High Heat
Soldering iron tips operate between 300°C and 450°C depending on your solder alloy (lead-free SAC305 requires higher heat than 63/37 leaded). Wood begins to scorch at roughly 200°C and auto-ignites around 300°C. Therefore, the iron's barrel must never directly touch the wooden base. We use brass tubing because of its high thermal conductivity and malleability, acting as a heat sink that dissipates radiant heat before it reaches the wood.
| Material | Specification | Est. 2026 Cost | Purpose |
|---|---|---|---|
| Red Oak Board | 12in x 6in x 3/4in (Hardwood) | $8.50 | High-density, heavy base to prevent tipping |
| Brass Tubing | 5/16in OD, 36in length (K&S Metals) | $6.20 | Forms the heat-dissipating holding coil |
| Curly Brass Wool | Hakko 599B or generic equivalent | $4.00 | Dry tip cleaning (prevents thermal shock) |
| RTV Silicone | Permatex 22058 Copper (High-Temp) | $7.50 | Secures brass to wood; withstands 500°F |
| Steel Dowel Pin | 1/4in diameter, 2in long | $1.50 | Internal armature to prevent brass kinking |
Step-by-Step Build Instructions
Phase 1: Milling the Oak Base
- Cut and Sand: Cut your oak board to 10 inches long by 5 inches wide. Sand to 220-grit and apply two coats of tung oil to seal the wood against flux splatter.
- Route the Cleaner Recess: Using a 1.5-inch Forstner bit, drill a 1-inch deep hole on the left side of the board. This will house the curly brass wool. Ensure the hole is deep enough that the iron tip won't strike the bottom wood when plunged into the wool.
- Mark the Coil Footprint: On the right side, mark two 5/16-inch pilot holes, spaced 3 inches apart, to anchor the brass tube.
Phase 2: Forming the Brass Heat-Sink Coil
The most common failure in DIY builds is kinking the brass tube while bending it. Brass work-hardens and snaps if forced.
- Insert the Armature: Slide the 1/4-inch steel dowel pin inside the 36-inch brass tubing. This prevents the tube from collapsing during bending.
- Bend the Coil: Wrap the tubing around a 1.5-inch diameter wooden dowel or PVC pipe. You want exactly 2.5 loops. The inner diameter of the coil should be slightly larger than your soldering iron's silicone grip sleeve (typically 0.75 inches for a standard Hakko FX-888D or Pinecil V2).
- Create the Anchor Legs: Bend the remaining straight ends downward at a 90-degree angle. These will insert into the pilot holes you drilled in the oak base.
Phase 3: Assembly and Thermal Sealing
- Inject a small bead of Permatex Copper RTV silicone into the pilot holes.
- Press the brass anchor legs into the holes. Wipe away excess silicone.
- Pack the curly brass wool into the 1.5-inch recess. Do not pack it too tightly; the iron tip needs room to penetrate without bending the tip.
- Cure Time: Allow the RTV silicone to cure for a full 24 hours before exposing it to heat.
Pro-Tip on Tip Longevity: Never use a wet cellulose sponge with a high-wattage iron. As noted in Adafruit's Guide to Excellent Soldering, plunging a 400°C tip into water causes rapid thermal contraction, leading to micro-fractures in the iron plating and exposing the copper core to rapid oxidation. Dry brass wool cleans via friction without dropping the tip temperature.
Workspace Ergonomics and Placement
According to IPC-7711/7721 rework standards, proper tool placement minimizes repetitive strain and accidental cable snags. Route your iron's silicone cord through a desk-edge cable catcher to ensure the cord's drag weight doesn't exceed 40 grams, which could pull a lightweight stand off the desk. Our heavy oak base (weighing roughly 1.8 lbs) easily counteracts standard silicone cord tension. Position the stand in your non-dominant 'sweep zone'—the natural resting arc of your arm—so you never have to look away from your PCB to holster the iron.
Failure Modes: Where DIY Stands Usually Fail
When analyzing failed DIY soldering iron stand projects on maker forums, three specific edge cases emerge:
- Center of Gravity Tipping: Using lightweight pine or plywood. When the iron is placed in the coil, the handle's weight shifts the center of mass. Solution: Always use dense hardwood (Oak, Walnut, Maple) and keep the base footprint at least 5x10 inches.
- Brass Oxidation and Binding: Over time, radiant heat oxidizes the brass coil, creating a rough surface that scratches the iron's silicone sleeve. Solution: Polish the inner loop of the brass coil with 1000-grit sandpaper and apply a micro-coating of high-temp dry graphite lubricant.
- Flux Corrosion on Brass: Rosin-based fluxes (like RMA) become mildly acidic when heated and can accelerate brass dezincification. Wipe down the brass coil with isopropyl alcohol (IPA) once a month to remove flux splatter and maintain a smooth surface.
DIY vs. Commercial Stands: Is the Effort Worth It?
How does this custom build compare to off-the-shelf options available in 2026? Let's look at the data.
| Feature | This DIY Oak/Brass Build | Hakko 602 (Solid Brass) | Generic $8 Amazon Stands |
|---|---|---|---|
| Material Cost | ~$27.70 | ~$12.50 | ~$8.00 |
| Thermal Mass | Extremely High (Oak + 36in Brass) | Moderate (Thin sheet brass) | Very Low (Thin stamped steel) |
| Tip Cleaning | Integrated Brass Wool (Safe) | Sponge (Causes thermal shock) | Sponge (Causes thermal shock) |
| Stability | Heavy, low-profile, anti-tip | Good, but lightweight base | Poor, frequent tipping |
| Aesthetics | Custom woodshop finish | Industrial yellow/black | Cheap painted metal |
While the Hakko 602 is cheaper and requires zero assembly, it relies on a wet sponge and lightweight stamped brass that can warp over years of high-heat exposure. The DIY build requires an afternoon of work but yields a heavier, safer, and tip-friendly station that looks professional on any workbench.
Frequently Asked Questions
Can I use aluminum tubing instead of brass?
No. Aluminum has a significantly lower melting point (660°C) and softens at much lower temperatures than brass. The radiant heat from a soldering iron barrel resting against aluminum tubing can cause it to sag and deform over time. Brass maintains its structural rigidity up to 900°C.
Will the wood eventually catch fire?
No, provided you maintain the 1-inch clearance between the iron's heating element and the wood base. The brass coil acts as a physical barrier and a thermal bridge, drawing heat away from the immediate vicinity of the wood. However, you should never leave an active iron unattended, regardless of the stand's quality.
How do I clean the brass wool when it gets clogged with solder dross?
Simply pull the brass wool out of the recess, shake it vigorously over a trash can, and use a stiff wire brush to dislodge trapped flux residue. Replace the wool every 6 to 12 months depending on your soldering volume.
What is the best technique for cleaning different tip shapes?
When using a wide chisel tip (like a Hakko T18-D24), angle the iron at 45 degrees when plunging into the brass wool to maximize surface contact and shear off oxidized solder dross. For delicate conical tips (T18-B), use a gentle twisting motion rather than a forceful plunge to avoid bending the tip's copper core.