
Demystifying Solder Paste: More Than Just Liquid Solder
If you are transitioning from hand-soldering through-hole components to assembling Surface Mount Devices (SMDs), you will quickly encounter a critical question: how do you use soldering paste? Unlike traditional rosin-core solder wire, solder paste is a thixotropic mixture of microscopic solder alloy powder suspended in a sticky, chemically active flux medium. It is designed to temporarily hold components in place before being melted (reflowed) into a permanent electrical and mechanical joint.
Using solder paste correctly bridges the gap between hobbyist prototyping and professional PCB manufacturing. Whether you are repairing a smartphone motherboard, building a custom mechanical keyboard, or assembling a batch of IoT sensors, mastering paste application and reflow is essential. This guide breaks down the metallurgy, tools, and step-by-step techniques required to achieve factory-quality solder joints at your home workbench.
The Anatomy of Solder Paste: Alloys and Particle Sizes
Before applying paste to your PCB, you must select the correct alloy and particle size (Type). The metallurgical composition of solder paste dictates its melting point, while the particle size dictates its suitability for specific component footprints.
Choosing the Right Alloy
- SAC305 (Sn96.5/Ag3.0/Cu0.5): The industry-standard lead-free alloy. It melts between 217°C and 220°C. It produces strong, reliable joints but requires higher reflow temperatures. Expect to pay around $38 to $45 for a 10cc syringe of high-quality SAC305 paste (e.g., Chip Quik SMD4300AX).
- Sn63/Pb37 (Leaded): The classic eutectic alloy melting at a precise 183°C. It offers superior wetting, a wider plastic working range, and is significantly more forgiving for beginners. A 10cc syringe typically costs between $25 and $30.
- Low-Temperature Alloys (e.g., Sn42/Bi57.6/Ag0.4): Melting around 138°C, these are ideal for heat-sensitive components or step-soldering (adding components to a board that has already been reflowed).
Paste Types and Particle Sizes
Solder paste is categorized by 'Type' based on the mesh size of the solder powder. Using the wrong type can lead to clogged stencils or micro-bridging.
| Paste Type | Particle Size Range | Best Application | Typical Stencil Thickness |
|---|---|---|---|
| Type 3 | 25 - 45 µm | Standard SMT (0805, SOIC, QFP) | 5 mil (0.127 mm) |
| Type 4 | 20 - 38 µm | Fine Pitch (0402, QFN, 0.5mm pitch ICs) | 4 mil (0.100 mm) |
| Type 5 | 15 - 25 µm | Ultra-Fine (0201, Micro-BGA, CSP) | 3 mil (0.075 mm) |
Beginner Tip: For 90% of hobbyist and prototyping projects, Type 4 paste offers the best balance of printability and versatility across both standard and fine-pitch components.
Essential Tools for Paste Application
To answer the question of how do you use soldering paste effectively, you need the right hardware. You do not need a $10,000 pick-and-place machine, but you do need precision tools.
- Application Method: A laser-cut stainless steel stencil (for batch production) or a pneumatic/manual syringe dispenser (for prototyping and rework).
- Squeegee: A rigid metal or hard plastic scraper to push paste through stencil apertures.
- Precision Tweezers: Fine-tip, non-magnetic titanium or ESD-safe tweezers (e.g., Vetus ST-15) for placing components.
- Reflow Heat Source: A dedicated reflow hotplate (like the $60 Miniware MHP30), a modified toaster oven, or a high-wattage hot air rework station.
Method 1: Stencil Printing (For Batch Assembly)
Stencil printing is the most reliable way to apply solder paste evenly across dozens of pads simultaneously. As detailed in SparkFun's Solder Paste Stencil Guide, the physics of the wipe is just as important as the paste itself.
Step-by-Step Stencil Application
- Secure the Board: Tape your bare PCB to a flat, rigid surface. Use Kapton tape to secure the stencil directly over the board, ensuring perfect alignment with the pads.
- Apply the Paste Bead: Squeeze a generous, continuous bead of solder paste along the top edge of the stencil, just above the component apertures.
- The Squeegee Pass: Hold your metal squeegee at a strict 45-degree angle to the stencil. Apply firm, even downward pressure and pull the squeegee toward you at a steady rate (about 1 to 2 inches per second). The goal is to shear the paste, forcing it into the apertures while wiping the top surface clean.
- Inspect and Lift: Carefully lift the stencil straight up (do not slide it). Inspect the pads. Every pad should have a flat, uniform brick of paste. If apertures are missing paste, do not attempt a second wipe; clean the board with isopropyl alcohol (IPA) and start over.
Pro-Tip on Stencil Cleaning: Never use paper towels to clean wet solder paste off a stencil; the fibers will snag on the microscopic apertures. Use lint-free polyester stencil wipes soaked in 99% IPA or a dedicated aqueous stencil cleaner.
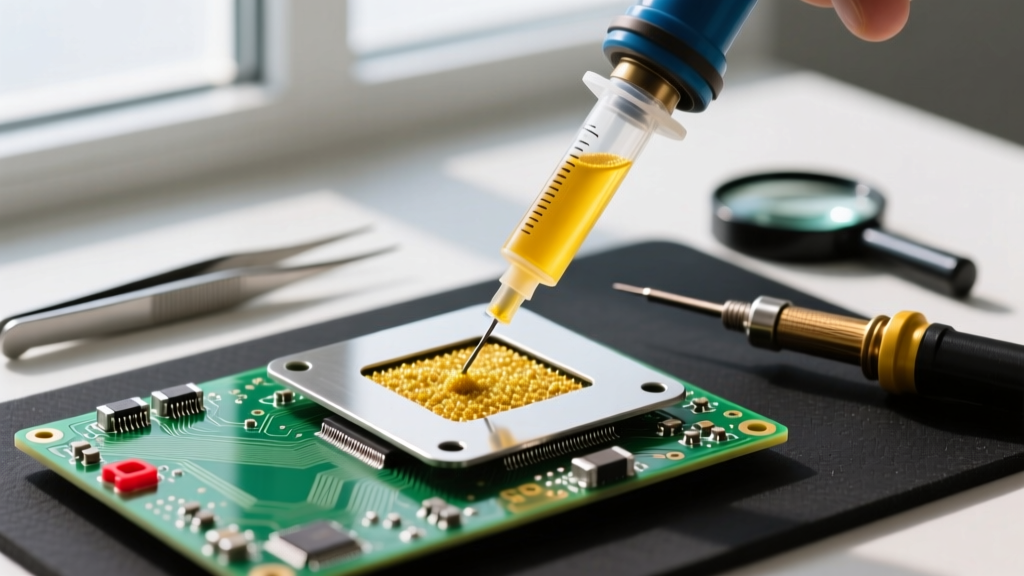
Method 2: Syringe Dispensing (For Prototyping & Rework)
When you lack a custom stencil, or if you are replacing a single blown capacitor, syringe dispensing is the go-to method. However, it requires a steady hand and an understanding of fluid dynamics.
Manual vs. Pneumatic Dispensing
Pushing a syringe plunger with your thumb is highly inconsistent. The pressure required to overcome the paste's viscosity varies, leading to massive blobs on some pads and starvation on others. For consistent results, use a pneumatic syringe dispenser (available for under $40 on Amazon). These devices use regulated air pressure (typically 10 to 30 PSI) and a digital timer to fire exact micro-dots of paste.
Dispensing Technique
- Use a blunt-tip dispensing needle (21-gauge for large pads, 25-gauge or 27-gauge for 0402 and 0603 components).
- Position the needle tip at a 45-degree angle, resting lightly on the edge of the PCB pad.
- Fire a dot of paste that covers roughly 50% to 70% of the pad area. The paste will spread when the component is placed and heated.
- For ICs with multiple pins, draw a continuous, thin line across all pads rather than dotting them individually, then use a toothpick to distribute the paste evenly.
Component Placement: Leveraging Flux Tack
Once the paste is applied, you must place the components. Solder paste is inherently tacky due to the rosin or synthetic resin in the flux medium. This 'tack' holds components in place during transport to the reflow oven.
Using your fine-tip tweezers, pick up the component and press it gently into the paste. You should feel a slight resistance, followed by the component seating flat against the PCB. Do not press so hard that the paste squirts out from under the component, as this will cause solder bridging during reflow. If working with QFN (Quad Flat No-leads) packages, ensure the component is perfectly centered; the surface tension of the molten solder will self-align it during reflow, but severe misalignment will result in open circuits.
The Reflow Profile: Baking the Board
Applying the paste is only half the battle. Reflow soldering requires heating the entire assembly through a specific thermal profile. If you heat the board too quickly, the flux solvents will boil violently, causing 'solder spatter' and tiny solder balls. The standard reflow profile consists of four distinct stages:
1. Preheat (Ramp)
Ramp the temperature from room temperature to 150°C at a controlled rate of 1°C to 3°C per second. This slowly evaporates the volatile solvents in the flux without causing thermal shock to ceramic capacitors or silicon ICs.
2. Soak (Thermal Equilibrium)
Hold the temperature between 150°C and 180°C for 60 to 90 seconds. This stage activates the flux chemicals, stripping oxidation from the PCB pads and component leads. It also ensures the entire board (and all components of varying thermal masses) reach the same baseline temperature.
3. Reflow (Peak Temperature)
Ramp the heat up to the alloy's liquidus temperature plus 20°C. For SAC305, the peak target is 235°C to 245°C. Maintain this peak for 30 to 45 seconds. The solder powder melts, wets the pads, and forms intermetallic bonds. The flux turns into a protective glass-like shield over the molten pool.
4. Cooling
Allow the board to cool naturally. Never use compressed air or a fan to force-cool a reflowed board. Rapid cooling creates micro-cracks in the solder joints and induces thermal stress in BGA packages. A natural cool-down yields a fine-grain, strong crystalline structure in the solder.
Troubleshooting Common Paste Failures
Even with perfect technique, beginners often encounter physical defects. Here is how to diagnose and fix them:
- Tombstoning: One end of a two-terminal component (like a resistor) lifts off the pad, standing upright like a tombstone. Cause: Uneven heating causing one pad to reflow before the other, or asymmetrical paste volume. Fix: Ensure your reflow heat source covers the board evenly; avoid placing boards too close to the edge of a hotplate.
- Bridging (Shorts): Solder flows between adjacent IC pins. Cause: Too much paste applied, or squeegee pressure was too light during stencil printing, leaving paste smeared on the solder mask. Fix: Reduce paste volume, increase squeegee pressure, or switch to a thinner stencil.
- Solder Balls (Spatter): Tiny spheres of solder trapped under components. Cause: Moisture in the paste boiling during preheat, or ramping the temperature too fast. Fix: Allow refrigerated paste to reach room temperature before opening, and extend the soak phase of your reflow profile.
Storage, Shelf Life, and Acclimatization
Solder paste is a perishable chemical product. Unopened, it has a shelf life of 6 months when stored in a refrigerator at 0°C to 10°C (32°F to 50°F). Never freeze solder paste, as this will separate the flux vehicle from the metal powder.
The Golden Rule of Acclimatization: When you take a syringe or jar out of the fridge, you MUST let it sit at room temperature for at least 2 to 4 hours before opening the cap. If you open a cold container in a humid room, atmospheric moisture will instantly condense inside the jar. This trapped water will cause catastrophic spattering and oxidation the next time you attempt to reflow the paste.
Final Thoughts
Learning how to use soldering paste effectively transforms your DIY electronics capabilities. By understanding the interplay between alloy selection, precise mechanical application, and strict thermal profiling, you can achieve professional-grade SMT assemblies right on your kitchen table or home workbench. Start with Sn63/Pb37 paste and Type 4 powder for your first few stencil prints to build confidence, then graduate to lead-free SAC305 as your reflow techniques solidify.