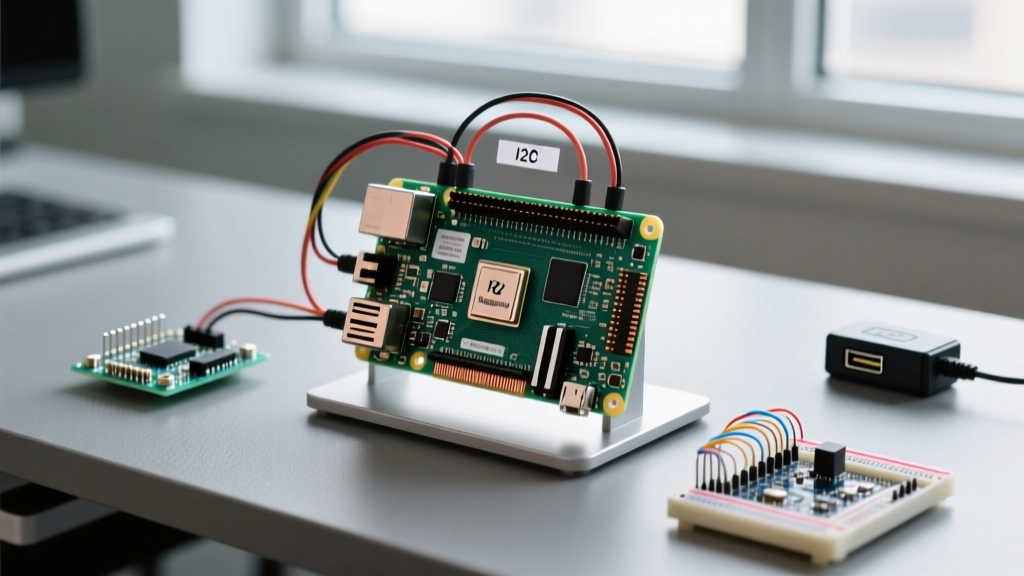

Project Overview & Difficulty Rating
Logging environmental data reliably requires more than just taping a sensor to a microcontroller. This project with Raspberry Pi hardware builds a robust, headless-capable temperature, humidity, and barometric pressure logger. It writes timestamped data to a local CSV file while simultaneously rendering real-time metrics on an I2C OLED display. We are bypassing fragile breadboard-only setups by focusing on I2C bus integrity, proper pull-up resistor math, and modern Python environment management.
Exact Parts List
- Compute: Raspberry Pi 4 Model B (4GB RAM variant) - ~$55
- Sensor: Adafruit BME280 I2C/SPI Breakout (Product ID: 2652) - ~$15
- Display: Adafruit Monochrome 1.3" 128x64 OLED with STEMMA QT (Product ID: 938) - ~$20
- Storage: SanDisk Extreme 32GB microSD (U3 A2 rated for high IOPS logging) - ~$12
- Power: Official Raspberry Pi 27W USB-C Power Supply - ~$15
- Wiring: 22 AWG solid core hookup wire or premium female-to-female Dupont jumpers
Hardware Wiring & Pin Mapping
The Raspberry Pi 4 exposes its primary I2C bus (I2C1) on the 40-pin GPIO header. Both the BME280 and the SSD1306-based OLED will share this bus. Because I2C is a multi-drop architecture, we wire the SDA and SCL lines in parallel.
| Pi 4 GPIO Pin (Physical) | GPIO Name | BME280 Breakout | OLED Display |
|---|---|---|---|
| Pin 1 | 3V3 Power | VIN / VCC | VIN / VCC |
| Pin 6 | GND | GND | GND |
| Pin 3 | GPIO 2 (SDA1) | SDI / SDA | SDA |
| Pin 5 | GPIO 3 (SCL1) | SCK / SCL | SCL |
I2C requires pull-up resistors on SDA and SCL. The Pi 4 has weak 1.8kΩ internal pull-ups, which are often insufficient for 400kHz fast-mode I2C with long wires. Fortunately, both the Adafruit BME280 (Product 2652) and OLED (Product 938) feature 10kΩ onboard pull-ups. Wired in parallel, they yield a net 5kΩ pull-up—perfect for driving the bus capacitance of a standard breadboard setup without signal degradation.
Software Setup & Compilable Python Code
Target Board Variant: This code and setup explicitly target the Raspberry Pi 4 Model B (4GB) running Raspberry Pi OS (Bookworm or newer, 64-bit). Bookworm enforces PEP 668, meaning we must use a Python virtual environment to install hardware libraries without breaking system packages.
1. Enable I2C and Create Virtual Environment
Run sudo raspi-config, navigate to Interface Options -> I2C, and enable it. Reboot, then set up your workspace:
mkdir ~/pi-logger && cd ~/pi-logger
python3 -m venv venv
source venv/bin/activate
pip install adafruit-blinka adafruit-circuitpython-bme280 adafruit-circuitpython-ssd1306 Pillow
2. Complete Python Data Logger Script
Save the following as logger.py. It includes hardware pin definitions, I2C initialization, display rendering, and CSV logging with explicit error handling for bus lockups.
import time
import board
import busio
import csv
import os
from datetime import datetime
from PIL import Image, ImageDraw, ImageFont
import adafruit_ssd1306
import adafruit_bme280

# --- PIN & BUS DEFINITIONS ---
# Pi 4 Hardware I2C1: SDA = GPIO 2 (Pin 3), SCL = GPIO 3 (Pin 5)
# Blinka handles the hardware mapping via 'board.SCL' and 'board.SDA'
I2C_BUS = busio.I2C(board.SCL, board.SDA, frequency=400000)

# Sensor I2C Addresses (Adafruit BME280 default is 0x77)
BME280_ADDR = 0x77
OLED_ADDR = 0x3C

# File path for CSV logging
CSV_FILE = 'environmental_log.csv'

def initialize_hardware():
    """Initialize I2C devices with explicit error handling."""
    try:
        # Initialize BME280 Sensor
        sensor = adafruit_bme280.Adafruit_BME280_I2C(I2C_BUS, address=BME280_ADDR)
        sensor.sea_level_pressure = 1013.25 # Standard sea level pressure in hPa

        # Initialize 128x64 OLED Display
        oled = adafruit_ssd1306.SSD1306_I2C(128, 64, I2C_BUS, addr=OLED_ADDR)
        oled.fill(0)
        oled.show()

        return sensor, oled
    except ValueError as e:
        print(f"[FATAL] I2C Address Not Found: {e}")
        print("Check physical wiring and run 'i2cdetect -y 1' in terminal.")
        raise SystemExit(1)
    except OSError as e:
        print(f"[FATAL] I2C Bus Error: {e}")
        print("Bus may be locked or pull-up resistors are missing.")
        raise SystemExit(1)

def log_to_csv(temp, hum, pres):
    """Append sensor readings to a local CSV file."""
    file_exists = os.path.isfile(CSV_FILE)
    with open(CSV_FILE, mode='a', newline='') as file:
        writer = csv.writer(file)
        if not file_exists:
            writer.writerow(['Timestamp', 'Temp_C', 'Humidity_%', 'Pressure_hPa'])
        writer.writerow([datetime.now().isoformat(), f'{temp:.2f}', f'{hum:.2f}', f'{pres:.2f}'])

def update_display(oled, temp, hum, pres):
    """Render metrics to the OLED screen."""
    image = Image.new('1', (oled.width, oled.height))
    draw = ImageDraw.Draw(image)

    # Use default font (Pillow built-in)
    draw.text((0, 0), f'T: {temp:.1f} C', fill=255)
    draw.text((0, 20), f'H: {hum:.1f} %', fill=255)
    draw.text((0, 40), f'P: {pres:.1f} hPa', fill=255)

    oled.image(image)
    oled.show()

if __name__ == '__main__':
    sensor, oled = initialize_hardware()
    print("Hardware initialized. Logging every 10 seconds...")

    try:
        while True:
            try:
                t = sensor.temperature
                h = sensor.humidity
                p = sensor.pressure

                log_to_csv(t, h, p)
                update_display(oled, t, h, p)

                time.sleep(10)

            except OSError as e:
                # Catch transient I2C glitches without crashing the main loop
                print(f"[WARN] Transient I2C read error: {e}. Retrying in 5s...")
                time.sleep(5)

    except KeyboardInterrupt:
        print("\nLogging stopped by user.")
        oled.fill(0)
        oled.show()
Debugging: First Three Things to Check When It Fails
I2C is notoriously unforgiving of loose connections and environment mismatches. If your script crashes on startup, execute these three checks in order:
- Verify the I2C Bus with
i2cdetect
Open a terminal and runsudo i2cdetect -y 1. You should see77(BME280) and3c(OLED) in the grid. If the grid is empty, your SDA/SCL wires are swapped, broken, or you forgot to enable I2C inraspi-config. - Check Virtual Environment Activation
Raspberry Pi OS Bookworm blocks globalpip installcommands. If your code throws module import errors, ensure your terminal prompt starts with(venv). If not, runsource ~/pi-logger/venv/bin/activate. - Multimeter Continuity Test
Power down the Pi. Set your multimeter to continuity (beep mode). Probe from the Pi GPIO Pin 3 to the BME280 SDA pad. A lack of a beep indicates a broken Dupont wire crimp—a highly common failure point in breadboard builds.
Common Error Strings & Ranked Causes
When the Python interpreter throws an exception, match it to these exact strings:
OSError: [Errno 121] Remote I/O error
Ranked Causes: 1) SDA/SCL wires are reversed. 2) The sensor is unpowered (check 3V3 rail). 3) I2C bus capacitance is too high due to excessively long wires (>30cm).ValueError: No I2C device at address: 0x77
Ranked Causes: 1) The BME280 address jumper on the back of the breakout is bridged, shifting the address to 0x76. ChangeBME280_ADDR = 0x77to0x76in the code. 2) You are using a BMP280 instead of a BME280 (BMP280 lacks humidity and sometimes defaults to different addresses).error: externally-managed-environment
Ranked Causes: You attempted to runpip installoutside of a Python virtual environment on a modern Debian-based Pi OS. Create and activate avenvas shown in the setup steps.
Extending or Simplifying the Build
Depending on your deployment environment, you may need to scale this project up for production or down for quick bench testing.
How to Simplify (Headless Bench Logger)
If you don't have the OLED display on hand, simply delete the adafruit_ssd1306 import, remove the update_display() function, and comment out the OLED initialization in initialize_hardware(). The script will continue to log to the CSV file silently. You can monitor the output by running tail -f environmental_log.csv over SSH.
How to Extend (Networked MQTT & RTC)
To push data to Home Assistant or Node-RED, integrate the paho-mqtt library. Add a payload publish step inside the while True loop. For deployments where the Pi might lose internet connectivity and suffer NTP time drift, wire a DS3231 Precision RTC (I2C address 0x68) to the same bus. The DS3231's temperature-compensated crystal oscillator will keep your CSV timestamps accurate to within ±2ppm, even if the Pi is offline for months.
Frequently Asked Questions
What is the best Raspberry Pi model for a low-power sensor project?
If power consumption is your primary constraint, the full-size Raspberry Pi 4 is not the ideal choice; it idles around 2.5W to 3W. For a strictly low-power, battery-operated sensor node, you should pivot to the Raspberry Pi Pico W (RP2040), which draws milliamps and supports deep sleep. However, if you need local database storage, complex edge-computing (like running a local dashboard), or SSH access for debugging, the Pi 4 (or the newer Pi 5, though it runs hotter) remains the correct tool for the job.
How do I run my Raspberry Pi project automatically on boot?
The most robust method in modern Raspberry Pi OS is using systemd. Create a service file at /etc/systemd/system/envlogger.service. Point the ExecStart directive to your virtual environment's Python binary: /home/pi/pi-logger/venv/bin/python /home/pi/pi-logger/logger.py. Enable it with sudo systemctl enable envlogger.service. Avoid using rc.local or .bashrc hacks, as they fail to handle service restarts upon I2C bus crashes gracefully.
Can I use a Raspberry Pi Pico instead of a full Raspberry Pi for this project?
Yes, but the software stack changes entirely. The Pico runs MicroPython or C/C++, not standard Linux Python. You would use the machine.I2C module in MicroPython instead of busio, and you would lose the ability to easily write to a standard FAT32/ext4 CSV file over SSH without implementing a USB mass storage device profile or an SD card SPI adapter. Stick to the Pi 4 if you want a Linux-based, network-accessible data logger.


