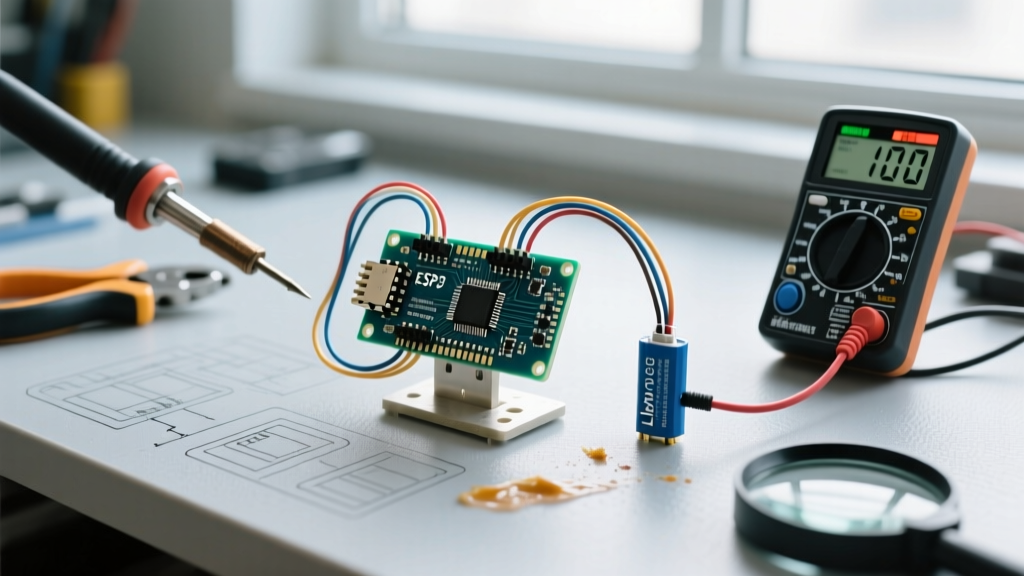
To remotely debug and control embedded hardware on a Raspberry Pi 5, install TeamViewer Host (ARM64) on Raspberry Pi OS Bookworm, paired with a Python gpiozero script utilizing the rpi-lgpio backend. This stack provides unattended SSH/terminal access and background service management without the overhead of a full desktop environment, while safely handling the Pi 5's new GPIO architecture.
The Verdict: Best Software Stack for Remote Pi Debugging
Choosing the right remote access layer for an embedded Linux board depends entirely on whether you need to debug a graphical interface or manage headless hardware services. TeamViewer offers three distinct Linux packages, and picking the wrong one will result in blocked ports, Wayland display server crashes, or wasted RAM.
| Use Case | Package | RAM Overhead | Wayland Compatible? |
|---|---|---|---|
| Headless GPIO/Service Debugging | TeamViewer Host (ARM64) | ~45 MB | Yes (No GUI capture needed) |
| Full Desktop GUI Debugging | TeamViewer Full (ARM64) | ~120 MB | No (Requires X11 fallback) |
| Fleet Management (100+ nodes) | TeamViewer IoT | ~30 MB | Yes (Agent only) |
- IF you need to interact with a GTK/Qt GUI application running on the Pi → You must switch Bookworm to X11 and use TeamViewer Full.
- IF you are managing a headless IoT node, running Python GPIO scripts, or need SSH tunneling → Use TeamViewer Host.
- Default Pick: For 95% of embedded hardware projects, install TeamViewer Host (ARM64). It survives reboots, requires no logged-in user, and avoids the Bookworm Wayland screen-capture bug entirely.
Parts List and GPIO Pin Mapping
This build targets the Raspberry Pi 5 (8GB variant) running the 64-bit Bookworm OS. The Pi 5 requires the official 27W USB-C PD power supply to prevent brownouts when switching inductive loads via relays. We are building a 4-channel remote hardware reboot station.
Bill of Materials
- Compute: Raspberry Pi 5 (8GB) - ~$80
- Power: Official Raspberry Pi 27W USB-C PD Power Supply - ~$12 (Do not use a generic 5V/3A phone charger; the Pi 5 will throttle GPIO current limits).
- Cooling: Official Active Cooler - ~$5
- Actuators: 4-Channel 5V Relay Module (Opto-isolated, Active LOW) - ~$8
- Wiring: Female-to-Female Dupont jumper wires
Pin Mapping Table
The Pi 5's GPIO header remains physically identical to the Pi 4, but the underlying silicon (RP1 chip) handles the pins differently. Wire the opto-isolated relay module as follows:
| Relay Module Pin | Pi 5 GPIO (BCM) | Physical Pin | Wire Color (Typical) |
|---|---|---|---|
| VCC | 5V | Pin 2 | Red |
| GND | GND | Pin 6 | Black |
| IN1 | GPIO 17 | Pin 11 | Yellow |
| IN2 | GPIO 27 | Pin 13 | Orange |
| IN3 | GPIO 22 | Pin 15 | Green |
| IN4 | GPIO 23 | Pin 16 | Blue |
Installing TeamViewer Host on Bookworm
Raspberry Pi OS Bookworm shifted to NetworkManager and Wayland by default. The legacy TeamViewer installation scripts often fail here. Follow these exact terminal commands to install the ARM64 Host package and bind it to your account for unattended access.
- Download the ARM64 Host package:
wget https://download.teamviewer.com/download/linux/teamviewer-host_arm64.deb - Install with dependency resolution:
sudo apt update && sudo apt install ./teamviewer-host_arm64.deb - Assign the device to your TeamViewer account (Headless setup):
sudo teamviewer setup
Note: This will prompt you to log in via a browser link on your main PC. Approve the 'Add device' prompt. - Enable unattended access (No password required on reboot):
sudo teamviewer options set UnattendedAccess true - Verify the daemon is running:
systemctl status teamviewerd.service
sudo teamviewer options set UDPEnabled false.
The Embedded Control Script (Python + rpi-lgpio)
The biggest trap for embedded developers moving to the Pi 5 is using the deprecated RPi.GPIO library. On Bookworm, you must use gpiozero with the rpi-lgpio backend. Install the backend first: sudo apt install python3-rpi-lgpio.
Below is the complete, compilable Python script to initialize the relays, sequence a hardware reboot pattern, and safely catch Pi 5-specific GPIO allocation errors.
import sys
import time
from gpiozero import OutputDevice
from gpiozero.exc import GPIOPinInUse, BadPinFactory, PinUnknownPi

# Hardware Pin Definitions (BCM Numbering)
RELAY_PINS = [17, 27, 22, 23]
relays = []

def initialize_hardware():
    """Safely allocate GPIO pins using the lgpio backend."""
    try:
        for pin in RELAY_PINS:
            # active_high=False because most 5V relay modules trigger on LOW
            relays.append(OutputDevice(pin, active_high=False, initial_value=False))
        print("[OK] GPIO pins allocated successfully via rpi-lgpio.")
    except GPIOPinInUse as e:
        print(f"[CRITICAL] GPIO pin conflict. Another process is holding the pin.\nDetails: {e}")
        sys.exit(1)
    except BadPinFactory as e:
        print("[CRITICAL] rpi-lgpio backend missing. Run: sudo apt install python3-rpi-lgpio")
        sys.exit(1)
    except PinUnknownPi as e:
        print(f"[CRITICAL] Board not recognized by gpiozero. {e}")
        sys.exit(1)
    except Exception as e:
        print(f"[ERROR] Unexpected hardware initialization failure: {e}")
        sys.exit(1)

def sequence_reboot_test():
    """Cycles all relays to verify hardware wiring."""
    print("Starting 4-channel sequence test...")
    for i, relay in enumerate(relays):
        print(f"Engaging Relay {i+1} (GPIO {RELAY_PINS[i]})")
        relay.on()
        time.sleep(1.5)
        relay.off()
        time.sleep(0.5)
    print("Sequence complete. All relays deactivated.")

if __name__ == "__main__":
    initialize_hardware()
    try:
        sequence_reboot_test()
    except KeyboardInterrupt:
        print("\n[INFO] Manual interrupt received. Cleaning up GPIO...")
    finally:
        # gpiozero handles cleanup on exit, but explicit close is safer for daemonized scripts
        for relay in relays:
            relay.close()
        print("[OK] Hardware state safely reset.")
Troubleshooting: Connection and GPIO Failures
When your remote session fails or your Python script crashes on the Pi 5, do not guess. Follow this diagnostic hierarchy.
First 3 Things to Check When It Fails
- System Time / NTP Sync: TeamViewer relies on TLS certificates. If the Pi 5 lost time during a power outage, the daemon will silently refuse to connect to the TV servers. Check with
timedatectl. - Wayland vs. X11 State: If you installed the Full client instead of Host, it will fail to capture the screen on Bookworm. Check your display server with
echo $XDG_SESSION_TYPE. - lgpio Backend Presence: If your Python script throws a
BadPinFactoryerror, the OS updated and stripped your pip packages. Verify withdpkg -l | grep lgpio.
Exact Error Strings and Ranked Causes
| Exact Error String | Ranked Causes | Fix |
|---|---|---|
teamviewerd.service: Failed with result 'exit-code' or status shows NotReady |
1. NTP time desync. 2. Corrupted global.conf.3. Out of memory (OOM) kill on 2GB/4GB models. |
Run sudo raspi-config → Localization → Timezone. Then sudo systemctl restart teamviewerd. |
Wayland screen capture not supported (in full client GUI) |
1. Bookworm default Wayland session blocks X11-based screen scrapers. | Run sudo raspi-config → Advanced Options → Wayland → Select X11. Reboot. |
RuntimeError: Failed to allocate GPIO (Python script) |
1. Pin held by a zombie Python process. 2. Pin mapped to an active hardware overlay (e.g., I2C/SPI). |
Run sudo killall python3. Check sudo raspi-config Interface options to ensure GPIO 17/27 aren't assigned to UART/SPI. |
Extending or Simplifying the Build
Depending on your deployment environment, you may need to scale this architecture up or down.
How to Simplify (Cost & Power Reduction)
If you are deploying this inside a server rack just to ping and reboot unresponsive network gear, the Pi 5 is overkill. Downgrade to the Raspberry Pi Zero 2 W.
- Code Change: None. The
gpiozeroscript is 100% portable. - Package Change: The Pi Zero 2 W runs a 32-bit OS by default. You must download the
teamviewer-host_armhf.deb(ARM hard-float) package instead of the ARM64 version. - Power: Use a 5V/2.5A micro-USB or USB-C supply. The relay module will draw ~300mA when all 4 coils are energized, which is near the limit of the Zero's USB power rail. Keep coil activation brief.
How to Extend (Fleet & Telemetry)
To scale this from a single bench tool to a remote environmental control node:
- Add Telemetry: Wire an I2C BME280 sensor to GPIO 2 (SDA) and GPIO 3 (SCL). Use the
adafruit-circuitpython-bme280library to log temperature and humidity. - MQTT Bridge: Instead of relying solely on TeamViewer SSH sessions to trigger the Python script, wrap the
gpiozerologic in an MQTT listener using thepaho-mqttlibrary. This allows your home automation server (Home Assistant/Node-RED) to trigger the relays over the network, while TeamViewer remains your fallback for deep OS-level debugging and package updates. - Watchdog Timer: Enable the Pi 5's hardware watchdog. If the Python script hangs or the OS kernel panics, the hardware watchdog will force a clean reboot, and TeamViewer Host will automatically reconnect to the network upon boot.
For official documentation on the Pi 5's new GPIO architecture, refer to the Raspberry Pi OS Bookworm migration guide. For TeamViewer Linux package specifics, consult the TeamViewer Linux download repository. Always verify your gpiozero pin factories against the official gpiozero documentation before deploying to production hardware.