
The Evolution of Servo Control in the Arduino Ecosystem
Interfacing an Arduino with servo motor hardware is a rite of passage for robotics and automation enthusiasts. While moving a single micro servo to 90 degrees is trivial, scaling up to multi-axis robotic arms, pan-tilt camera rigs, or hexapod locomotion introduces severe hardware and software bottlenecks. In 2026, the landscape of servo drivers has matured significantly. Generic I2C driver boards are cheaper and more robust, and advanced libraries now handle complex kinematics and jitter reduction natively.
This guide bypasses the basic 'blink-and-sweep' tutorials. We will deep-dive into the mathematical limitations of the native Servo.h library, transition to the industry-standard PCA9685 16-channel I2C driver, and explore advanced power management architectures required to prevent catastrophic brownouts when driving high-torque metal-gear servos.
The Native Servo.h Library: Capabilities and Hard Limits
The built-in Arduino Servo Library is an excellent starting point. It generates the required 50Hz PWM signal (a 20ms period with a 1ms to 2ms high pulse) using hardware timers. However, relying on native pins for complex projects introduces three critical failure modes:
- Timer1 Conflicts: On the ATmega328P (Uno/Nano), the Servo library monopolizes Timer1. This immediately disables hardware PWM on pins 9 and 10, breaking analogWrite() functionality and conflicting with libraries like
IRremoteorTone. - Pin Count Ceilings: The ATmega328P supports a maximum of 12 servos. The ATmega2560 (Mega) supports up to 48, but routing that many wires to a single MCU creates a physical spaghetti nightmare.
- Interrupt Jitter: Because the native library relies on software interrupts to maintain pulse widths, any heavy serial communication, I2C polling, or delay() functions in your main loop will cause visible servo twitching and mechanical wear.
Expert Insight: If your project requires more than two standard servos, or if you are using I2C sensors (like LiDAR or IMUs) simultaneously, abandon the native library immediately. The CPU overhead and timer conflicts will degrade your system's real-time performance.
Upgrading to the PCA9685 16-Channel I2C Driver
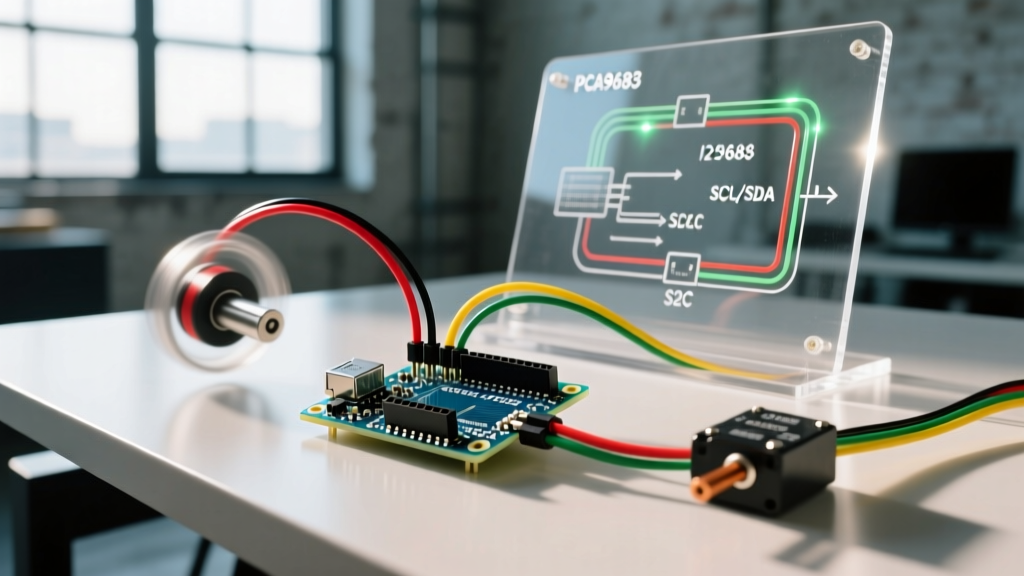
The NXP PCA9685 is a 16-channel, 12-bit PWM controller that communicates via I2C. By offloading the PWM generation to this dedicated chip, the Arduino's CPU is entirely freed from timing interrupts. As of 2026, third-party PCA9685 breakout boards with integrated 3.3V to 5V logic level shifters and heavy-duty 10A screw terminals are widely available for $6 to $9, making them the undisputed standard for multi-servo arrays.
Wiring and I2C Addressing
The board requires only four connections to the Arduino: VCC (5V logic), GND, SDA (A4 on Uno, 20 on Mega), and SCL (A5 on Uno, 21 on Mega). The default I2C address is 0x40. If you need to chain multiple boards for a 32-servo hexapod, you can solder the address jumper pads (A0 through A5) on the PCB to shift the address up to 0x7F.
The Mathematics of 12-Bit PWM Resolution
To use the Adafruit PWMServoDriver Library effectively, you must understand the underlying math. The PCA9685 operates on a 12-bit resolution, meaning each 20ms period (at 50Hz) is divided into 4,096 discrete steps.
- Step Duration: 20ms / 4096 = 0.00488ms (4.88 microseconds) per step.
- 0 Degrees (1ms pulse): 1ms / 0.00488ms = 205 steps.
- 90 Degrees (1.5ms pulse): 1.5ms / 0.00488ms = 307 steps.
- 180 Degrees (2ms pulse): 2ms / 0.00488ms = 410 steps.
Implementation Code: Adafruit_PWMServoDriver
#include <Wire.h>
#include <Adafruit_PWMServoDriver.h>

Adafruit_PWMServoDriver pwm = Adafruit_PWMServoDriver(0x40);

#define SERVOMIN  205 // 1ms pulse (0 degrees)
#define SERVOMAX  410 // 2ms pulse (180 degrees)
#define SERVO_FREQ 50 // Analog servos run at ~50Hz

void setup() {
  pwm.begin();
  pwm.setOscillatorFrequency(27000000);
  pwm.setPWMFreq(SERVO_FREQ);
  delay(10);
}

void setServoAngle(uint8_t servoNum, float angle) {
  // Map 0-180 degrees to our calculated step range
  int pulseLen = map(angle, 0, 180, SERVOMIN, SERVOMAX);
  pwm.setPWM(servoNum, 0, pulseLen);
}

void loop() {
  setServoAngle(0, 0);   // Move servo 0 to 0 degrees
  delay(1500);
  setServoAngle(0, 180); // Move servo 0 to 180 degrees
  delay(1500);
}
Advanced Motion: Implementing VarSpeedServo for I2C
Standard libraries snap the servo to the target position at maximum speed, which causes mechanical shock, gear stripping, and massive current spikes. While the native VarSpeedServo.h library solves this for direct-pin connections, it doesn't support I2C. For the PCA9685, you must implement a software interpolation routine or use advanced kinematic libraries like ROS_Serial or custom easing functions.
A simple linear interpolation function to smooth out I2C servo movements without blocking the main loop looks like this:
void smoothMove(uint8_t servo, int startPulse, int endPulse, int steps, int delayMs) {
  float increment = (float)(endPulse - startPulse) / steps;
  for (int i = 0; i <= steps; i++) {
    int currentPulse = startPulse + (increment * i);
    pwm.setPWM(servo, 0, currentPulse);
    delay(delayMs);
  }
}
Power Architecture: Preventing Brownouts and Thermal Throttling
The most common point of failure when pairing an Arduino with servo motors is inadequate power delivery. The AMS1117-5.0 linear voltage regulator on a standard Arduino Uno R3 can safely dissipate about 800mA of continuous current. However, if you are stepping down from a 9V barrel jack, thermal throttling will engage at roughly 400mA.
Servo Current Draw Matrix
| Servo Model | Operating Voltage | Stall Torque | Stall Current | Recommended Driver |
|---|---|---|---|---|
| TowerPro SG90 | 4.8V - 6.0V | 1.8 kg-cm | ~150 mA | Arduino 5V Pin (Max 3) |
| MG996R (Metal Gear) | 4.8V - 7.2V | 13.0 kg-cm | ~2,500 mA | External 5A+ UBEC |
| DS3218 (20kg Digital) | 5.0V - 8.4V | 20.0 kg-cm | ~3,200 mA | External 10A+ BEC / LiPo |
The UBEC Solution
If you are driving MG996R or DS3218 servos, you must use an external UBEC (Universal Battery Eliminator Circuit). A 5V/6V 5A UBEC costs around $8 to $12 in 2026. Connect the UBEC output directly to the V+ and GND screw terminals on the PCA9685 board. Crucially, you must tie the UBEC Ground to the Arduino Ground to establish a common logic reference, otherwise the I2C signals will fail to register.
Capacitive Buffering for Transient Spikes
Even with a robust UBEC, the sudden inrush current when a heavy servo breaks stiction can cause micro-second voltage sags, resetting the Arduino or corrupting I2C data packets. To mitigate this, solder a 1000µF to 2200µF electrolytic capacitor (rated for 10V or higher) directly across the V+ and GND screw terminals on the PCA9685 board. This acts as a local energy reservoir, absorbing transient spikes and maintaining bus stability.
Troubleshooting Common I2C and Jitter Failures
- I2C Bus Lockups: Cheap 2026-era clone PCA9685 boards sometimes omit the 10kΩ pull-up resistors on the SDA and SCL lines. If your Arduino freezes when calling
pwm.begin(), add external 4.7kΩ pull-up resistors from SDA/SCL to the 5V logic line. - Servo Twitching at Rest: If your servos hum or twitch while holding a position, you are likely experiencing ground loop noise. Ensure your servo power ground and Arduino logic ground are connected at a single 'star ground' point, rather than daisy-chained through thin breadboard wires.
- Overheating PCA9685 Chip: The PCA9685 only handles the logic PWM signals; it does not drive the servo power. If the NXP chip itself is hot to the touch, you have likely wired the high-current servo power into the logic VCC pin instead of the dedicated V+ screw terminal.
Conclusion
Successfully integrating an Arduino with servo motor arrays requires moving beyond basic pin-toggling. By leveraging the PCA9685 I2C driver, calculating precise 12-bit pulse widths, and engineering a robust, isolated power delivery system with adequate capacitive buffering, you can build multi-axis robotic systems that are smooth, reliable, and free from the jitter that plagues amateur builds. Always respect the current limits of your MCU's onboard regulators, and let dedicated driver hardware handle the heavy lifting.