
The Anatomy of Arduino Power Inputs
Learning how to power an Arduino with a battery is a fundamental rite of passage for electronics makers, yet it remains one of the most common sources of hardware failure. Unlike desktop development where USB provides a clean, regulated 5V, battery power introduces fluctuating voltages, chemical discharge curves, and strict regulator limitations. To build reliable off-grid projects in 2026, you must match your battery chemistry to the specific voltage regulation architecture of your chosen microcontroller board.
Before connecting any power source, you must understand the three primary power input pathways found on standard AVR and ARM-based Arduino boards:
- The Barrel Jack / VIN Pin: This route feeds directly into the board's onboard voltage regulator. On older boards, this is a linear regulator; on newer iterations, it is a switching buck-boost converter. It requires a higher input voltage (typically 7V to 12V) to account for the regulator's dropout voltage.
- The 5V Pin: This pin bypasses the onboard regulator entirely. You must supply a highly regulated, clean 5V source here. Feeding raw, unregulated battery power into this pin will instantly destroy the ATmega328P or Renesas RA4M1 microcontroller.
- The 3.3V Pin: Similar to the 5V pin, this bypasses regulation and requires a precise 3.3V input, primarily used for low-power IoT boards like the Nano 33 IoT.
Battery Chemistry Compatibility Matrix
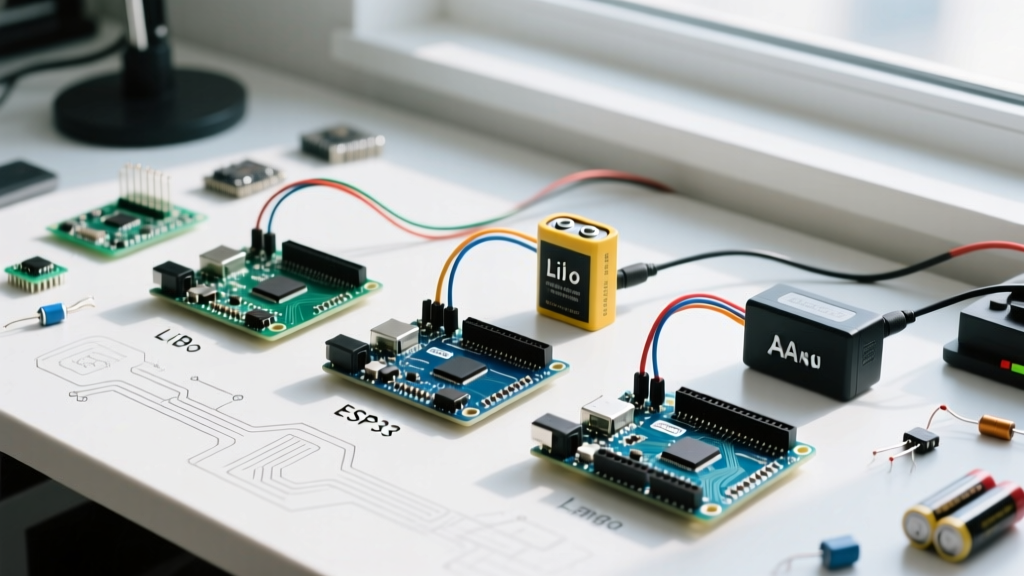
Not all batteries behave identically under load. A standard 9V carbon-zinc battery will sag dramatically when an Arduino draws current to power a servo or a Wi-Fi module, whereas a Lithium-Ion cell maintains a steady voltage until it is nearly depleted. Below is a compatibility matrix to help you select the right chemistry for your project.
| Battery Chemistry | Nominal Voltage | Fresh/Max Voltage | Recommended Input Pin | Efficiency & Thermal Profile |
|---|---|---|---|---|
| Alkaline AA (x6 Pack) | 9.0V | 9.6V | VIN / Barrel Jack | Moderate efficiency; linear regulators will dissipate excess voltage as heat. |
| 9V Carbon-Zinc | 9.0V | 9.6V | VIN / Barrel Jack | Poor. High internal resistance causes severe voltage sag under loads >100mA. |
| Li-Ion 18650 (1S) | 3.7V | 4.2V | 5V Pin (via Boost Converter) | Excellent. High energy density, but requires a step-up (boost) module to reach 5V. |
| LiPo 1S (Pouch) | 3.7V | 4.2V | 5V Pin (via Boost Converter) | Excellent. Lightweight and compact; requires low-voltage cutoff protection. |
| LiFePO4 (1S) | 3.2V | 3.6V | 3.3V Pin (Direct) or 5V (Boost) | Superior safety and cycle life; flatter discharge curve than standard LiPo. |
Board-Specific Compatibility Breakdown
The phrase "Arduino" encompasses a wide variety of hardware architectures. The method you use to power an Arduino Uno R3 will literally melt the voltage regulator on an Arduino Nano if you aren't careful. Here is how the most popular boards handle battery power in 2026.
Arduino Uno R3 vs. Uno R4 Minima
The Arduino Uno R3 relies on the NCP1117ST50T3G linear voltage regulator. Linear regulators work by burning off excess voltage as heat. If you power an Uno R3 with a 12V battery pack through the VIN pin, and your circuit draws 200mA, the regulator must dissipate 1.4 Watts of heat. Because the board lacks a dedicated heatsink, the regulator will quickly hit its thermal shutdown threshold at 150°C, causing the board to brownout and reset.
Conversely, the Arduino Uno R4 Minima represents a massive leap in power management. It utilizes an efficient switching buck-boost converter that accepts anywhere from 6V to 24V on the VIN pin. This means you can power the R4 with a 12V sealed lead-acid (SLA) battery or a 3S LiPo pack (11.1V nominal) with minimal heat generation and vastly superior battery life.
Arduino Nano and Nano 33 IoT
The classic Arduino Nano uses a miniature linear regulator (often an LM1117MPX-5.0 or similar) with an even smaller thermal mass than the Uno. Powering a Nano via the VIN pin with a 9V battery is highly discouraged for anything other than ultra-low-power sleep-mode circuits. For the Nano, the best approach is to use a 3.7V LiPo cell paired with a 5V boost converter, feeding directly into the 5V pin.
The Nano 33 IoT operates at 3.3V logic and utilizes an AP2112K-3.3 LDO regulator. Because it requires less voltage overhead, you can safely power it via the VIN pin using a single LiFePO4 cell (3.2V nominal, 3.6V max), which sits perfectly within the regulator's dropout tolerance without generating excess heat.
Step-by-Step Wiring: LiPo to Arduino (The Right Way)
Single-cell Lithium Polymer (LiPo) batteries are the gold standard for portable maker projects. However, a fully charged 1S LiPo outputs 4.2V, which is insufficient to reliably drive a 5V Arduino (the ATmega328P requires a minimum of 4.5V for stable 16MHz operation). As the battery discharges to 3.6V, the microcontroller will experience erratic behavior and corrupted EEPROM writes.
To solve this, you must use a DC-DC step-up (boost) converter. Here are the two most reliable configurations:
Option A: The Budget MT3608 Module ($1.50 - $2.50)
- Solder wires to the BAT+ and BAT- pads of a standard 1S LiPo battery holder.
- Connect these to the IN+ and IN- pads of a generic MT3608 boost converter module.
- Using a multimeter, turn the tiny brass potentiometer on the MT3608 until the OUT+ and OUT- pads read exactly 5.00V.
- Connect the OUT+ to the Arduino's 5V pin and OUT- to the Arduino's GND pin.
Warning: The MT3608 lacks low-voltage cutoff. If you drain your LiPo below 3.0V, the cell will suffer irreversible chemical degradation and become a fire hazard during subsequent charging cycles.
Option B: The Adafruit PowerBoost 1000C ($22.00)
For professional or mission-critical deployments, the Adafruit PowerBoost 1000C is the superior choice. It integrates a boost converter, a lithium charging circuit (MCP73871), and a low-battery cutoff switch into a single footprint. It seamlessly switches between battery and USB power, making it ideal for IoT nodes that require uninterrupted uptime. You wire the battery to the JST-PH connector, and solder the 5V and GND output pins directly to the Arduino's 5V and GND headers.
Critical Failure Modes to Avoid
When researching how to power an Arduino with a battery, most tutorials omit the catastrophic failure modes that destroy hardware. Keep these edge cases in mind:
- Backfeeding the USB Port: If you apply 5V to the Arduino's 5V pin while the USB cable is simultaneously plugged into a PC, the two power sources will fight each other. This can fry the PC's USB port or the Arduino's USB-to-Serial IC (ATmega16U2). Always disconnect USB when injecting power directly to the 5V pin.
- Ignoring the Reverse Polarity Diode: The barrel jack on the Uno R3 features a 1N4007 protection diode. While this saves the board if you plug in a center-negative power supply, it introduces a 0.7V voltage drop. If your battery pack sags to 6.5V, the diode drops it to 5.8V, which is below the NCP1117's dropout voltage, resulting in a brownout.
- Capacitive Inrush Current: When connecting a battery to a boost converter with large output capacitors, the initial inrush current can trip the battery's internal protection BMS (Battery Management System), shutting the battery down instantly. Always ensure your boost module has adequate input capacitance (typically 22µF or higher) to soften the inrush spike.
Summary: Choosing Your Power Path
Successfully deploying battery-powered microcontrollers requires moving beyond simple USB tethering. For legacy boards like the Uno R3 and Nano, stick to 6V-9V battery packs on the VIN pin for low-current projects, or use a 1S LiPo with a boost converter fed into the 5V pin for high efficiency. For modern boards like the Uno R4 or ESP32-based variants, leverage their advanced switching regulators to accept a wider, more forgiving range of battery chemistries. By respecting the electrical limits of onboard regulators and the discharge curves of modern lithium cells, your off-grid projects will achieve maximum uptime and hardware longevity.
For deeper insights into lithium cell safety and discharge characteristics, refer to the comprehensive Adafruit Li-Ion and LiPoly Battery Guide, which details the exact charge profiles and storage requirements necessary to maintain battery health in embedded systems.